Do you have a question about the Aritech Advisor MASTER ATS4000 and is the answer not in the manual?
Explains that not all features may apply and some might be restricted to users.
Explains terminology used for premises or security system parts is specific.
Importance of regularly testing the system to ensure equipment operates properly.
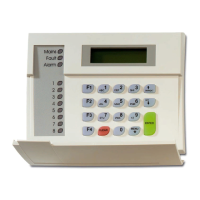
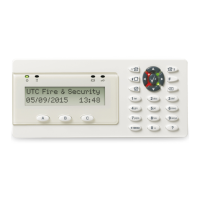
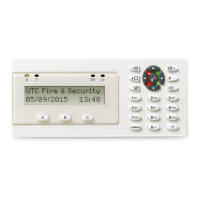
Details the function of each key on the Advisor MASTER keypad for system operation.
Explains how messages are displayed on the LCD for system guidance and user input.
Describes the function of Area LED's and System Alarm LED's for indicating system status.
Defines alarm groups, their assignment to specific areas/functions, and time control.
Indicates system breaches of security via flashing LED's.
Displays system failures like communication issues or low battery.
Explains door groups for access control, their assignment to doors, and time restrictions.
Describes floor groups for lift control, assignment to floors, and time restrictions.
Details the process of entering PIN codes, error correction, and menu timeouts.
Procedure to activate a silent signal to alert security personnel by using a duress digit with PIN.
Procedure to reset the duress facility after activation.
Steps to open a door using the Advisor MASTER keypad with a door code or PIN.
Explains the preset time limit to leave an area after arming the system.
Reasons why arming or disarming specific areas might not be possible.
Step-by-step guide on how to arm the Advisor MASTER system.
Procedure for disarming the alarm system before entering an armed area.
Explains the preset time allowed to disarm before an alarm occurs upon entering an area.
Procedure for disarming the system during an alarm condition.
Reasons why disarming specific areas might not be possible.
Step-by-step guide on how to disarm the Advisor MASTER system.
Details how active zones are displayed, either one at a time or as a list of numbers.
Describes local alarms occurring when an area is occupied and activated.
Explains alarms when an area is armed or a 24-hour zone is activated.
Details system alarms related to device tampering, communication failure, or faults.
Procedure to acknowledge and reset a local alarm indication on the keypad.
Steps to reset a zone that is currently in alarm state.
Specific steps to reset a zone in alarm using the keypad and menu.
Provides additional details and troubleshooting for alarm conditions.
Guide to accessing and viewing a history of past alarm events on the system.
Explains how menu options are numbered and presented within the manual.
Step-by-step instructions to navigate and access the Advisor MASTER system menu.
Procedure to access menu option 1 to view the status of all zones.
Guide to accessing menu option 2 to list all currently active zones.
Procedure to access menu option 3 to list all zones currently in an alarm state.
Guide to accessing menu option 4 to list all zones that have been inhibited.
Instructions to access menu option 5 for viewing system event history.
Explains how to view test results for zones and cameras when areas are disarmed.
Explains how to view test results for zones and cameras when areas are armed.
Procedure to access menu option 6 to view disarm or arm test results.
Steps to access the service menu via menu option 7 for system maintenance.
Guide to accessing menu option 8 to check camera film frame counts.
Instructions to access menu option 9 to view the names assigned to system zones.
Procedure to access menu option 10 to exclude faulty or broken zones from the system.
Steps to access menu option 11 to include previously inhibited zones back into the system.
Guide to access menu option 12 for testing individual zone operation.
Procedure to access menu option 13 to initiate an automatic disarm test.
Steps for programming users when two authorized users are needed for access.
Procedure to delete a user from the system via menu option 14.
Guide to display user details, alarm group, and door group via menu option 14.
Steps to create or modify user profiles, including details like alarm group and door group.
Guide to access menu option 15 to display the current system time and date.
Procedure to set a new time and date for the system via menu option 15.
Instructions for adjusting the system's internal clock for daylight saving time changes.
Instructions for fine-tuning the system's internal clock for accurate timekeeping.
Procedure to exclude or include remote arming stations/data gathering panels from system reporting.
Steps to enable or disable the service technician's access to the installer menu.
Guide to reset camera film frame counts to zero or update them via menu option 18.
Procedure to program door and floor groups using menu option 20.
Specific instructions for programming door groups.
Specific instructions for programming floor groups.
Guide to record holiday dates in the system using menu option 21.
Procedure to open a valid door using the arming station via menu option 22.
Steps to control door states (unlock, lock, disable, enable) via menu option 23.
Guide to print the complete system history using menu option 24.
| Display | 2x16 character LCD |
|---|---|
| Operating Temperature | -10°C to +55°C |
| Communication | RS485 |
| Power Supply | 12V DC |
| Relative Humidity | 95% non condensing |
| Keys | 16 keys, 4 function keys |
| Tamper protection | Front and rear tamper protection |