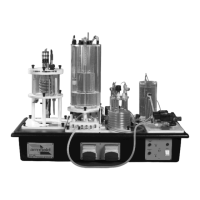
Operation
41
Some exercises include PID control of the heater. In these exercises the heater is
controlled via the PID control window, and the switch is displayed onscreen only to
give an indication of whether the heater is on or off.
The heating element may also be controlled using the thermostat mounted on the lid
of the small process vessel, as described below.
Use of the Thermostat (Temperature Switch)
A thermostat is mounted on the lid of the small process vessel. In some exercises,
the heating element is controlled using this thermostat. The thermostat switches the
heater on when the temperature in the vessel is below a Set Point value, and off
when the temperature is above that value. The Set Point may be selected using the
circular selector on top of the thermostat. Thermostat control may be selected in the
software by selecting the Thermostat radio button on the mimic diagram screen of
the software:
Use of the Differential Pressure Sensors
When required, the outputs from the differential pressure sensors are displayed on
the mimic diagram screen in the PCT40 software. The pressure sensors are located
inside the manifold block in front of the large process vessel, and each is used in
conjunction with an orifice within the block. P1 and P2 are only used for small
flowrates associated with PCT41. To direct flow through the large orifice / P3,
connect the outlet flow from the peristaltic pump to the self-sealing fitting front of the
manifold block, as described in the appropriate teaching exercise. Connect another
tube to the Guest push fitting on the back of the manifold and direct the outlet flow as
required for the exercise. The internal pressure sensor will then provide the
differential pressure between the opposite sides of the orifice. Note that the
downstream connection from the orifice to P3 incorporates an in-line quick release
connector. In normal use this is connected to give differential pressure that is related
to flow. Alternatively the connection can be broken, with the sensor vented to
atmosphere to allow line pressure to be measured. In some exercises, the second
pump is connected to the upstream side of the orifice using the connector on the right
hand end of the block.
Emptying tubes with self-sealing ends
Some of the tubes supplied with the equipment have self-sealing ends. This prevents
any fluid from draining out of the apparatus when changing the configuration of the
plumbing. However, it also prevents water draining naturally from the tubing when the
tubing is not in use. It is therefore recommended that the tubing be manually drained
if the equipment is not to be used for some time, to prevent any possibility of harmful
micro-organisms building up inside the trapped water.
Self-sealing fittings may be manually drained as follows:
Hold both ends of the tubing over a suitable sink or drain. Depress the ends
of both self-sealing fittings, taking care not to completely block the ends,
allowing water to drain. Tilt the tube until all the water has drained out.
The tubing can now safely be stored until needed.