VIPEDIA-12 Products – Installation Guide
U-0641-0344.docx – Issue: 8 complete, approved
Page 11 of 52
4 Installation
Please read and observe the safety information guidelines available on the product and in
Section “1 Safety and Precautions” (page 7) prior to installation. Failure to follow these
instructions and guidelines may cause personal injury and/or damage to the equipment.
1. Ensure that the power supply from the central equipment rack is turned off.
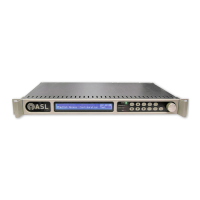
2. Fit the VIPEDIA-12 into a 19-inch standard equipment rack on supporting rails, and secure the unit
in position using the fixing screws and washers provided.
3. If required, fit the memory card into the Micro-SD card slot.
• Carefully insert the memory card into the Micro-SD card slot (with the terminal side facing down)
until it clicks into place.
• Remove the memory card by lightly pushing the card once.
Warning:
When inserting or removing the memory card, be careful to not drop the memory card.
IN
+-
18-40V 2A
18-40V
2A
1
2
CONTACTS OUT
1 - 6
7 - 12
CONTACTS OUT
DBB IN 1
DBB OUT 1
µSD 1
DBB
S M
µSD 2
DIA G.
ETH 3 ETH 4
ETH 5 ETH 6
Memory card slot (for future use)
Card is fitted)