MediaPack SIP User’s Manual 5. Configuring the MediaPack
Version 4.6 103 June 2005
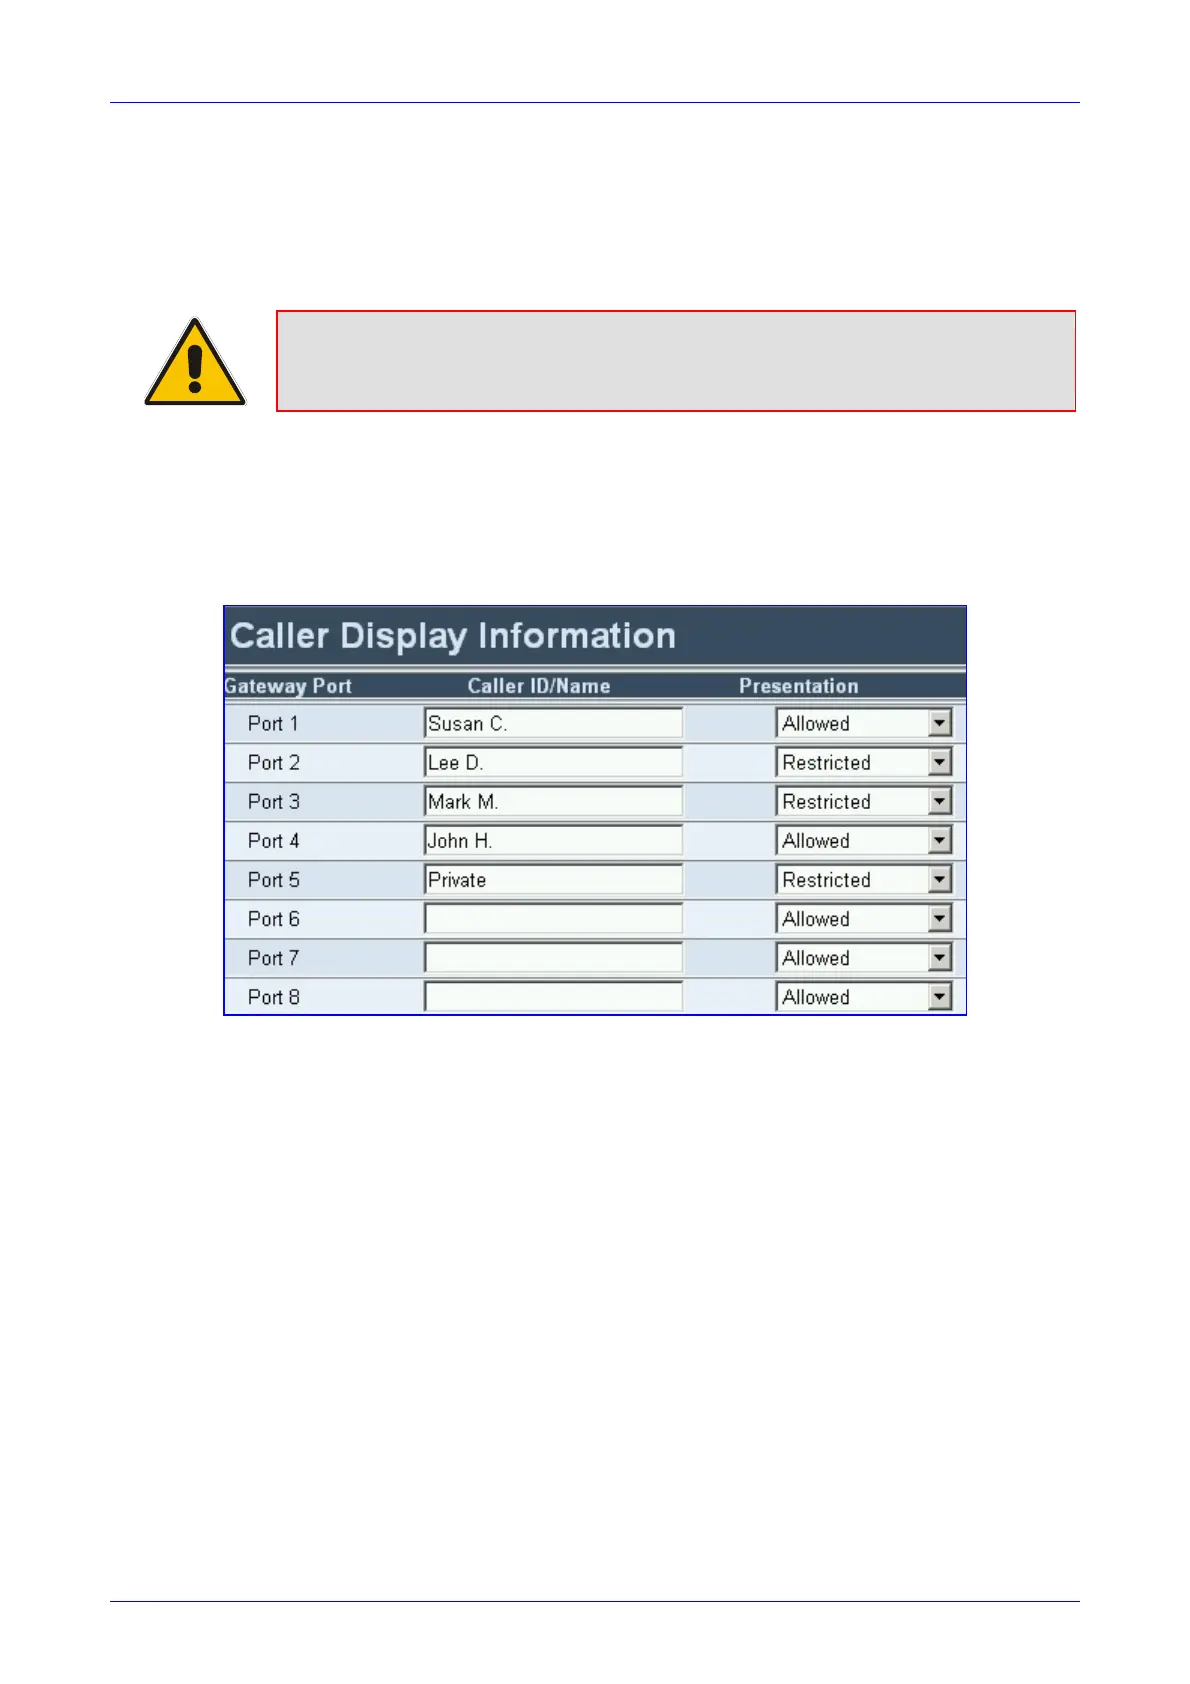
5.5.8.3 Caller ID
Use the Caller Display Information screen to send (to IP) Caller ID information when a call is
made using the VoIP gateway (relevant to both FXS and FXO). The person receiving the call can
use this information for caller identification. The information on this table is sent in an INVITE
message in the ‘From’ header. For information on Caller ID restriction according to destination /
source prefixes, refer to Section
5.5.3 on page 76.
Note: If Caller ID name is detected on an FXO line (EnableCallerID = 1), it is used
instead of the Caller ID name defined in this table (FXO gateways only).
¾ To configure the Caller ID table, take these 6 steps:
1. Open the ‘Caller Display Information’ screen (Protocol Management menu > Endpoint
Settings submenu > Caller ID option); the ‘Caller Display Information’ screen is displayed.
Figure
5-23: Caller Display Information Screen
2. In the Caller ID/Name field, enter the Caller ID string. The Caller ID string can contain up to
18 characters.
Note that when the FXS gateway receives ‘Private’ or ‘Anonymous’ strings in the ‘From’
header, it doesn’t send the calling name or number to the Caller ID display.
3. In the ‘Presentation’ field, select ‘Allowed’ [0] to send the string in the Caller ID/Name field
when a (TelÆIP) call is made using this VoIP gateway port. Select ‘Restricted’ [1] if you
don’t want to send this string. Note that when ‘Presentation’ is set to ‘Restricted’, the
parameter ‘Asserted Identity Mode’ must be set to ‘P-Asserted’.
Note: The value of the ‘Presentation’ field can (optionally) be overridden by configuring the
‘Presentation’ parameter in the ‘Source Number Manipulation’ table.
To maintain backward compatibility, when the strings ‘Private’ or ‘Anonymous’ are set in the
Caller ID/Name field, the Caller ID is restricted and the value in the Presentation field is
ignored.
4. Repeat steps 2 and 3 for each VoIP gateway port.
5. Click the Submit button to save your changes.
6. To save the changes so they are available after a power fail, refer to Section
5.9 on page
161.

 Loading...