MediaPack SIP
MediaPack SIP User’s Manual 48 Document #: LTRT-65405
The first time a browser request is made, the user is requested to provide his Administrator or
Monitoring username and password to obtain access. Subsequent requests are negotiated by the
browser on behalf of the user, so that the user doesn’t have to re-enter the username and
password for each request, but the request is still authenticated (the Embedded Web Server uses
the MD5 authentication method supported by the HTTP 1.1 protocol).
For details on changing the Administrator and Monitoring username and password, refer to
Section
5.6.5 on page 146. Note that the password and username can be a maximum of 19 case-
sensitive characters.
To reset the Administrator and Monitoring username and password to their defaults, enable the
ini file parameter ‘ResetWebPassword’.
5.2.2 Limiting the Embedded Web Server to Read-Only Mode
Users can limit access to the Embedded Web Server to read-only mode by changing the ini file
parameter ‘DisableWebConfig’ to 1. In this mode all Web screens, regardless to the access level
used (Administrator or Monitoring), are read-only and cannot be modified. In addition, the
following screens cannot be accessed: ‘Quick Setup’, ‘Change Password’, ’Reset‘, ‘Save
Configuration‘, ‘Software Upgrade Wizard’, ‘Load Auxiliary Files’, ‘Configuration File’ and
‘Regional Settings’.
5.2.3 Disabling the Embedded Web Server
Access to the Embedded Web Server can be disabled by using the ini file parameter
‘DisableWebTask = 1’. The default is access enabled.
5.3 Accessing the Embedded Web Server
¾ To access the Embedded Web Server, take these 4 steps:
1. Open a standard Web-browsing application such as Microsoft™ Internet Explorer™ or
Netscape™ Navigator™.
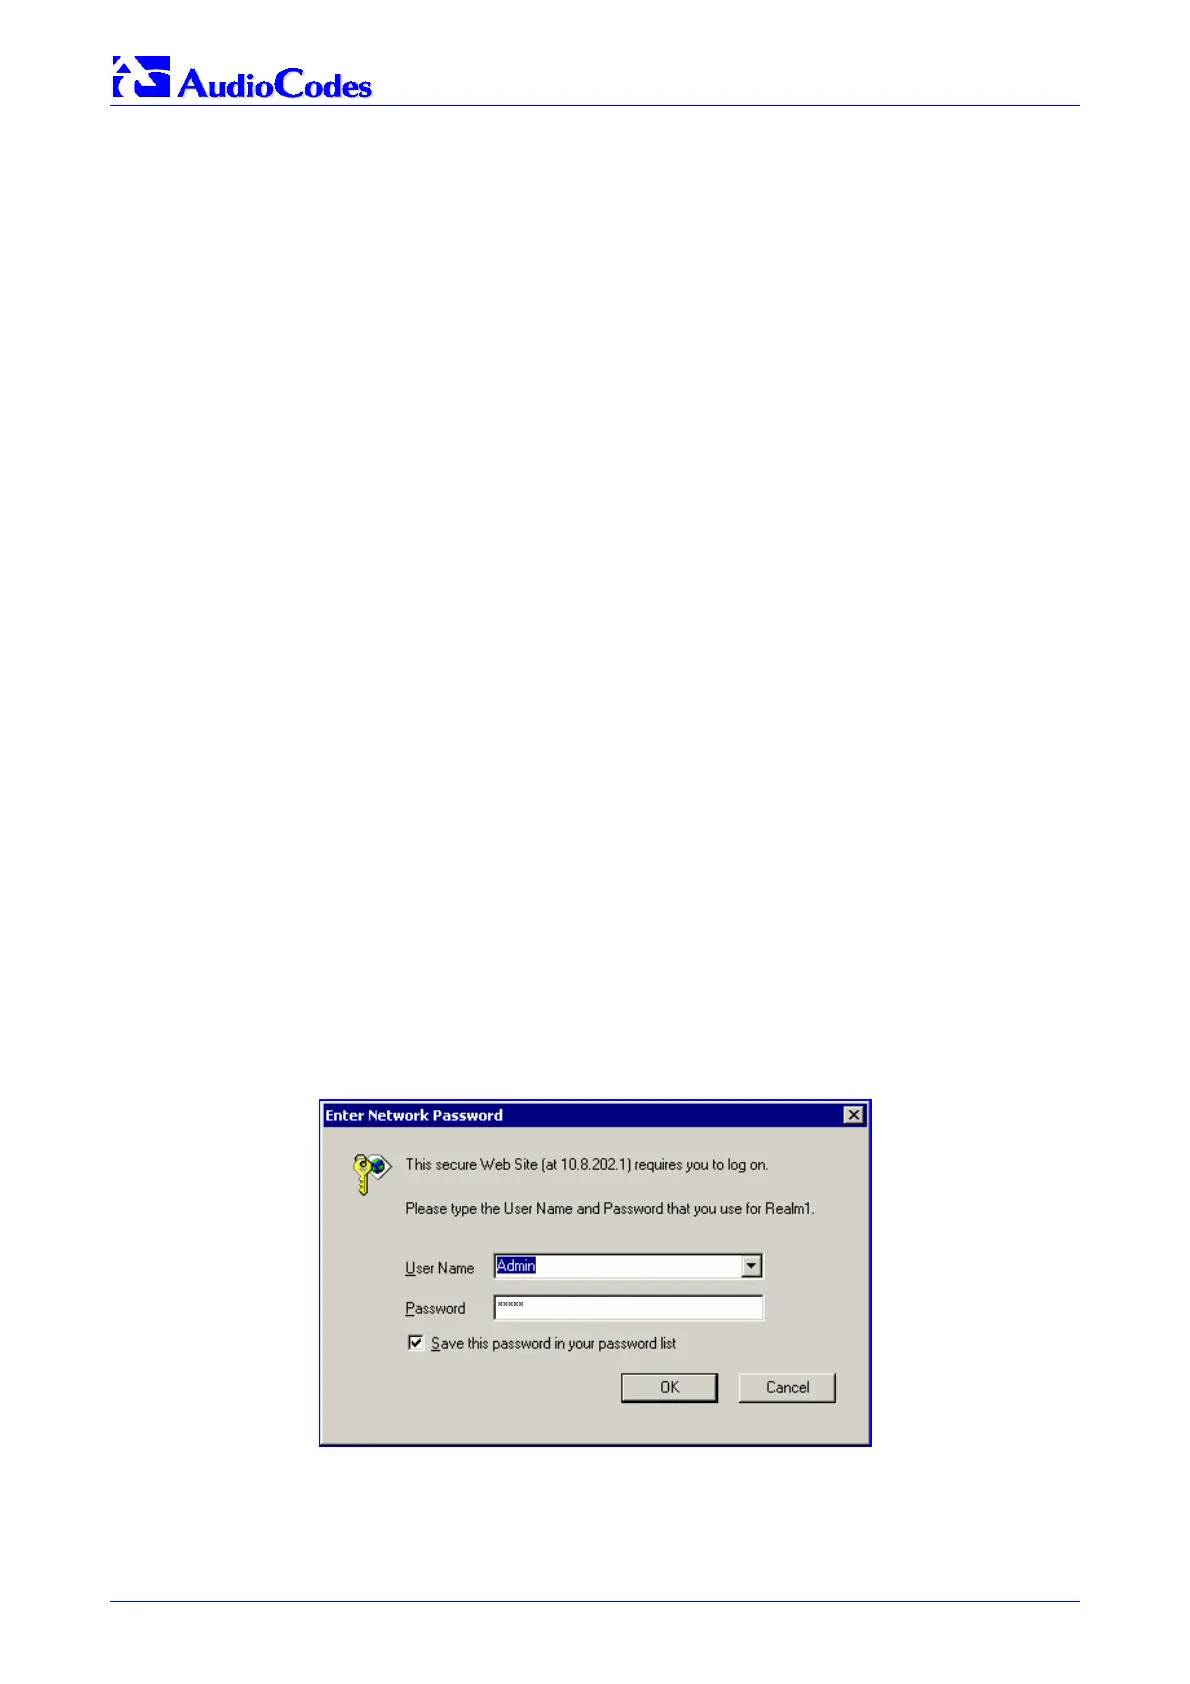
2. In the Uniform Resource Locator (URL) field, specify the IP address of the MediaPack (e.g.,
http://10.1.10.10); the Embedded Web Server’s ‘Enter Network Password’ screen appears,
shown in Figure
5-1.
Figure
5-1: Embedded Web Server Login Screen
3. In the ‘User Name’ and ‘Password’ fields, enter the username (default: ‘Admin’) and
password (default: ‘Admin’). Note that the username and password are case-sensitive.
4. Click the OK button; the ‘Quick Setup’ screen is accessed (shown in Figure
4-1).

 Loading...