50
Removing a Drive (2U and 4U Chassis)
To remove a drive:
1. Remove the bezel; see “Removing the Bezel” on page 49.
2. Identify the drive to be replaced by looking for the amber LED on the drive that indicates a fault; see “Media
Pack and System Drives” on page 16.
3. Make sure the anti-tamper locks are not engaged. The red arrows on the locks point inwards if the locks are
disengaged. Unlock them if necessary by rotating them counterclockwise using a screwdriver with a Torx T20
bit.
4. Push the drive carrier latch in the direction of the white arrow.
5. Open the drive latch and pull the drive out of the slot.
Inserting a Drive (2U and 4U Chassis)
To insert a drive:
1. Fully open the drive latch.
2. Insert the drive into the slot with the latch facing left.
3. Push the drive in and push the latch inward until the drive locks in place.
4. Lock the drive.
5. Reattach the bezel.
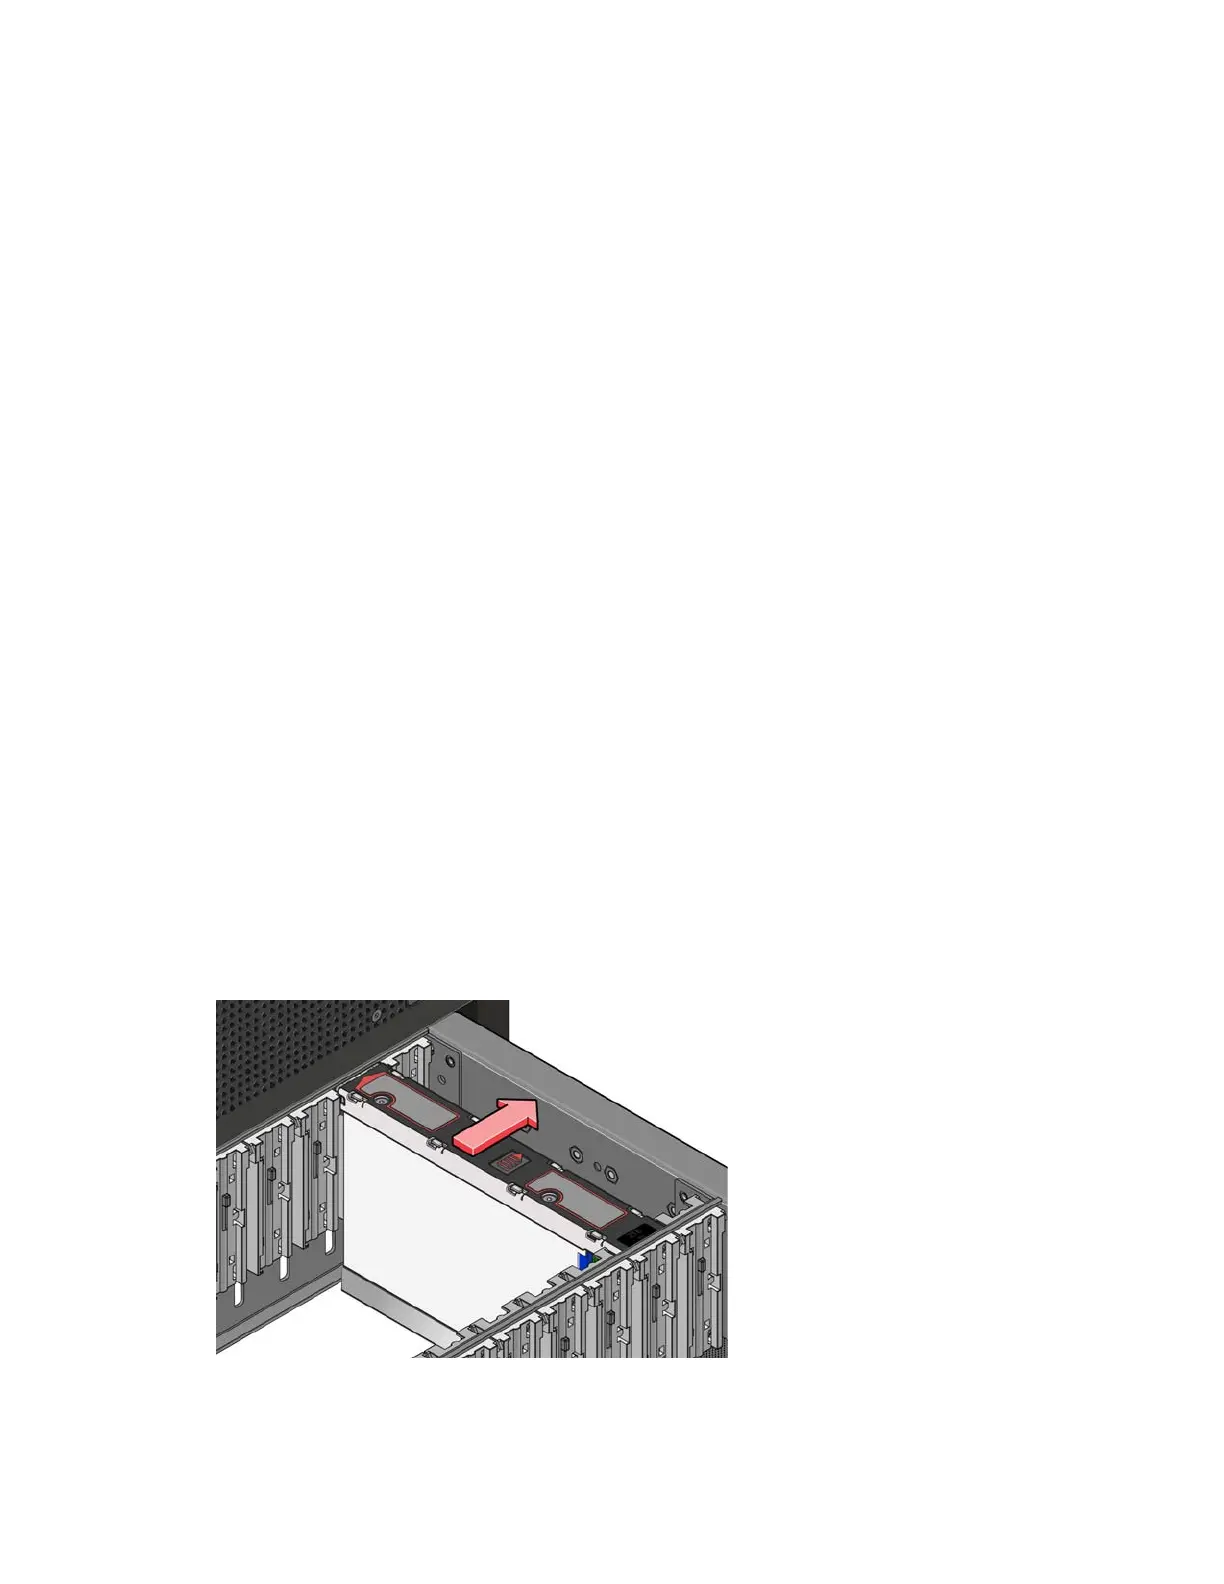
Removing a Drive (E5)
To remove a drive:
1. Identify the drawer containing the failed drive; see “Avid NEXIS | E5 Drive Drawer and Sideplane Status
Panel” on page 10.
2. Open the appropriate drive drawer and identify the failed drive by its LED. (See “Media Pack and System
Drives” on page 16.)
3. Push the drive carrier latch in the direction shown in the following illustration to unlock the drive.
4. Pull the drive upwards and out of the drawer.