Chapter 2: Installation and Configuration 11
Configuring a SYNC HD in the
Session Setup Window
When a SYNC HD is connected through Loop
Sync and enabled in the Peripherals dialog, its set-
tings become available in the
SYNC Setup and
Timecode Settings sections of the Session Setup
window.
Clock Source
When connected and configured in the Loop Sync
chain, the SYNC HD appears along with any HD
interfaces in the
Clock Source pop-up menu, lo-
cated in the Session Setup window.
The Clock Source can be any device in the Loop
Sync chain. This lets you use any digital input
source available on any HD interface (including
the SYNC HD) simply by selecting that device and
source from the
Clock Source pop-up menu.
Clock Reference
The selected Clock Source device determines your
choices for clock reference.
When Clock Source is a SYNC HD
When a SYNC HD is set to be the Clock Source, it
is the Loop Master. Clock, Positional Reference,
and Video Format selectors become active in the
SYNC Setup section of the Session Setup window.
SYNC HD Clock Reference choices include:
• Internal/VSO
•Video In
• Video Reference
•LTC
•Bi-Phase
• Pilot Tone
•AES/EBU
• Word Clock
• Loop Sync
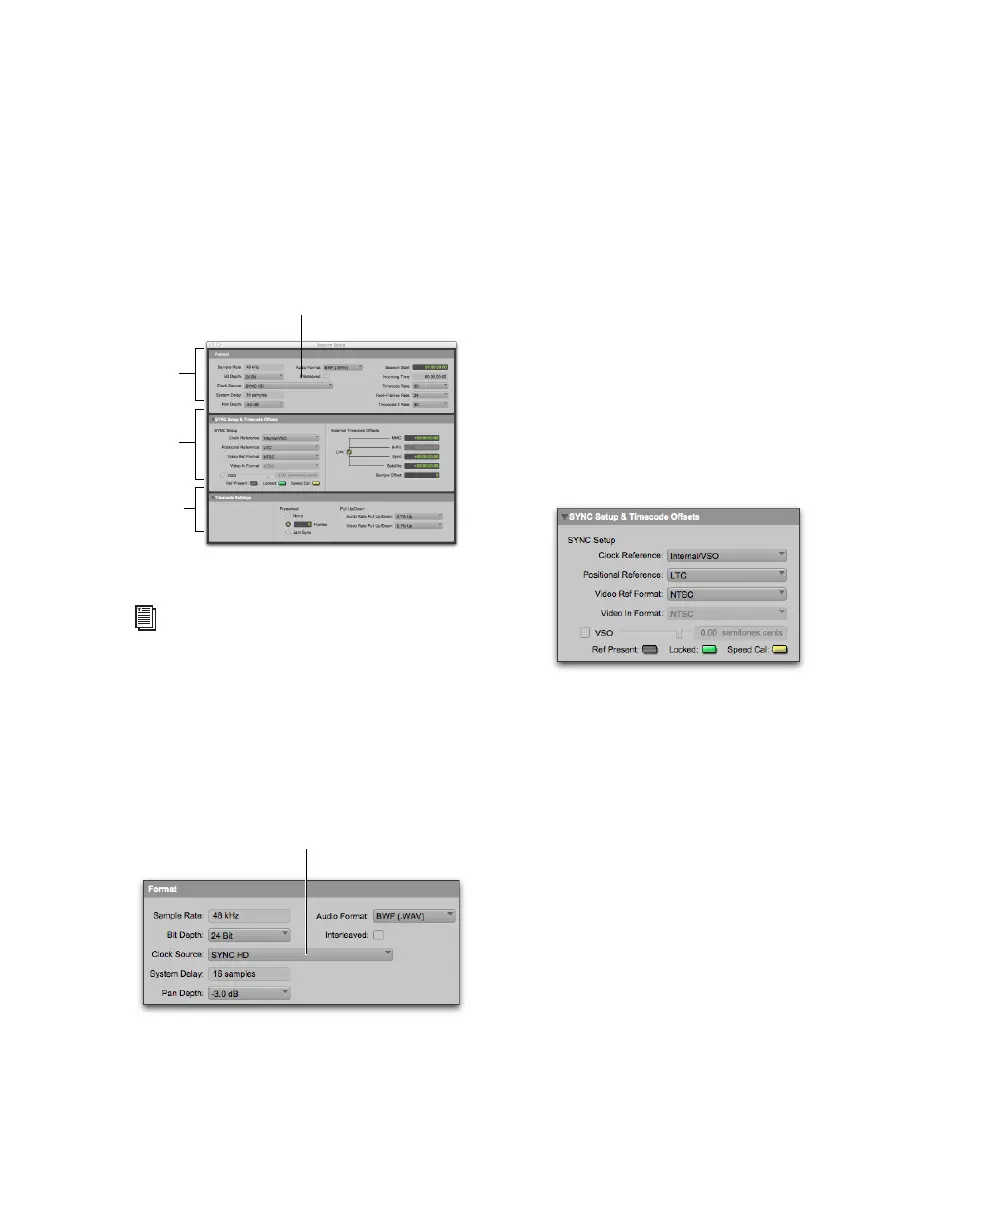
Session Setup window
See the Pro Tools Reference Guide for more
information on the Session Setup Window.
SYNC HD selected as Clock Source in the Session
Setup window
Session
settings
SYNC
Setup
Timecode
Settings
Clock Source
SYNC Setup controls in the Session Setup window