- 37 -
SW1 - SENSOR ADDRESS
Sensor DIP1DIP2 DIP3 DIP4 DIP5
1
ON ON ON ON ON
2
OFF ON ON ON ON
3
ON OFF ON ON ON
4
OFF OFF ON ON ON
5
ON ON OFF ON ON
6
OFF ON OFF ON ON
7
ON OFF OFF ON ON
8
OFF OFF OFF ON ON
9
ON ON ON OFF ON
10
OFF ON ON OFF ON
11
ON OFF ON OFF ON
12
OFF OFF ON OFF ON
13
ON ON OFF OFF ON
14
OFF ON OFF OFF ON
15
ON OFF OFF OFF ON
16
OFF OFF OFF OFF ON
17
ON ON ON ON OFF
18
OFF ON ON ON OFF
19
ON OFF ON ON OFF
20
OFF OFF ON ON OFF
21
ON ON OFF ON OFF
22
OFF ON OFF ON OFF
23
ON OFF OFF ON OFF
24
OFF OFF OFF ON OFF
25
ON ON ON OFF OFF
26
OFF ON ON OFF OFF
27
ON OFF ON OFF OFF
28
OFF OFF ON OFF OFF
29
ON ON OFF OFF OFF
30
OFF ON OFF OFF OFF
31
ON OFF OFF OFF OFF
32
OFF OFF OFF OFF OFF
N.B. Dip Switches 6, 7 and 8 are not used
NOTE: by default, the DIP SWITCHES are all
positioned at OFF
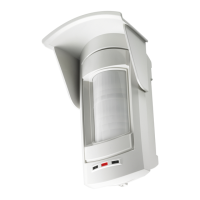
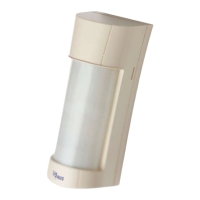
OutSpider PA and OutSpider DT are equipped with an anti-masking circuit, made of a central RX
receives and four active infrared TX transmitters positioned on the sides of the PIR sensors, that detects
obstacles placed in front of the sensor up to a distance of about 5 cm.
An alarm, caused by an attempt to mask the sensor, is signalled by quick flashing of the yellow sensor
and activates the dedicated relay output AM.
Operation
Antimask: When the Antimask circuit detects an obstacle that is
less than 5 cm from the lenses, a delay time of about 20 seconds
activates before this is signalled. If, at the end of this time, the
obstacle is not removed, the AM anti-masking relay activates
and the yellow LED flashes slowly.
Both the LED and the relay are automatically reset after the first
alarm of the sensor.
NOTE: this function however does not guarantee that the sensor
cannot be masked.
Dirty lenses: When the Antimask circuit detects that the average
of the signal value saved after a certain interval of time changes
by about 20 %, the F output and the yellow LED flashes slowly.
Initial power-up
Upon initial power-up the anti-masking circuit completes a self-adjustment.
In this phase it is essential for the cover to be properly installed in order to allow the sensor to
adjust itself to the correct value.
Precautions
Keep the sensor lens clean from dust or other filtering material that may modify its operation.
Antimask and Dirty Lenses
TX TX
TX TX
RX
E
N
G