AXIS Panorama PTZ User’s Manual Configuration
13
Configuring the Panorama Application
After completing the minimum configuration of the AXIS Panorama PTZ’s 2 cameras, click
Panorama in the Administration Tools. Note that the Panorma settings only need to be
made in one of the two cameras.
1. Configure/check the IP addresses for the 2 cameras used by the application. The IP
address for the camera currently being used for the configuration should already be
shown, but the IP address for the other (attached) camera must be entered manually.
2. Select the orientation for each camera, i.e. select which camera will be the right way up
and which will be upside down.
3. Set the maximum frame rate to be used, or leave as Unlimited.
4. Select the required image size. The available options are 320x240 and 640x480. Other
image settings are made in the standard administration tools in each camera. See
Minimum Configuration above.
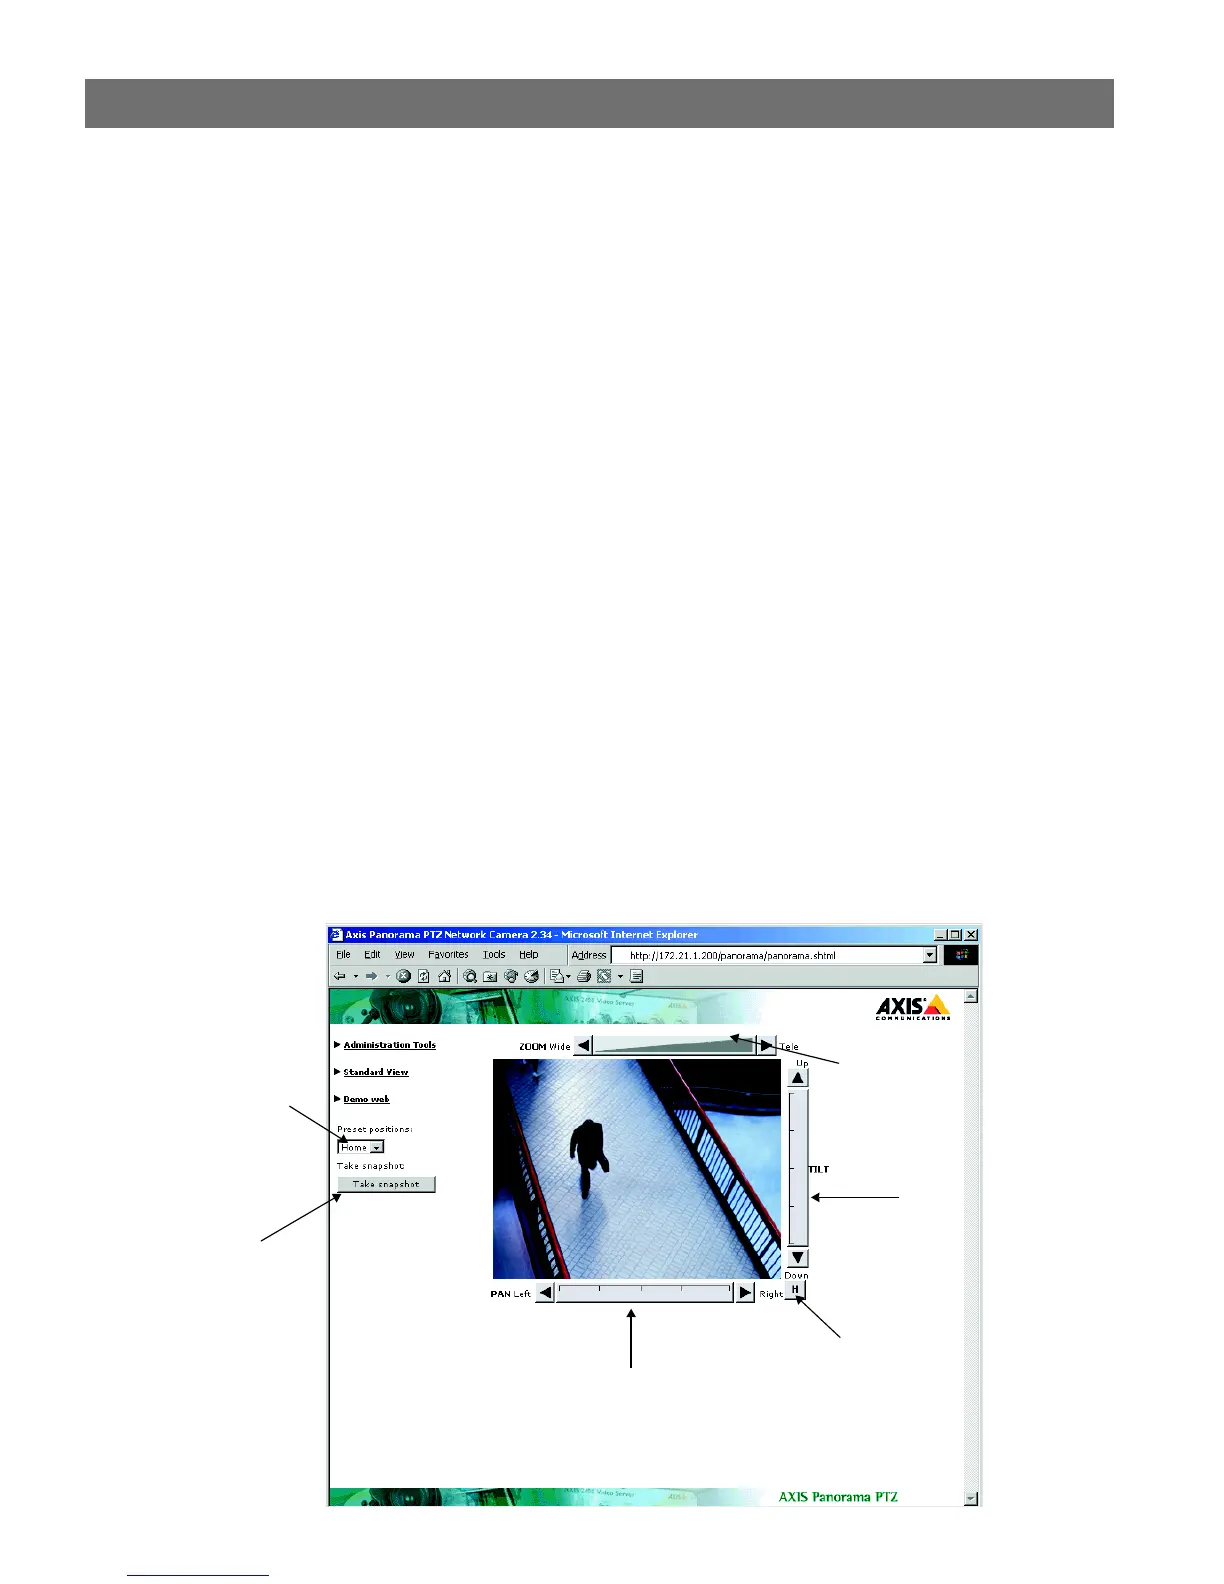
Using the Panorama PTZ Tools
The most common way of changing the Panorama view is to use the Pan, Tilt and Zoom
bars provided in the product’s web page, as shown in the illustration below. The bars can
either be clicked anywhere along their length, whereupon they will go directly to that
position or zoom, or alternatively, the arrow heads at the ends of each bar can be used,
whereupon the position or zoom is changed step-by-step.
Tilt bar
Pan bar
Zoom bar
Preset positions list
Snapshot button
Home button