Initial Assembly
10
Adjusting bolt
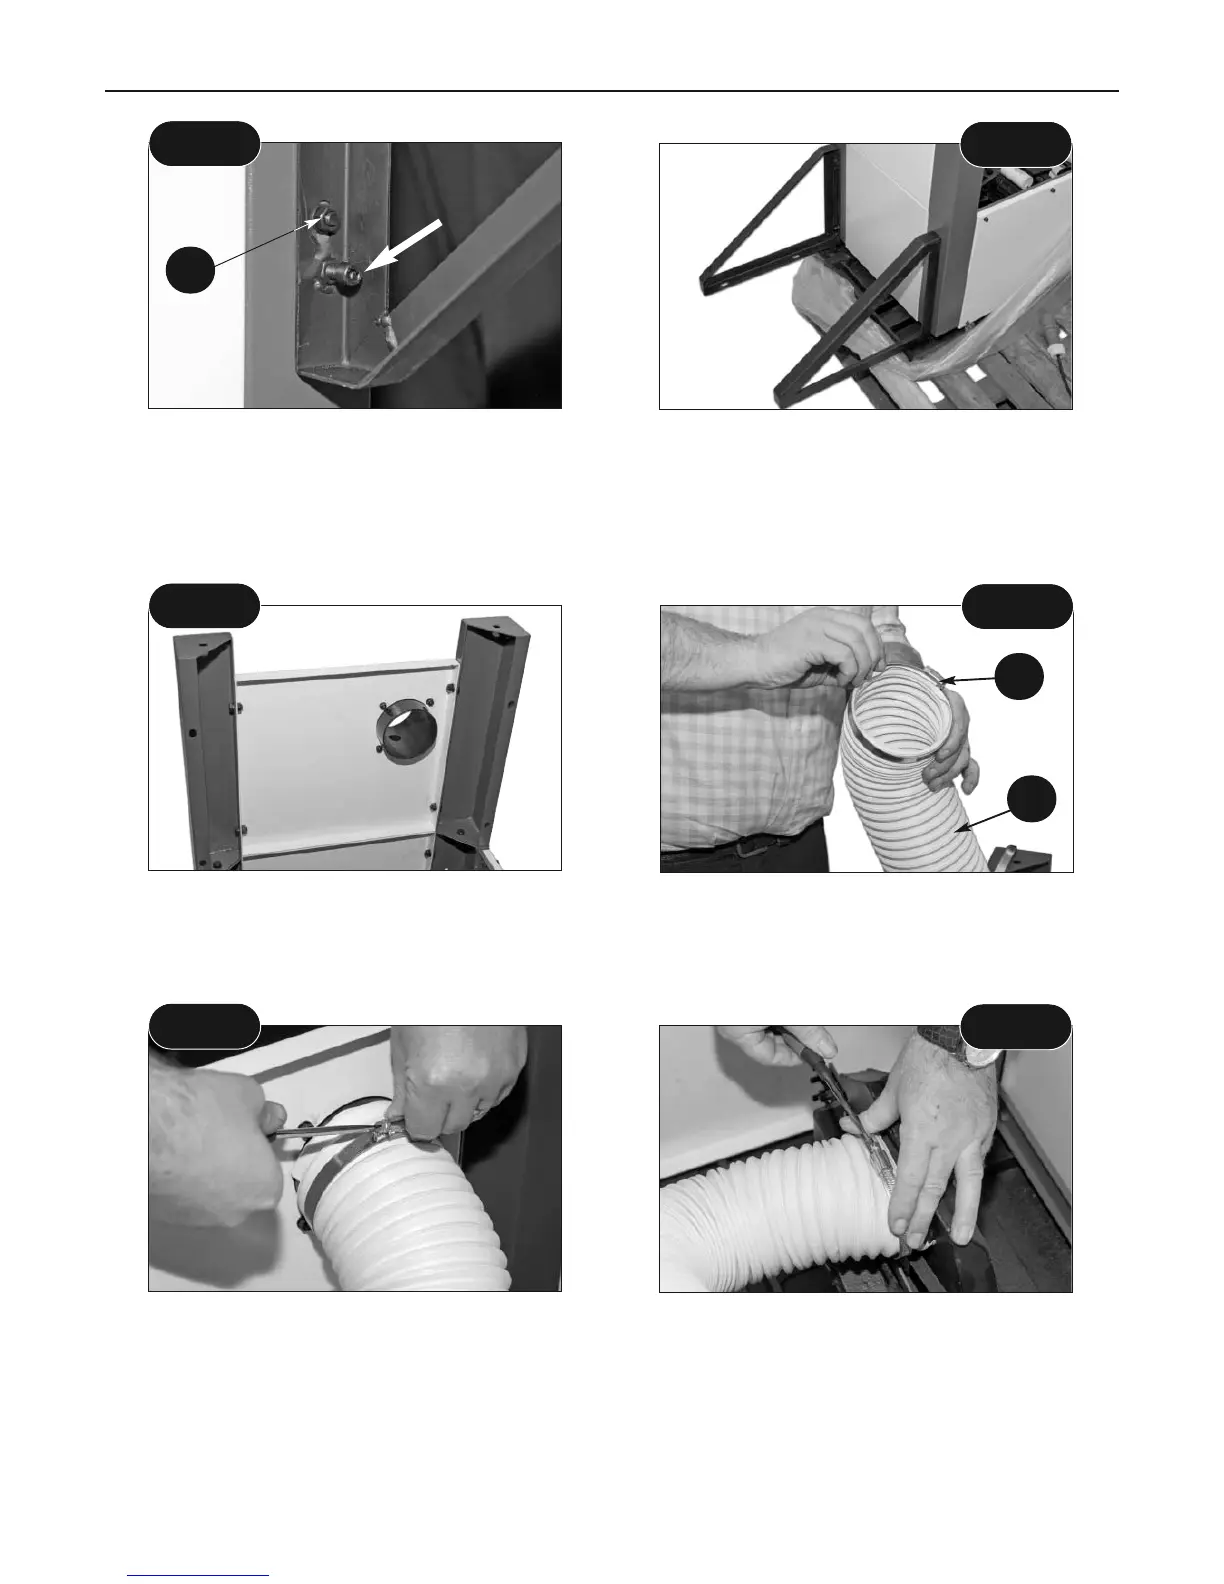
Table supporting brackets assembled
Fig 5
Fig 6
9A
Locate the remaining three panels (2) and 20 No. M8x16mm (5C) bolts, nuts and double washers.
Take up the rear panel with the dust extraction moulding fitted and fit between the rear legs,
using washered bolt through the leg and panel and securing with washer and nut. Again, secure
the nuts finger tight only. (See fig 7)
Fig 7
Fig 8
With easy open access, now is a good time to fit the dust extraction hose. Locate the hose (4A)
and the two 125mm jubilee clips (16). Stretch the hose out to its full length. Slip the jubilee clips
over the ends of the hose, fit the hose to the outlet on the saw box and the dust extraction
moulding and tighten the clips to clamp them in place. (See figs 8-9 and 10)
Fit the hose over the dust extraction
moulding and clamp in place
Fit the hose over to the saw box outlet
and clamp in place
Fig 9
Fig 10
Fit the remaining panels to the legs, using the same securing sequence. Wriggle, push, pull, press,
lever etc., the legs and the panels into the best alignment with the upper chassis and tighten the
nuts and bolts using the spanners provided. (See figs 11-12)
16
4A



 To Next Page