Setting the Machine
29
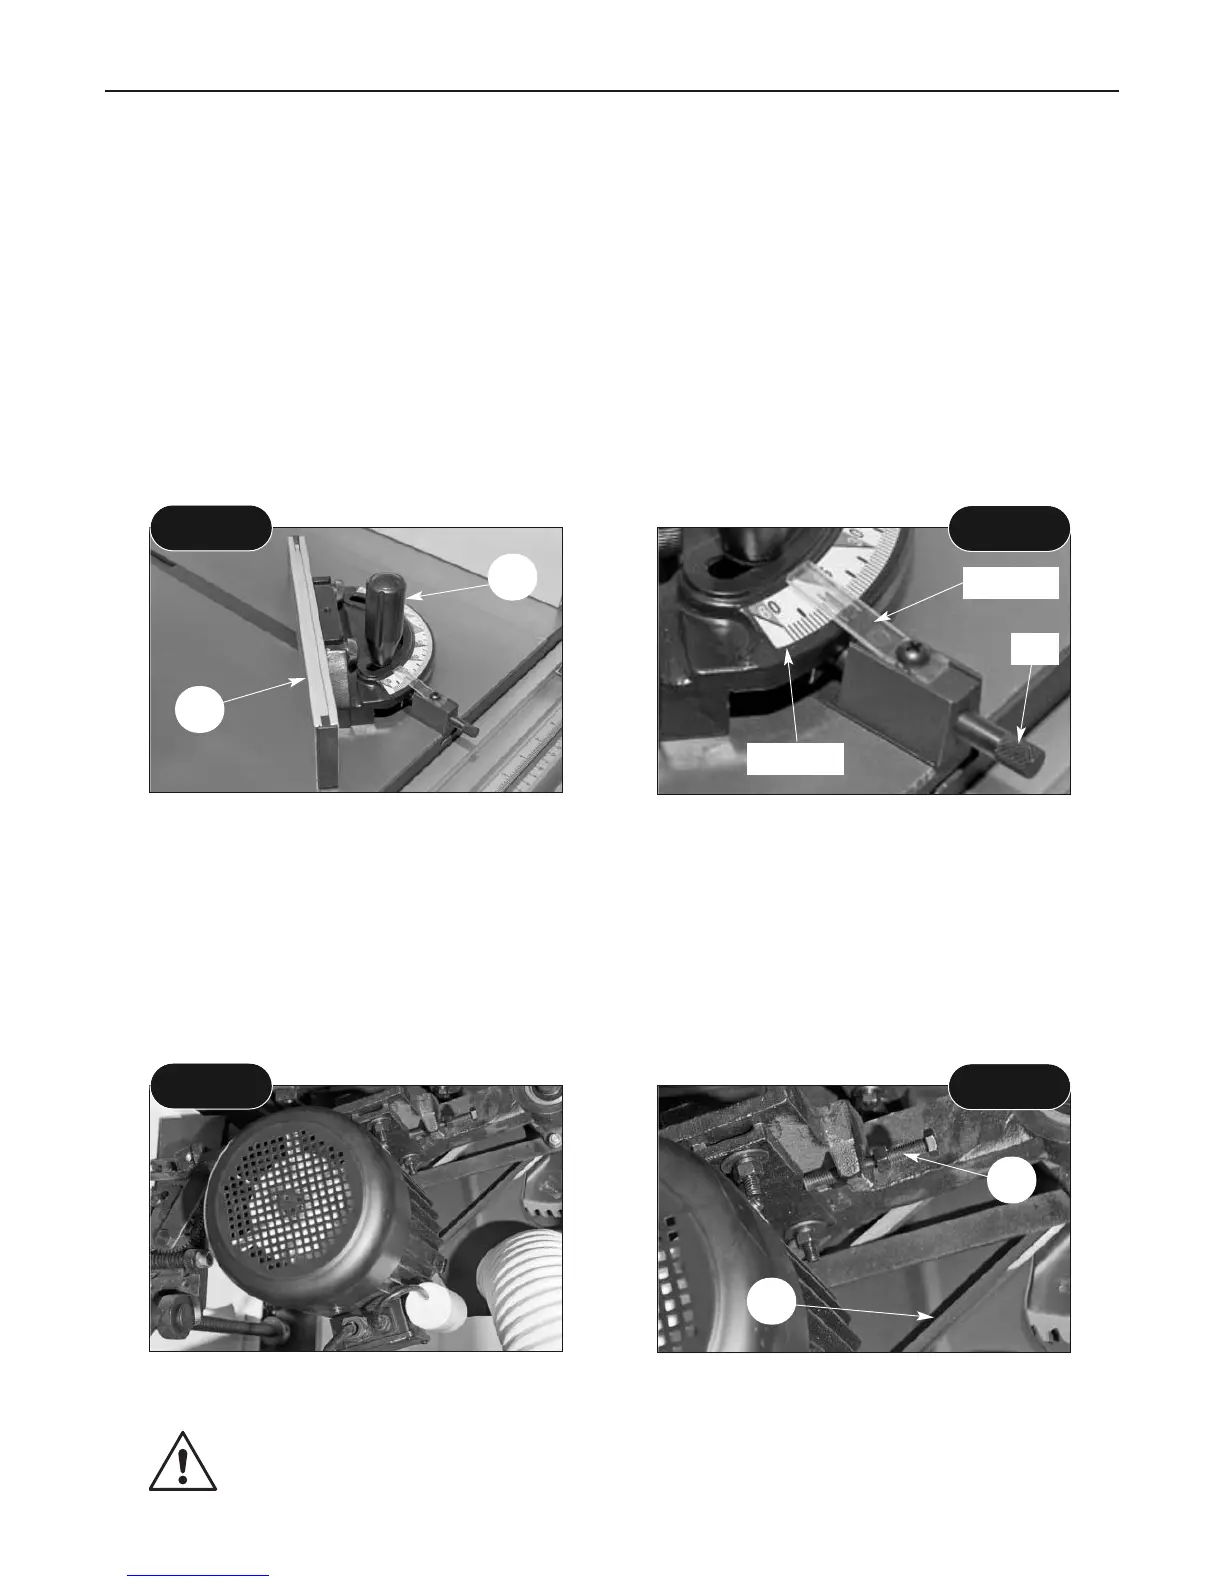
Check the belt tension, see figs 106-107, the belt should be tight, but not unduly so. Remove all
tools and stow away. Check that the machine tables are clear. Lower the saw to leave about 25mm
protruding, set the saw upright.
Checking the Belt Tension
Motor assembly
Belt (A) and Belt tensioner bolt (B)
Fig 106
Fig 107
A
B
Fit the small mitre fence (11) into the
machines ‘T’ slot. Loosen the clamping
handle (A).
Check that the indexing pointer gives the
correct reading against the scale.
Fig 104
Fig 105
11
A
Pointer
Scale
Pin
Fit the small mitre fence (11) to the machine. Loosen the clamping handle (A).
NOTE: There are 3 preset positions available with the small mitre fence. +45˚, 0˚, and -45˚, these
are achieved using lugs in the casting and a push/pull pin against which the lugs are stopped. The
pin has to be fully withdrawn to allow the fence to pivot from one side to the other.
Set the face to zero angle using the preset position. Check that the angle is correct (and the lug is
on the correct side of the pin). Check that the indexing pointer gives the correct reading against
the scale. Adjust the pointer if necessary. Check left and right positions. Check the pointer is still
correct. If the preset positioning is wrong, set the fence with a square/mitre gauge, set the pointer
accurately against the scale and clamp the fence in position without recourse to the presets.
Remove the small mitre fence from the table and stow carefully aside. (See figs 104-105)
Setting the Mitre Fence
CHECK that everything that should be tight, is tight; saw blade guard, rise and
fall lock mechanism, fence clamps etc.
Continues Over....
 Loading...