Setting the Machine
28
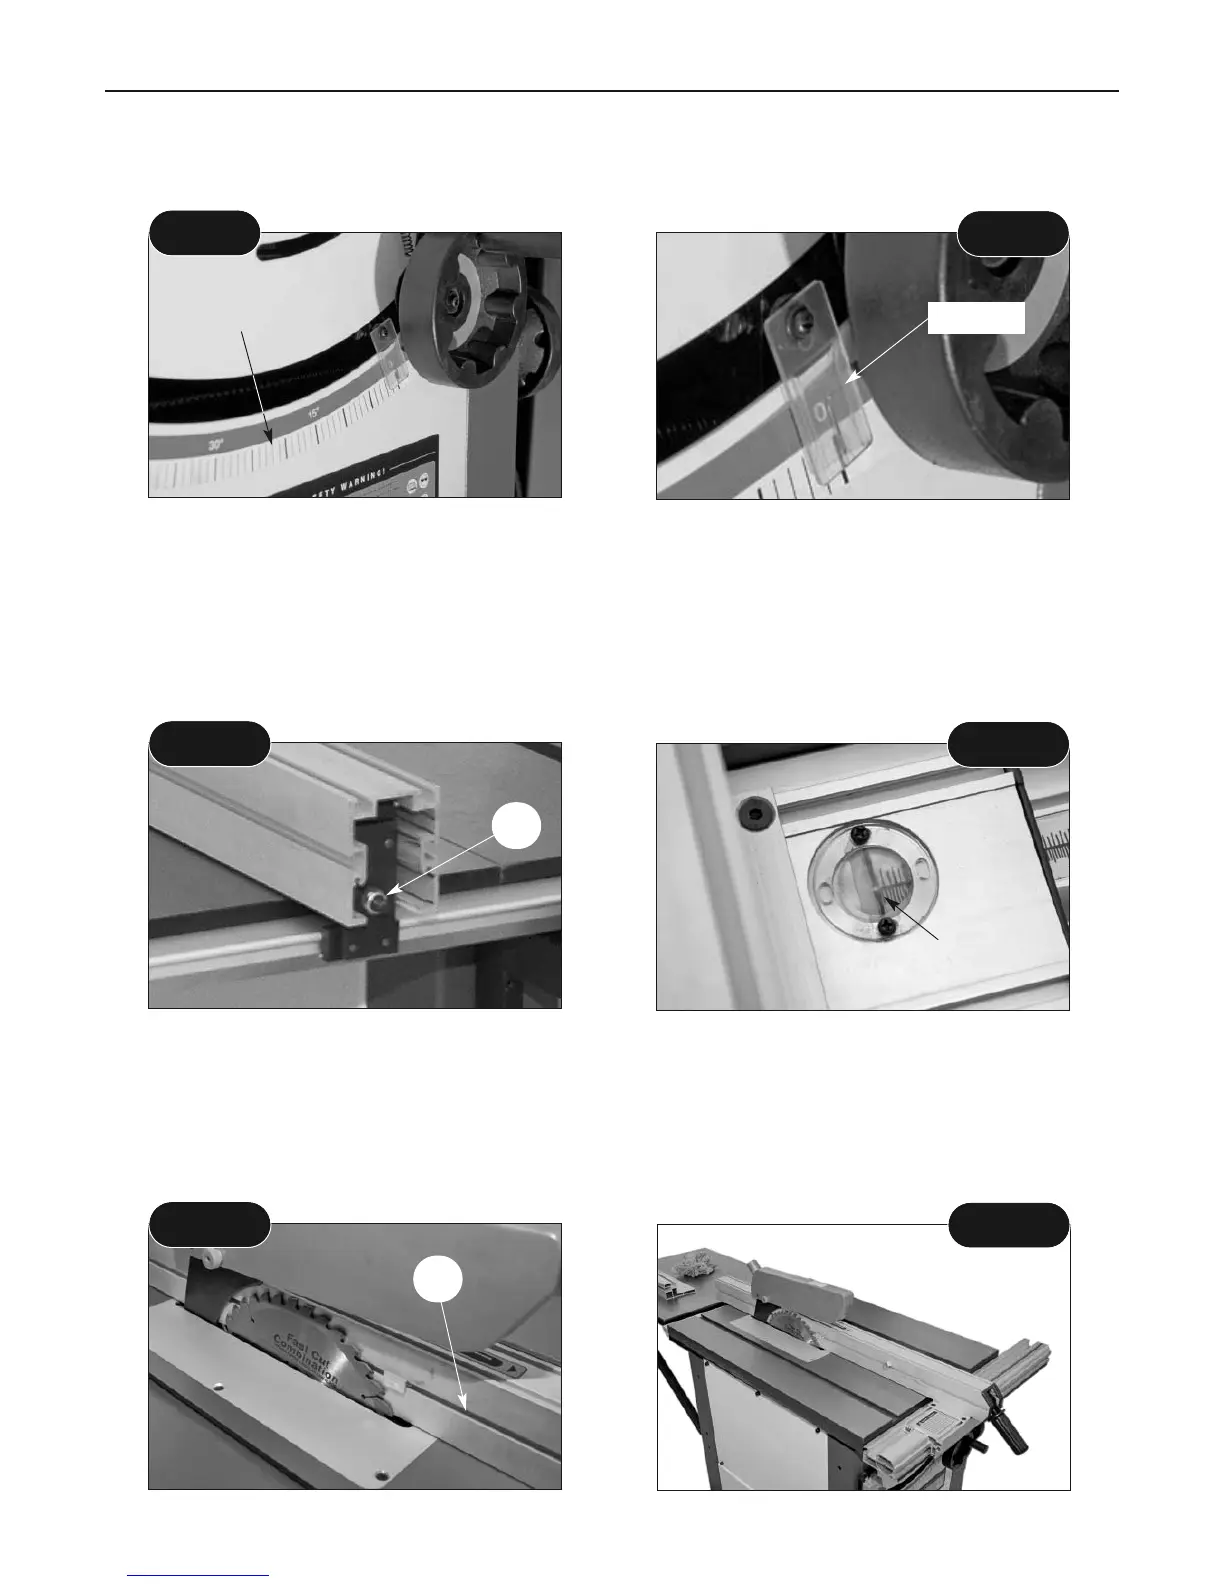
Tilt the blade fully over. Using a mitre square, set the angle of the saw to 45˚. Check that the index
mark gives a corresponding reading against the scale. Adjust the pointer if necessary. Reset the
blade upright, check that the angle scale reading is correct. (See figs 98-99)
Set the rip fence a predetermined distance from the saw blade and lock in position. Check that
the rip fence is held securely when it is locked in position. If the locking appears a little 'slack'
adjust the position of the clamping lug at the rear of the rip fence by tightening the nut. (A)
Check that the preset distance corresponds to the measurement on the scale against the index
mark in the magnifying lens. If not, adjust the position of the rip fence on its mounting bracket.
Check that the index mark gives a
corresponding reading against the scale.
45˚ Scale pointer
Fig 98
Fig 99
Pointer
Tilt index scale
Setting the Rip Fence (See figs 102-103)
Check that the fence (20) is parallel to the saw blade by sliding it up against it. If the fence is out
of alignment loosen the (short or long) rip fence rails and adjust until correct, tighten the bolt.
NOTE: Lubricate the fence rails and the underside of the rip fence clamp assembly (20) with a
ptfe dry lubricant, so the fence assembly runs smoothly back and forth.
Fig 100
Fig 101
Fig 102
Fig 103
A
20
Index mark