Changing the Saw Blade
Maintenance
36
Tighten up the saw nut, using the tommy bar to hold
the shaft steady. Check the riving knife is aligned
with the saw blade, and correctly positioned. Replace
the table insert and secure with the 5 screws.
Replace the saw blade guard. When everything is
satisfactory, turn the saw blade once by hand to
check it doesn't foul anywhere. Reconnect the
machine to the mains supply. Give the machine a
'quick' burst check ( i.e. quick ON-OFF) to ensure
everything is O.K. If everything is satisfactory,
continue to use the machine. Check the old blade for
sharpness, missing teeth, resin buildup, etc., clean if
necessary and send for refurbishment/resharpening
if required. If the blade is not to be re-sharpened,
clean and pack away in its stowage case.
Keep the saw as clean and free from saw dust build
up as is practical. Periodically, remove the saw gullet
and vacuum out and clean out the saw box and the
extraction housing. Remove any resin build up in the
saw box, using a proprietary resin cleaner.
Remove the upper side panels and clean the
threaded drive shafts of the rise and fall and tilt
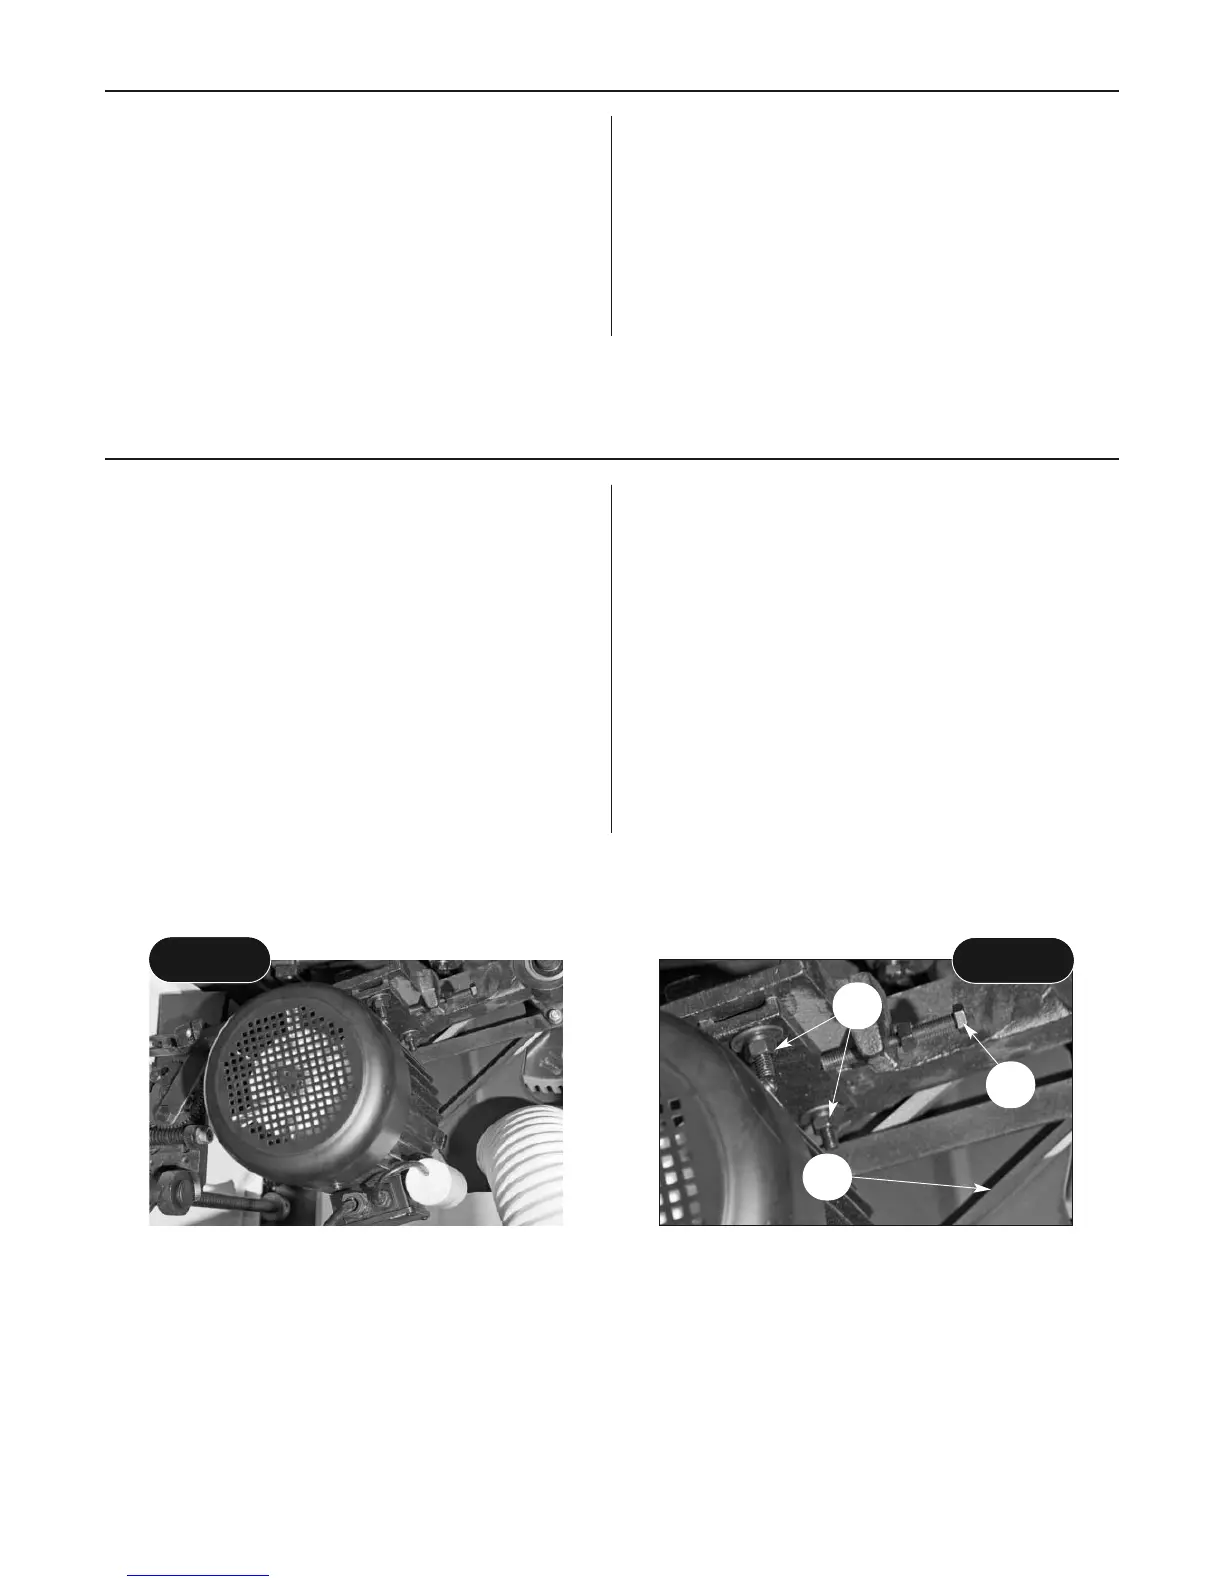
mechanisms. At the same time check the belt drive,
i.e. the belt is not 'glazing' with resin build up,
likewise with the pulley wheels. Check the belt
tension. If the belt (A) is becoming slack, loosen the
motor hold down bolts (B) and drive the motor
backward with its adjusting bolt (C). (See figs 116-
117) Check the saw blade regularly for chipped,
missing, damaged teeth etc. and remove any resin
build up from the blade, riving knife etc.
If you have finished using the saw bench, clean
above and below the work table and using a damp
cloth wipe the saw bench over. If the saw bench is
not going to be used for a period of time, use a
rustproofing spray (see our catalogue), spray a light
coat over the work table and place a dust sheet over
the saw bench.
Motor assembly
Belt (A), Motor hold down bolts (B)
and Belt tensioner bolt (C)
Fig 116
Fig117
A
C
B