Page 22
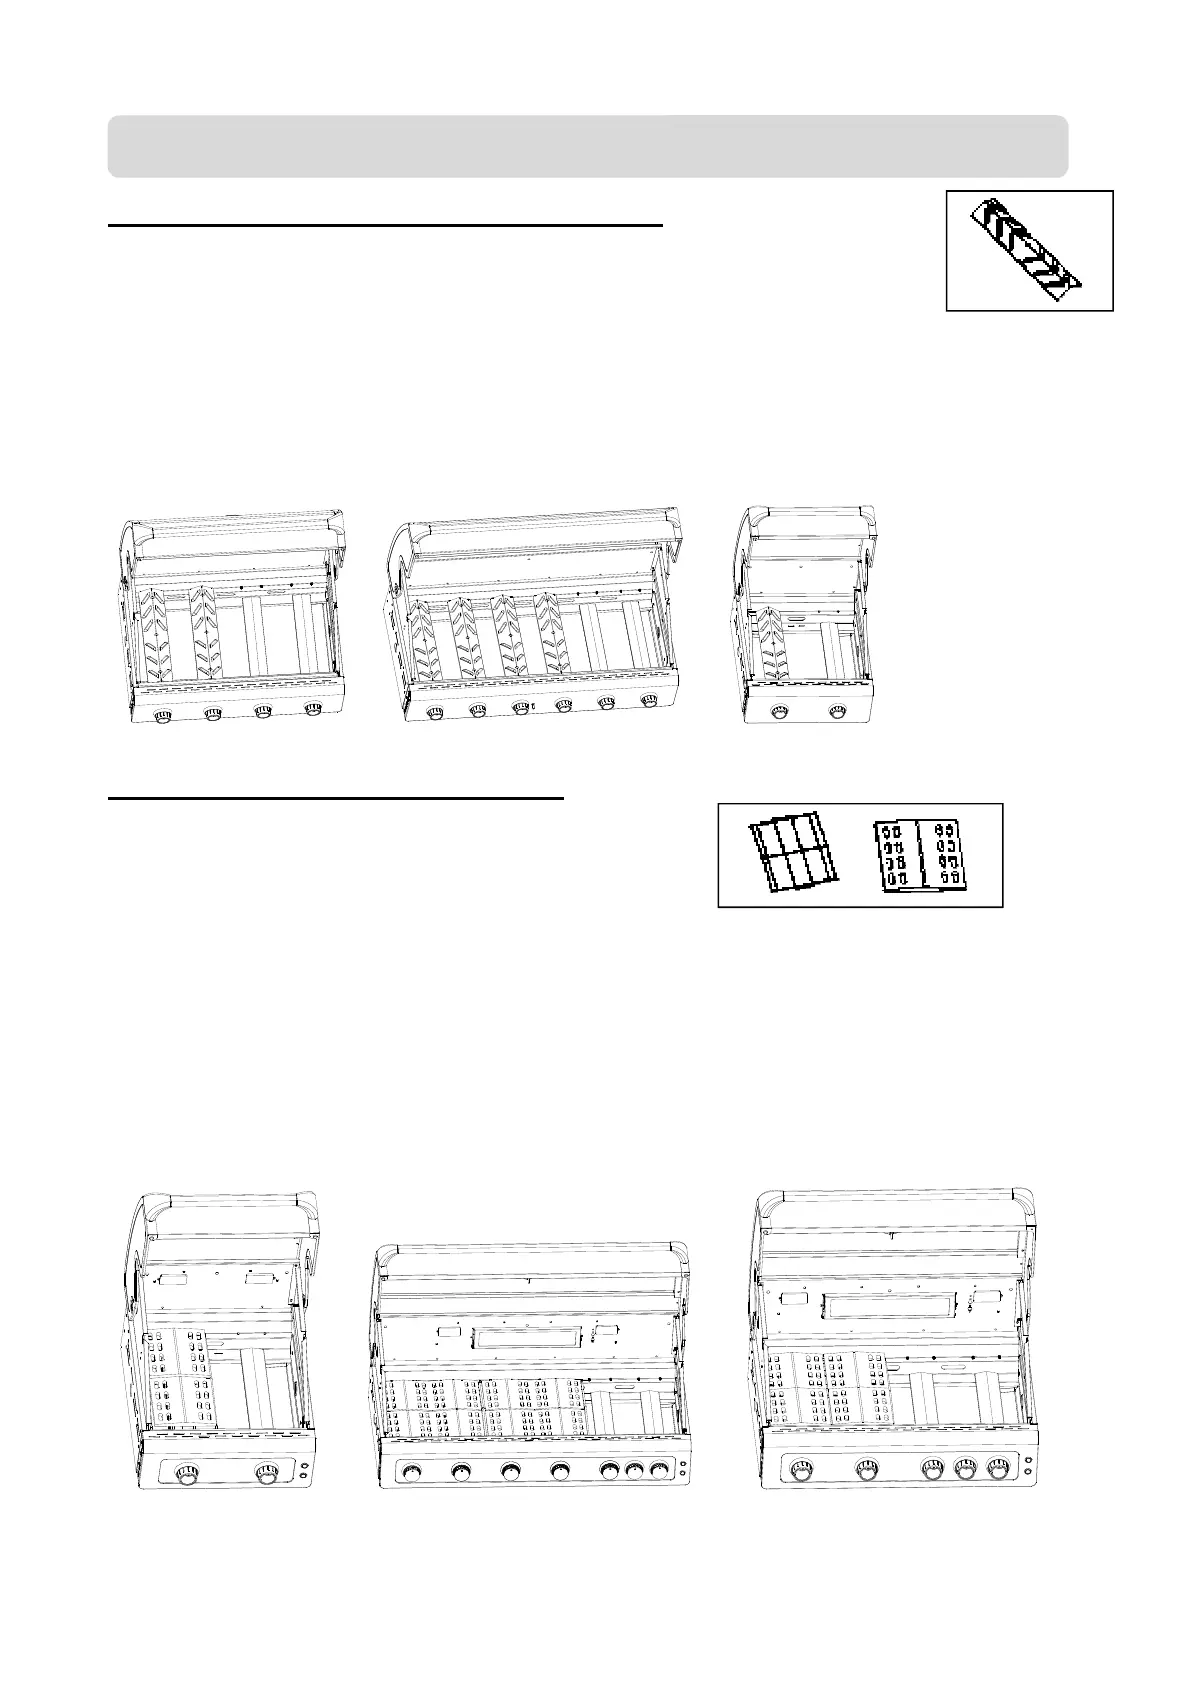
STEP 10 (FOR STANDARD AND PREMIUM ONLY): Fit the flame tamer(s)
2B One Flame Tamer
4B Two Flame Tamers
6B Four Flame Tamers
The Flame Tamers fit above each burner in the cooking grill portion of the barbeque only.
Flame tamers are not required underneath the hotplate. The correct position for each flame
tamer is on the lower support shoulder in the firebox held in place by the locating dimples
on the support shoulder. The cooking grill and hotplate positions can be switched in your
barbeque, make sure the flame tamers are always positioned under the cooking grill. If you
purchase optional extra grills, you will also need extra flame tamer(s) so that each burner
under the grill section is covered by a flame tamer.
STEP 11 (FOR DELUXE MODELS ONLY): Position the Ceramic Tiles and Bracket
2B Two Ceramic Tiles & One Ceramic Tile Bracket
4B Four Ceramic Tiles & One Ceramic Tile Bracket
6B Eight Ceramic Tiles & Two Ceramic Tile Brackets
Place the Ceramic Tiles onto the Ceramic Tile Bracket, and then fit the Bracket (with tiles)
onto the lower support shoulder of the firebox. The Bracket should be positioned centrally
over the burner(s) that are under the cooking grill. Each bracket should be located in place
by the dimples in the support shoulder. If the hotplate and the cooking grill positions are
swapped, make sure that the Ceramic Tiles / Bracket(s) are re-adjusted to be under the
cooking grill. If you purchase extra cooking grill(s) for 2B / 4B to replace the hotplate, you
will also need an extra set of Ceramic Tiles / Bracket to fit under the extra cooking grill.
Note for 6B that maximum ceramic tiles that can fit is for 2/3 cooking grill.
Assembly instructions (continued)