R5914712 /00 SP2K-C56
5.5 Lens shift, zoom & focus
Motorized lens adjustment
The SP2K-C projector is equipped with a motorized lens shift functionality and a motorized zoom & focus
functionality.
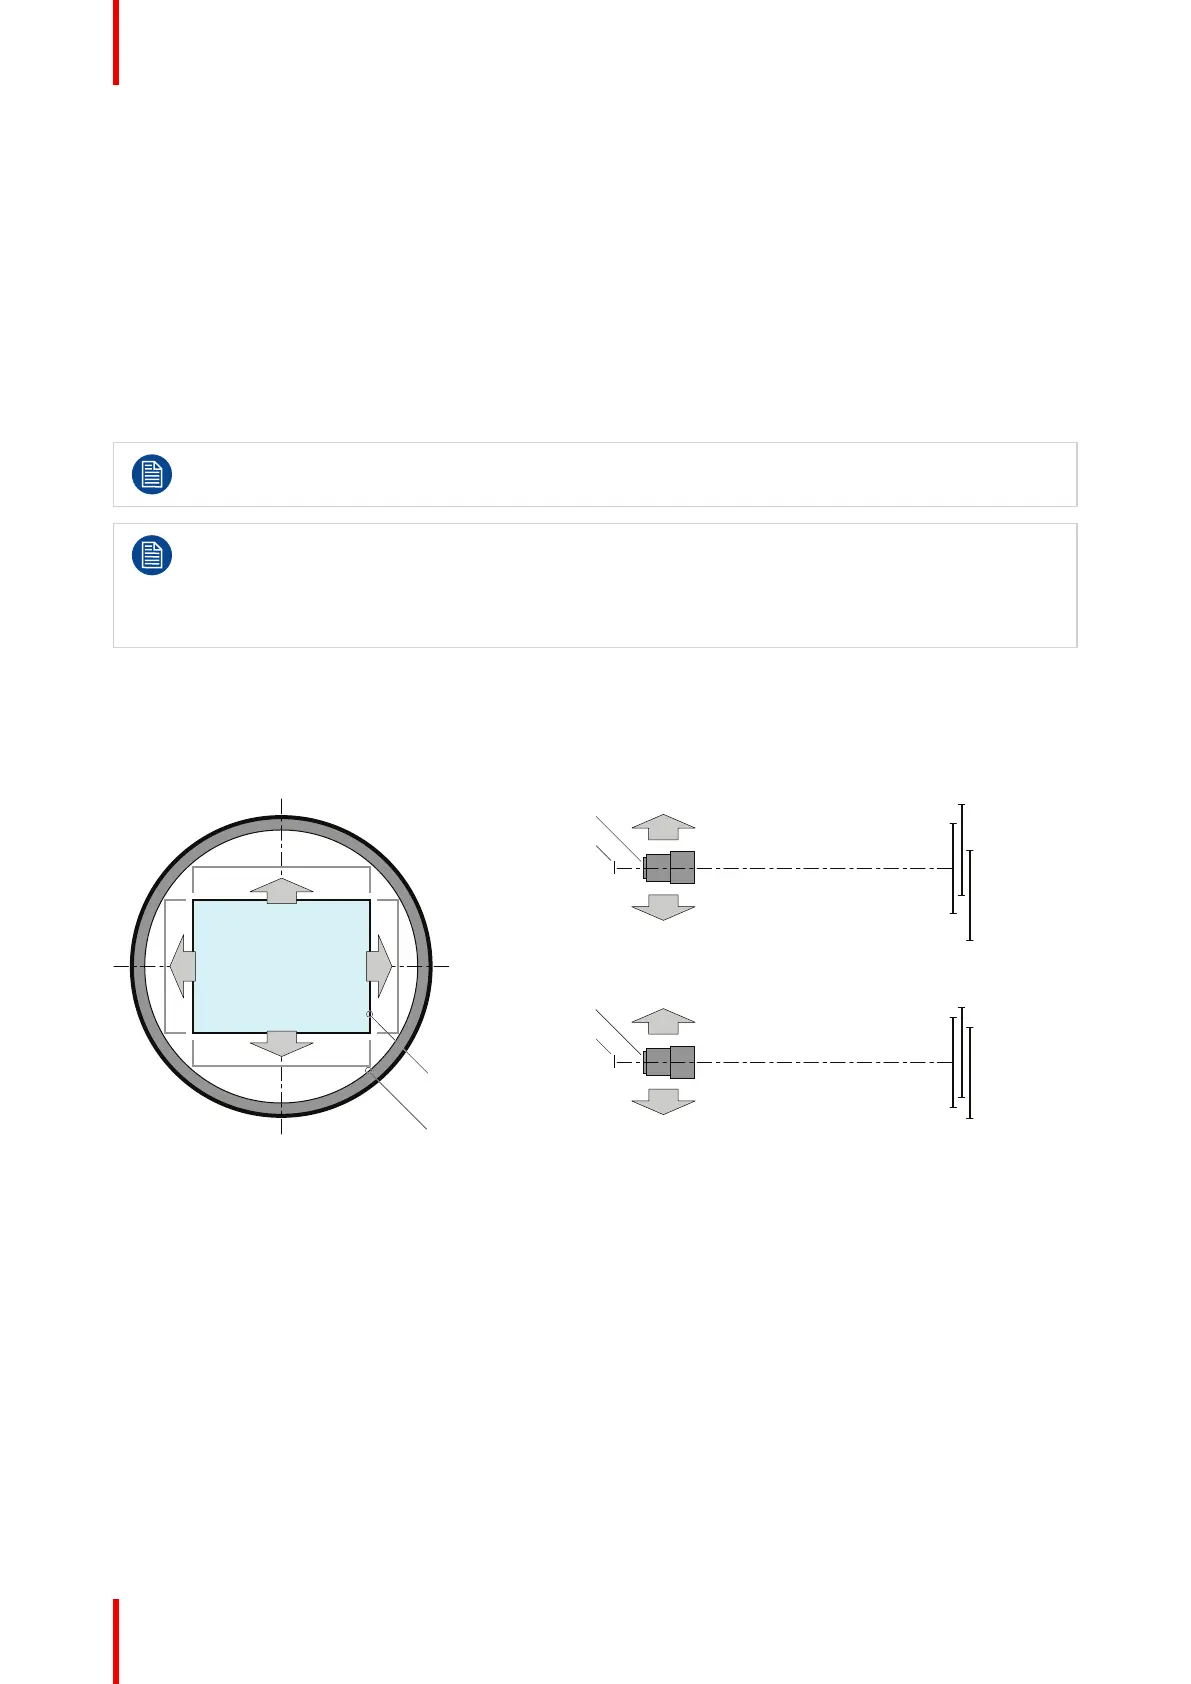
About the shift range
The lens can be shifted with respect to the internal optics of the projector (DMD) which results in a shifted
image on the screen (Off-Axis). A 100% shift means that the center point of the projected image is shifted by
half the screen size. In other words, the center point of the projected image falls together with the outline of the
image in an On-Axis projection. Due to mechanical and optical limitations the shift range is limited as well.
The maximum shift range for the SP2K-C projector depends on the type of lens holder chosen.
Take into account that when using Scheimpflug to adjust the lens holder, the shift range will become
asymmetrical as a direct consequence. An up/down shift range of 30%/70% could (for example)
become 25%/75% instead after Scheimpflug adjustment.
For this reason it is advised to perform Scheimpflug adjustment after you have reached the
sharpest possible image using lens shift, zoom and focus.
Maximum shift range C-Lens holder
All lenses have a shift range of 30% up, 70% down, 15% left, and 15% right. This range is valid for all throw
ratios. Within these shift ranges the projector and lens will perform excellently. Configuring the projector
outside these shift ranges will result in a slight decline of image quality.
U
D
SIDE VIEW
P
F
TOP VIEW
P
F
L
R
+30%
-70%
-15%
+15%
U
D
L R
P
F
+30%
-70%
-15% +15%
Image 5–9 Shift range for an SP2K-C projector with C-Lens holder
P DMD.
F Field of view.
How to shift the lens of the SP2K-C projector?
1. In the Configuration – Lens Selection menu, Select the correct lens file and the calibrate the selected lens
with a Calibrate & return to mid position action.
2. Use the up and down arrow keys in the Light, dowser, lens menu to shift the lens vertically and use the
left and right arrow keys to shift the lens horizontally.
Lenses & Lens holder