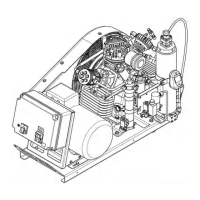
Cylinders and Pistons
Inspection:
2nd
stage
• The cylinder
(1)
and the piston rings
(3)
should
show no sign of wear. (see page
40-44).
• The piston pin
(4)
should show no sign of wear.
(see page 52).
Assembly of cylinder and piston:
• O-ring
(2)
should always be replaced.
• Set the con-rod to top dead center position.
• Grease a-ring
(2)
slightly with vaseline; slide
a-ring without twisting over the lower cylinder
into the groove of the flange.
• When reinstalling the snap-ring
(5)
ensure its
correct position!
• Lubricate piston
(3)
sufficiently and check that
the piston ringgaps are in correct position (turned
by 180°). For the correct set of piston
rings: (see page
46).
• Assemble piston
(3)
and cylinder
(1)
in
reverse order of the disassembly.
• Carefully fit cylinder
(1
).
( see fig. 12).
• Fit the valve head and mount it. (see pages 18
ar:id
20).
32
Cylindres et pistons
Controle:
2eme etage
• Verifier l'usure du cylindre
(1)
et du piston
(3)
et
des segments de piston. (Vair page 40-44).
• Verifier l'usure de l'axe de piston
(4).
(Vair page 52).
Montage
du
cylindre et
du
piston:
• Remplacer le joint torique
(2).
• Mettre la bielle
au
point mart superieur.
• Graisser le joint torique
(2)
avec de la vaseline
et
I'
enfiler sans le torsader sur la partie
inferieure du cylindre sur le meme alignement
que le pied du cylindre.
• Veiller
a positionner correctement la bague de
retenue
(5)
tors du montage.
• Bien lubrifier le piston
(3),
tout en veillant au
decalage des coupes des segments (180
°).
(Position correcte du segment de piston:
page
46).
• Le montage du piston
(3)
et du cylindre
(1)
s'effectue dans l'ordre inverse de celui du de-
montage.
• Faire glisser avec precaution le cylindre
(1)
par-dessus les segments. (Vair ill. 12).
• Remonter la tete de soupape. (Vair page 20).