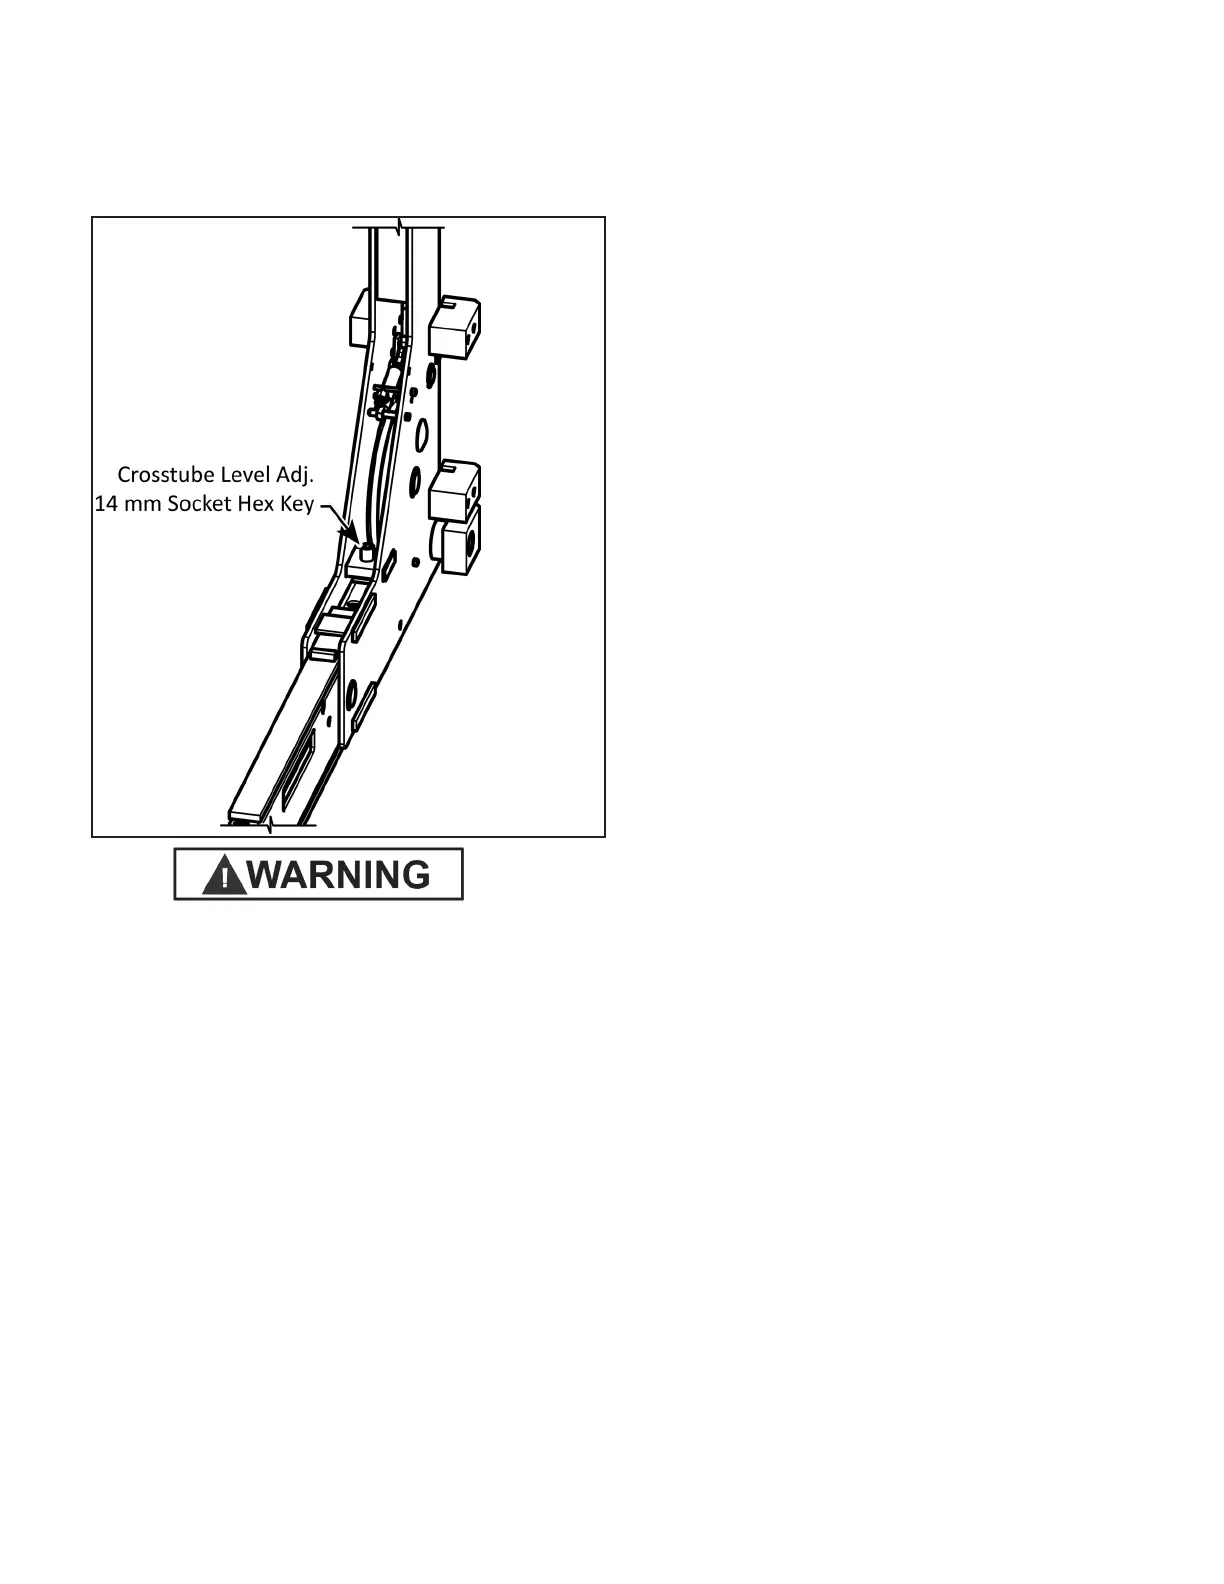
13. Remove the Vehicle from the Lift and using a level
adust both the Left and Right Short Crosstube until just
a slight upward angle is produced. This upward angle will
be corrected with Vehicle loading. A 14mm Hex Socket is
required to adjust the cap screw illustrated below Fig. 17.3.
Safety locks may not engage at exactly the same time
when Vehicles are being raised. They should be close. Be
sure that all four corners have passed the SAME safety
ladder bar slot before lowering Lift on the safety locks.
NEVER lower Lift on different safety lock position or dam-
age to the Lift may result.
STEP 18
(Bleeding)
1. Lift must be fully lowered before changing or adding fluid.
2. Raise and lower teh Lift six times. The Cylinder is
self-bleeding. After bleeding the system, fluid level in power
unit reservoir may be reduced. Add more fluid if necessary
to raise the Lift to its full height.
3. To pressure test, run Lift to full rise and run Motor
for approximately 3-seconds after the Lift stops. This will
place pressure on the hydraulic system. Stop and check all
fittings and hose connections. Tighten or reseal if required.
STEP 19
(APPLY ANTI-SLIP TAPE)
1. Clean the runway. Use a broom or brush to remove
loose dirt and debris from the runway.
2. Thoroughly wash, rinse and dry the runway using a
mild solution of soap and clean water to remove any oils,
grease and water-solubleClean contamination. Dry the
runway with a clean cloth and allow to air dry.
3. Cut the Anti-Slip Tape into four equal pieces.
Suggested length is 72 in. (1,829 mm).
4. Verify the Runway is dry and clean. It is critical for
maximum adhesion of the Anti-Slip Tape that the runway
be dry, free of dirt, oils and grease.
5. Measure and mark the runways with pencil guide lines
to outline the tape installation area on the ramp. Refer to
the figure on the next page for a suggested layout of the
Anti-Slip Tape.
IMPORTANT! Do not install this Tape directly on the
edge of a Runway. Stay at least 1 in (25 mm) away from
edges. Do not attempt to bend this Tape over an edge.
6. Wash your hands. The Anti-Slip Tape’s adhesive side
is protected by a paper or plastic film. You will remove
this film a few inches at a time to apply the Tape to the
Runway.
IMPORTANT! Handle the tape by its edges. Minimize
contact between the adhesive and your hands. The oils
from your hands will reduce the adhesive’s long-term
effectiveness.
IMPORTANT! BendPak recommends two people work
together to install the Tape. One person removes the
backing and applies the Tape to the Runway while the
second holds the Tape in place over the guide lines
marked on the Runway.
7. Lay one piece of the Anti-Slip Tape on the runway and
peel back about 2 inches (50 mm) of the protective film.
Apply the adhesive side to the Runway inside the guide
lines you created in step 5.
8. Slowly remove the film as you press the exposed
Tape’s adhesive side into the Runway. Work slowly and
apply 2 to 5 inches at a time to stay within your guide
lines.
9. After applying the Tape use a heavy rubber roller
to press the Tape into the Runway and to ensure firm
contact with the adhesive.
10. Apply the Anti-Slip Tape to the remaining area of the
Lift’s runways similar to the figure below.
31
Fig. 17.2