13
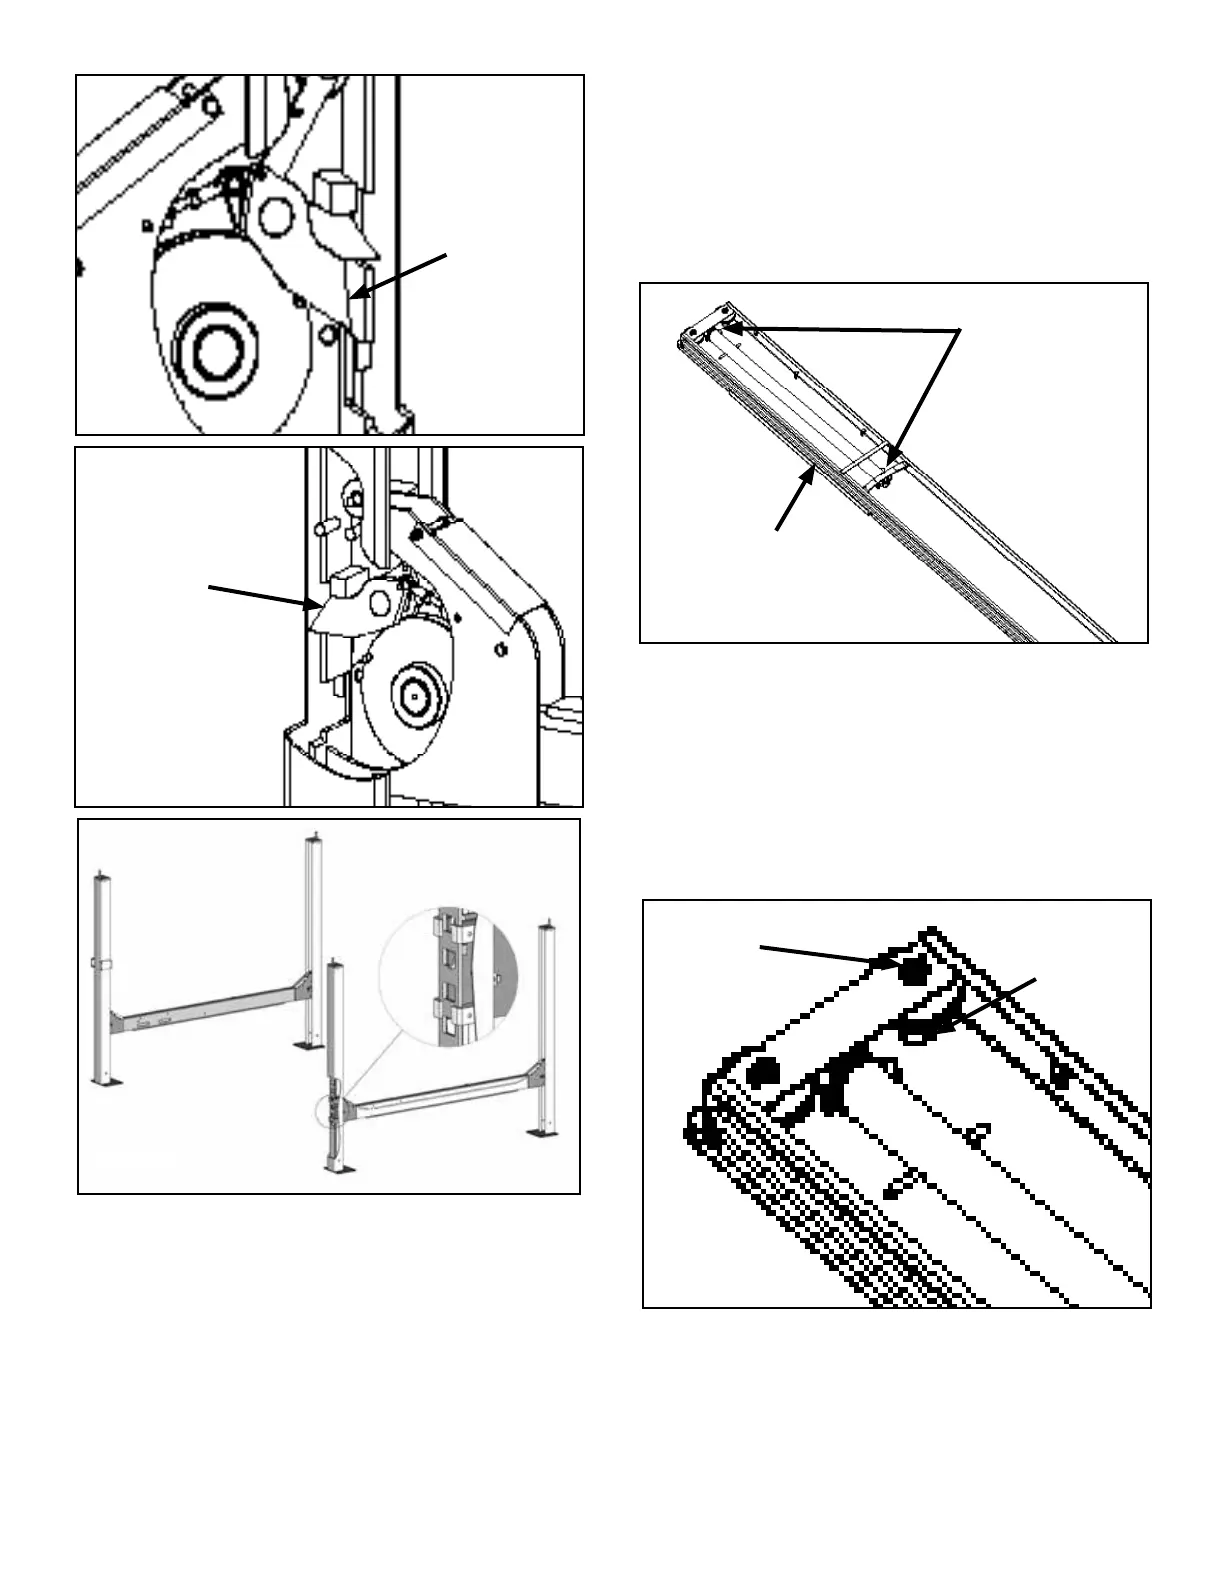
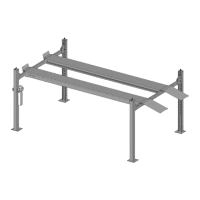
3. The posts and crosstubes will now be in position and
spaced properly for the ramps. Be very careful not to dis-
turb the posts and crosstubes at this time as they may tip
over causing personal injury or harm.
STEP 5
(Power Side Ramp Installation)
1. Locate the POWER SIDE RAMP easily identified by
the cylinder and sheaves assembled in the ramp or the
sheave roller mounting plates welded on the underside.
The Power Side Ramp will be positioned on the side of
the lift where the Power Unit is installed. (See Fig. 5.1)
2. Check that the cylinder ports are facing away from
the utility rail side of the Power Side Ramp. (See Fig 5.1)
3. Remove any pre-installed CABLE SHEAVES from the
POWER SIDE RAMP making sure to and pay attention
to the order in which they are removed. (This will help at
the time of re-installation.) First remove the Socket Head
Cap Screw, then press the sheave axle through the ramp
completely until the sheaves are removed. (See Fig. 5.2)
4. Position the POWER SIDE RAMP on top of the cross-
tubes with the UTILITY RAIL towards the center. Align the
holes in the ramp with the holes on the crosstubes and
bolt together using four M12 x 1.75 hex bolts, nuts, and
washers. (See Fig. 5.3)
Slack
Safety Lock
Fig 4.2
Primary
Safety Lock
Fig 4.3
Cylinder Ports
This Side
Fig 5.1
Utility Rail
This Side
Fig 5.2
Sheave
Axle
Socket
Head Cap
Screw
Fig 4.4