12
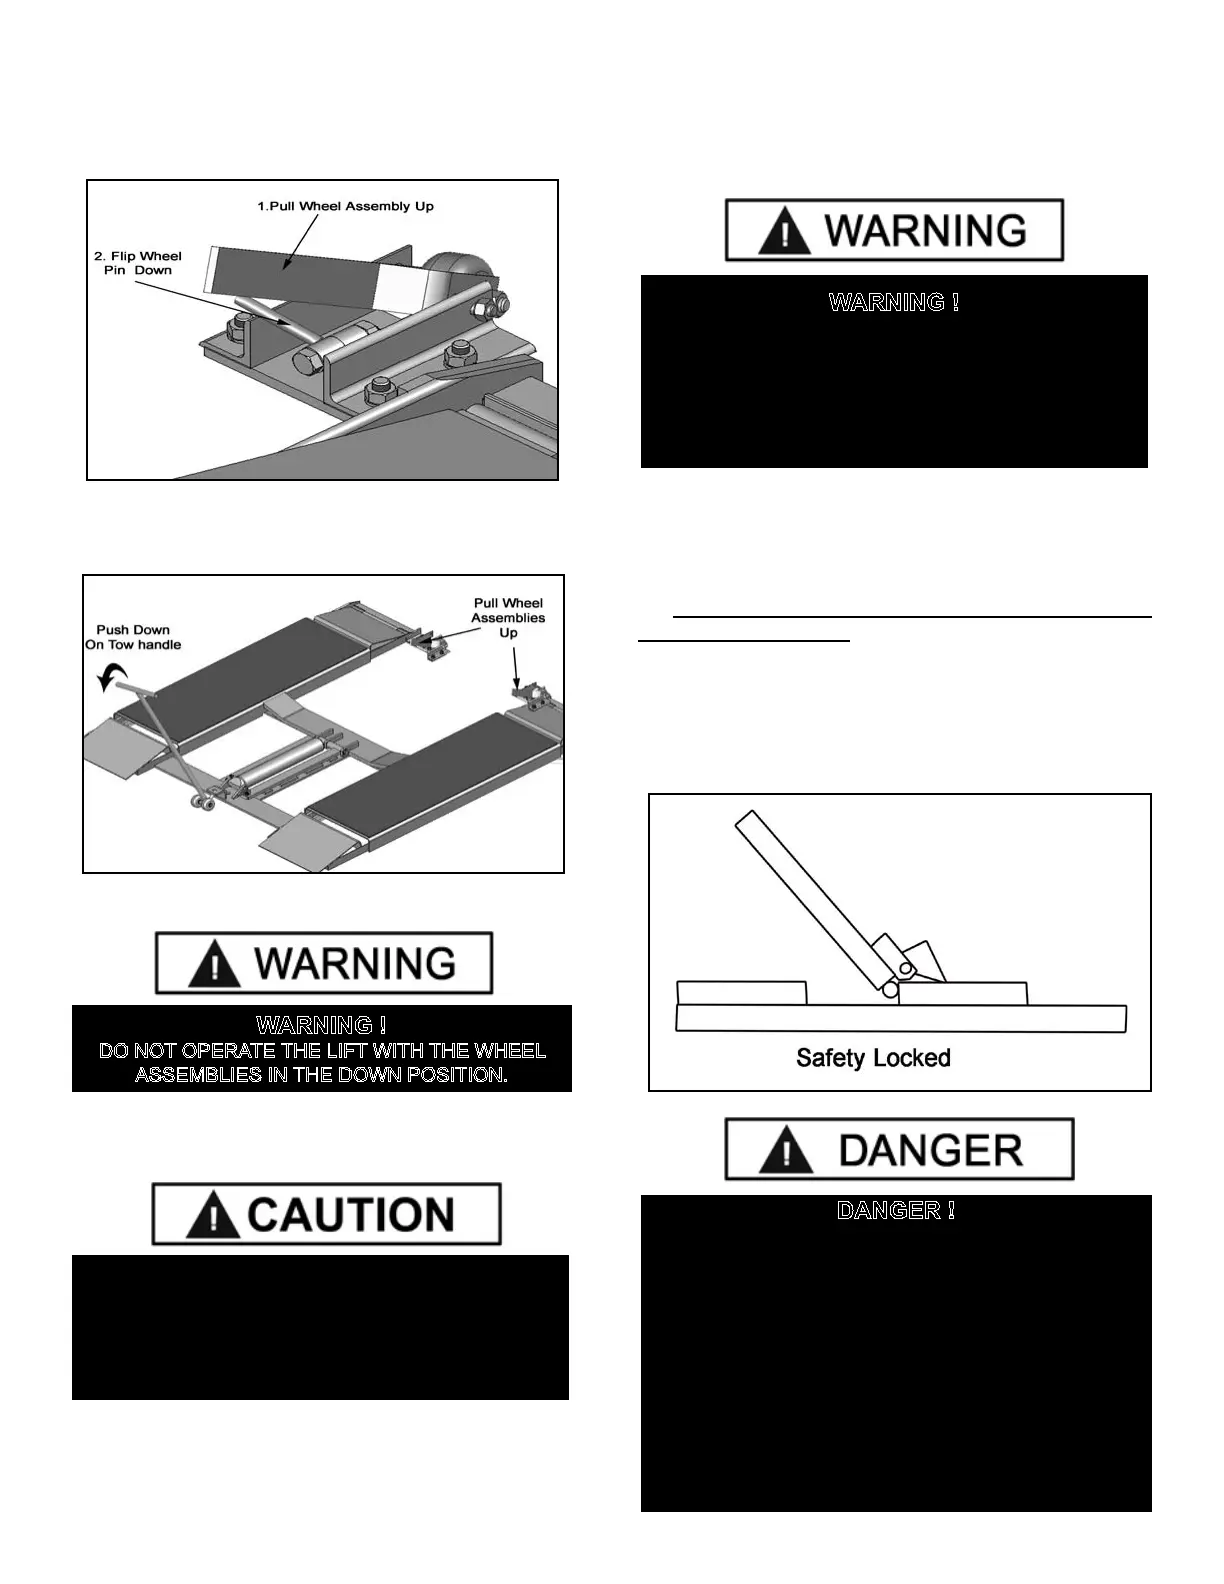
TO MOVE LIFT
1. Pull up on Wheel Assembly handle.
2. Flip Down Wheel Pin. (See Fig. 8.5)
3. Insert the Tow Handle into the Tow Handle Anchor
and push down on the Tow Handle to raise the Lift
Assembly off the ground. (See Fig. 8.6)
4. Remove the Tow Handle and Lower the Rear Wheel
Assemblies.
STEP 9
(Lift Start Up / Final Adjustments)
1. Confirm the Power Unit reservoir is full with 6 quarts/
1.5 gals of 10-WT hydraulic oil or Dexron-III automatic
transmission fluid.
2. Test the Power Unit by pressing the push-button
switch. If the motor sounds like it is operating properly,
raise the lift and check all hose connections for leaks. If
the motor gets hot or sounds peculiar, stop and check all
electrical connections.
3. Check the MAIN SAFETY LOCK to make sure it
moves freely. Lubricate all SAFETY PIVOT points with
WD-40 or equal.
4. RAISE LIFT UNTIL THE CYLINDER BOTTOMS OUT
AND THE LIFT STOPS.
5. Lower the lift until the Safety rests In the Locked
Position.
6. Verify that the Safety rests in the locked position at
each safety stop. (See Fig. 9.1)
Fig. 8.6
Fig. 8.5
CAUTION!
During the START-UP procedure, observe all operat-
ing components and check for proper installation and
adjustment. DO NOT attempt to raise vehicle until a
thorough operational check has been completed.
WARNING !
KEEP HANDS AND FEET CLEAR. Remove hands and
feet from any moving parts. Keep feet clear of lift when low-
ering. Avoid pinch points.
ALWAYS WEAR SAFETY GOGGLES
DANGER !
VISUALLY CONFIRM THAT ALL PRIMARY
SAFETY LOCKS ARE ENGAGED BEFORE
ENTERING WORK AREA.
Suspension components us on this lift are intended to
raise and lower lift only and are not meant to be load
holding devices. Remain clear of elevated lift unless
visual confirmation is made that all primary safety locks
are fully engaged and the lift is LOWERED onto the
safety locks, Refer to installation /operation manual for
proper safety lock procedures
and /or further instruction.
Fig. 9.1
WARNING !
DO NOT OPERATE THE LIFT WITH THE WHEEL
ASSEMBLIES IN THE DOWN POSITION.