45
• Change lens memory name: Your lens memory has a default name in the format of
"Memory_NN" where NN is any number from 00 to 99. You may press Backspace key to erase
characters shown in dialog box, press Caps key to toggle switch between upper and lower case,
▲▼◄►
key to select letters, and Enter key to accept changes made. Each memory name can
contain up to 9 characters including letters, numbers, symbols and blank spaces.
• Cancel: Press to cancel changes made to lens settings.
• Accept: Press to accept changes made to lens settings.
• Clear Memory: Press to clear settings saved in current memory position. The memory button
prompts you to confirm the deletion. Press Enter to delete the settings or
▲▼◄►
key to
move the cursor away from the position and cancel the deletion.
Caution:
Please execute the Center Lens function every time a lens is installed to ensure that the projector memorizes the
exact lens settings.
• Center Lens
Thisfunctioncalibratesthelens,forthelensmemoryandpositionsittothepredenedcenter.
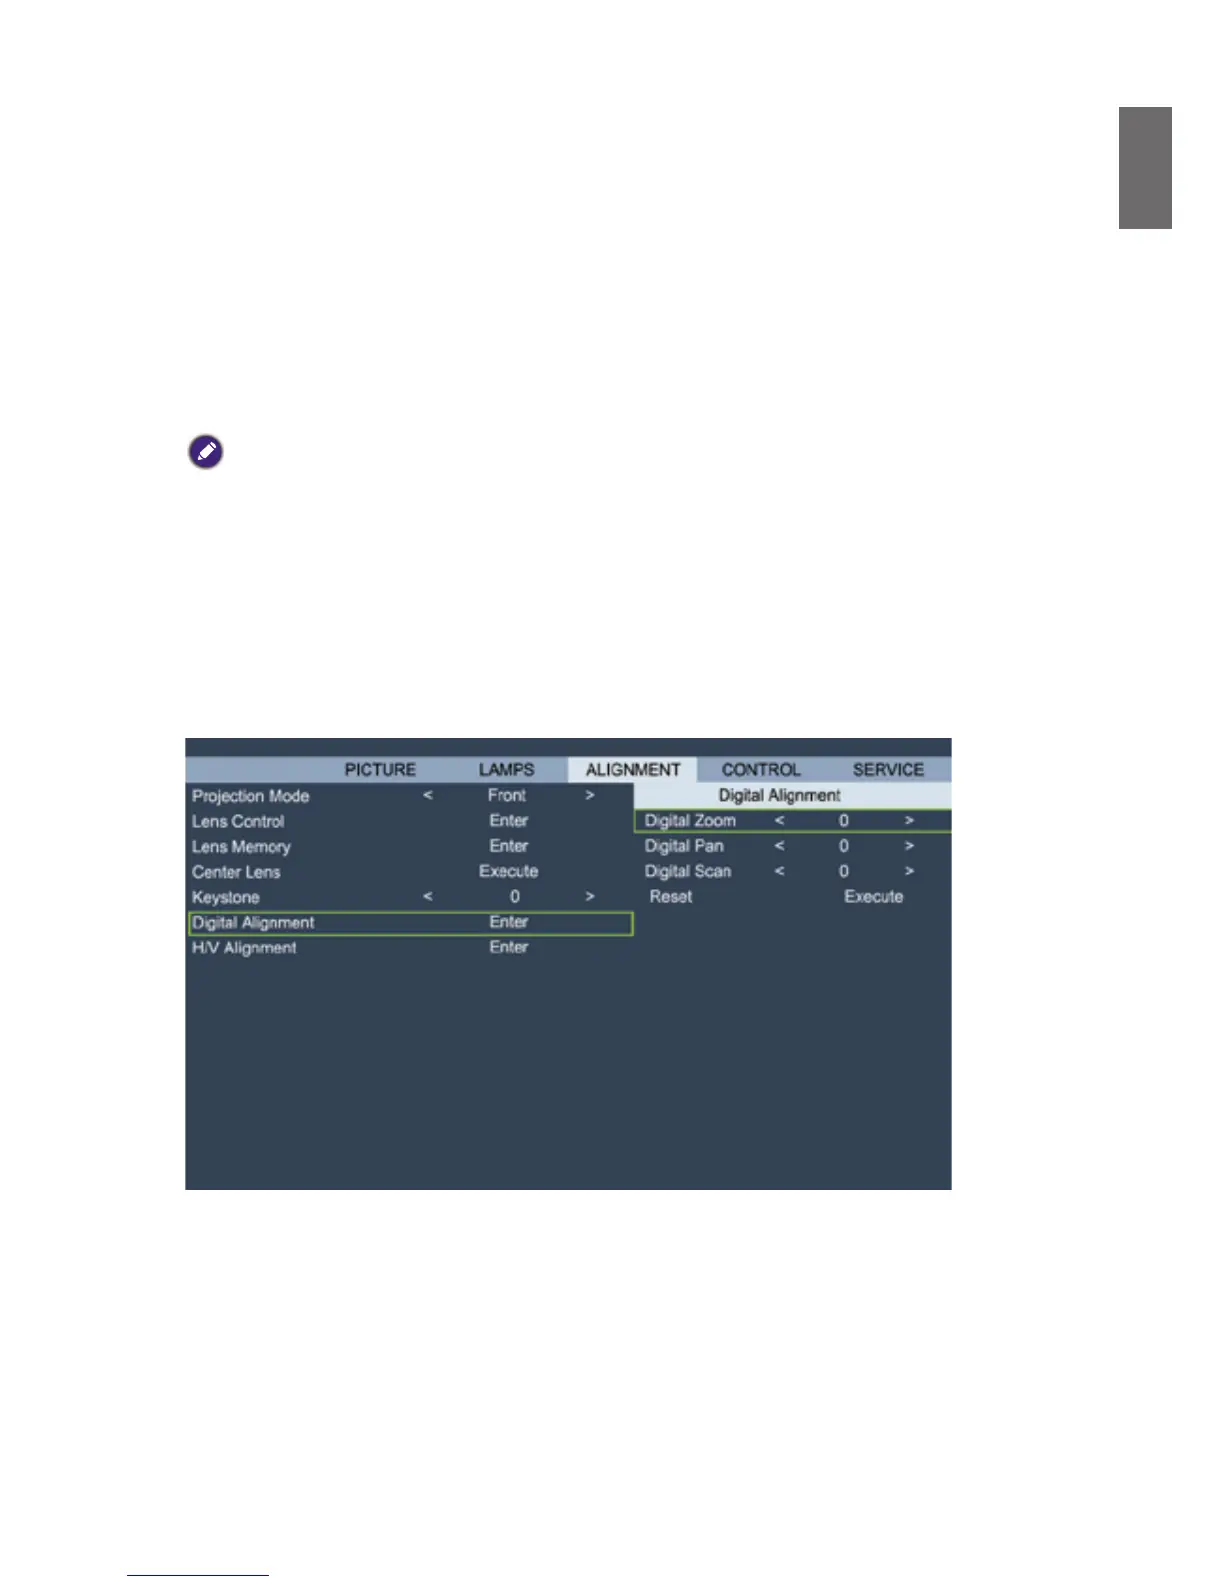
• Keystone
Select this function and press
◄►
arrow key to correct vertical deformation caused by
projection angle.
• Digital Alignment
DISPLAY
Select this function to zoom the projection image.
Digital Zoom: Press
◄►
arrow key to zoom in the projection image.
Digital Pan: Press
◄►
arrow key to pan out on projection image. This is valid only when the
projected image is enlarged.
Digital Scan: Press
◄►
arrow key to tilt projection image. This is valid only when the
projected image is enlarged.
Reset: Press to reset Digital Alignment settings to factory default values.
• H/V Alignment
H Zoom: Use
◄►
to narrow the horizontal size of the projected image.