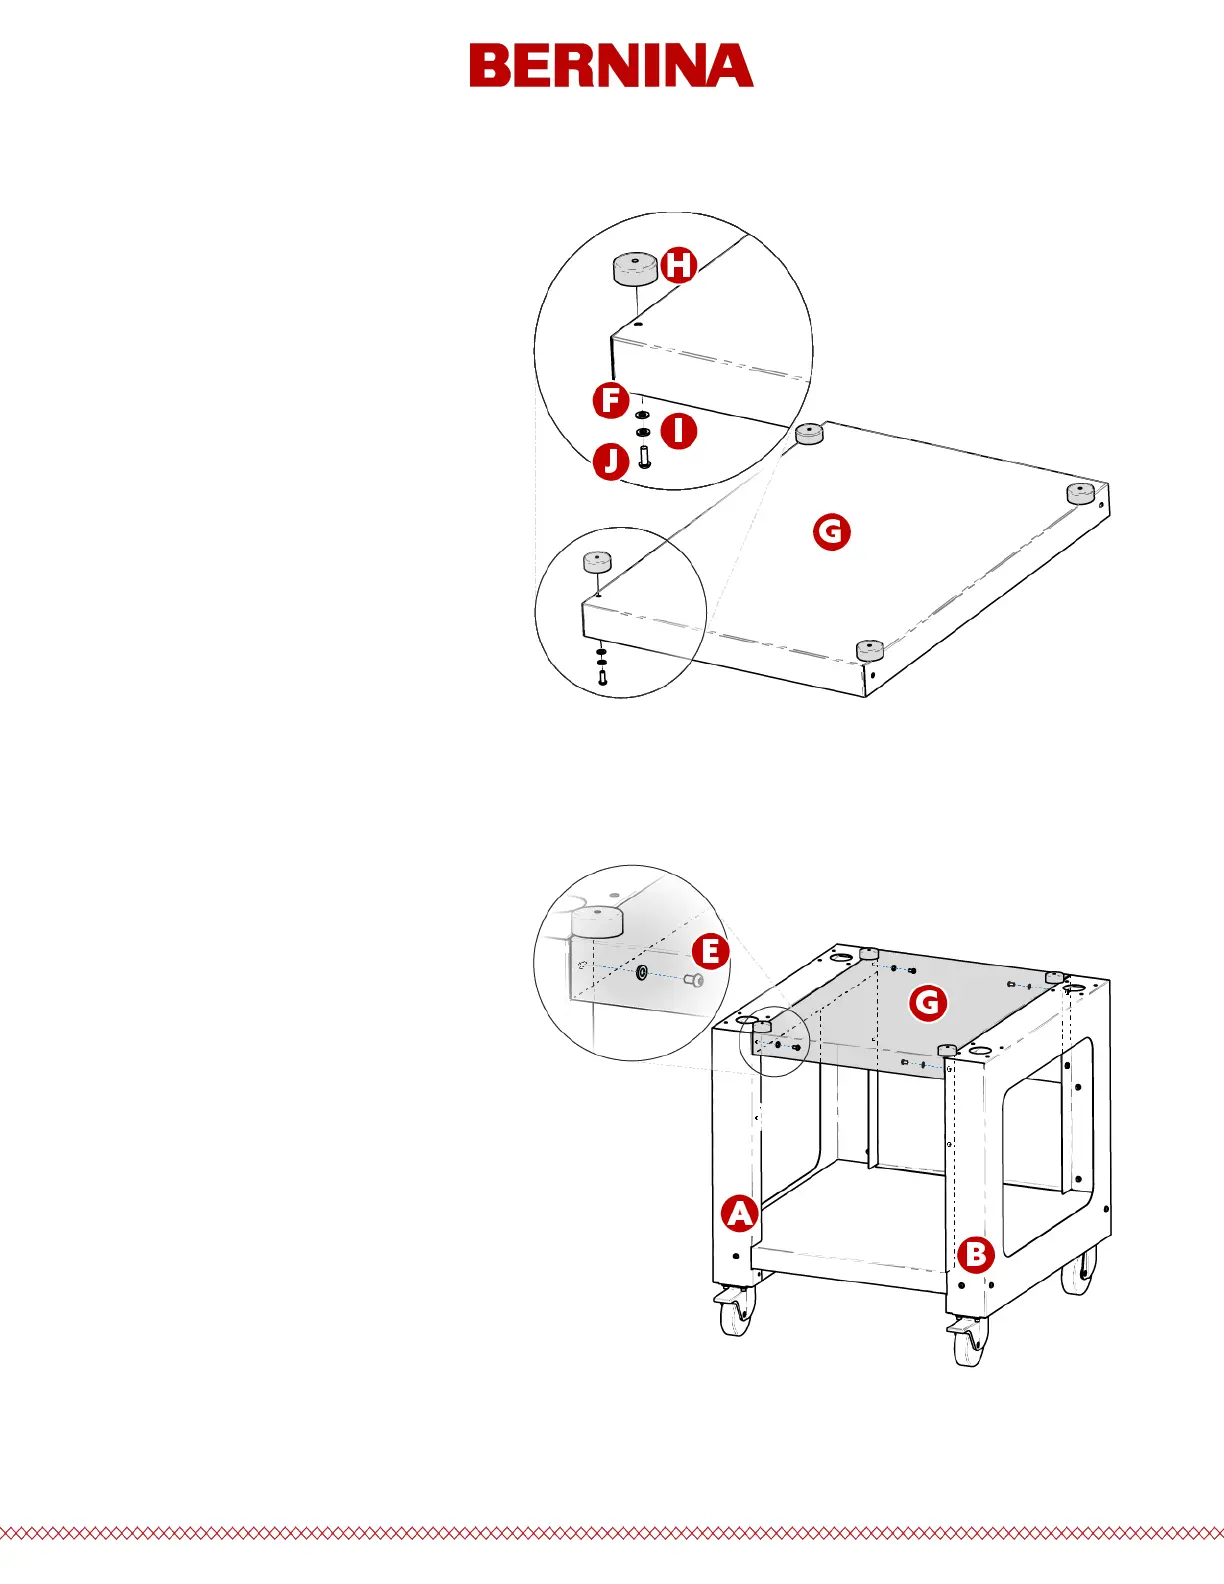
Stage 3 - Installing the Machine Locators
1. Install items J, I, and F (M6 x 16mm
Screw, M6 Lock Washer, and M6
Washer) from the bottom side of
item G (Cart Shelf) as shown.
2. Install item H (Machine Locator) onto
item J (Screw) from the top side of
item G (Cart Shelf) as shown.
3. Fully tighten items H (Machine
Locator) and J (Screw).
4. Repeat steps 1-3 for the (3)
remaining sets of items J, I, F, and H
at the (3) remaining corners of item G
(Cart Shelf).
Stage 4 - Installing the Cart Shelf
1. Position item G (Cart Shelf) between
the two Cart Legs, items A and B,
with the (4) Machine Locators (item
H) resting on the Cart Legs, items A
and B.
IMPORTANT: The side of item G
(Cart Shelf) labeled with the “F”
sticker (with the two Machine
Locators (item H) positioned closer to
the edge) faces the front of the Cart.
2. Install (2 each) items E and F (M6 x
12mm Screw and M6 Washer) at locations shown towards the front of the Cart.