BestCode Next Series 8 Technical Manual October 2022 Page 265 of 290
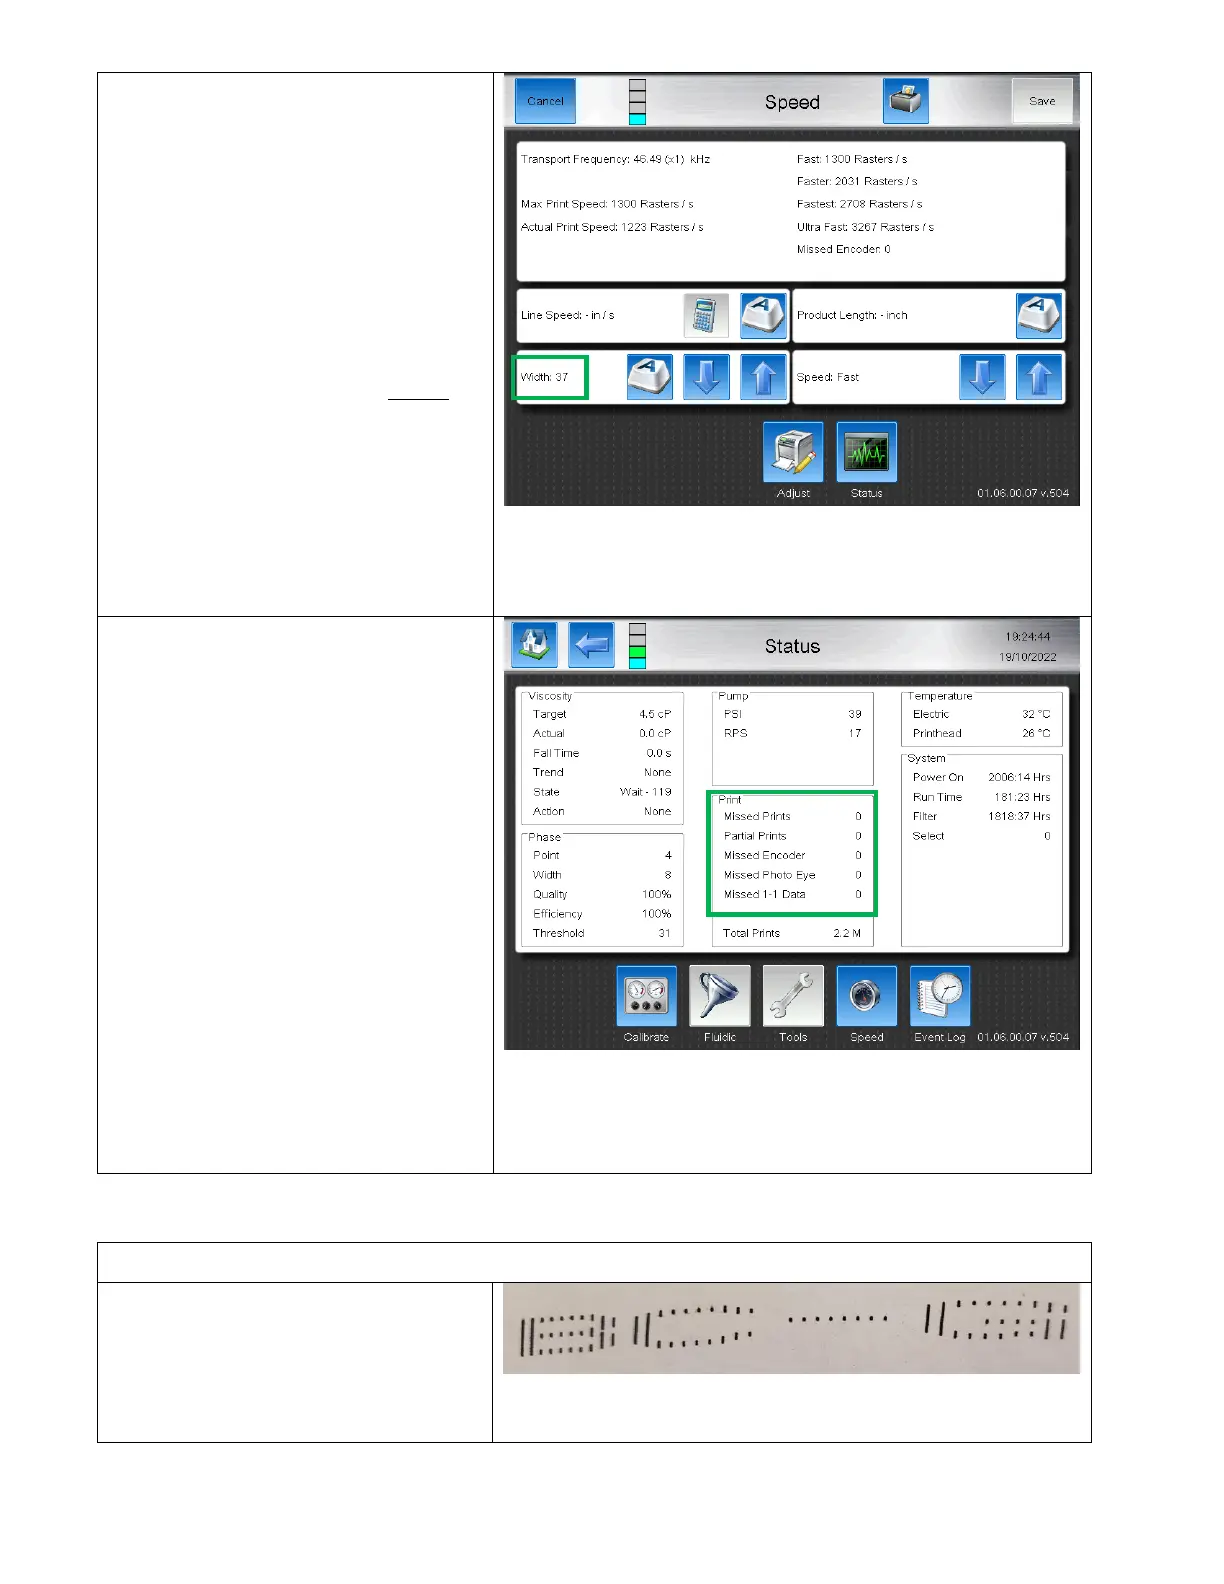
4. Now that the Maximum Transport
Frequency is set, the Width needs to be
increased until the “Actual Print Speed”
Raster/s value is less than the “Max
Print Speed” Raster /s value.
5. The width value can be roughly
determined by dividing the "Actual Print
Speed" value by the “Max Print Speed”
value.
In the given example, 46530/1300 = ~37
If the Transport Frequency is too low,
increase the Encoder multiplier on the
Peripherals > Encoder screen.
6. The “Warning: Actual exceeds max,
print will stretch” pop-up is now
removed from the screen and the
system is ready to make the first test
print.
7. Configure the printer photocell or setup
for AutoPrint and start the jet. Do not
yet install the head onto the Production
Line.
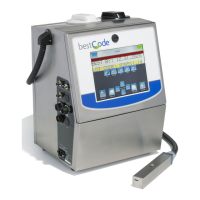
8. Review the Status Screen check for
“Missed Encoders” and “Missed Photo
Eye”.
9. If both values are 0, install the head and
proceed to print testing.
If values are not 0, AND they are
incrementing, proceed to Missed
Encoder Troubleshooting or Missed
Photo Eye troubleshooting
If values are not 0, and they are NOT
incrementing, reselect the Message to
clear Missed Encoders and Missed Photo
Eye and monitor for a few minutes.
Setting up the Print Length
After setting the printer up for the “Minimum Width value” run a sample print.
Scenario 1: Print too Long
If the print is too long, increase the Speed
from Fast to Faster and recalculate the width.
Then print again. Increase the Speed until
print width is achieved.