33
Setting Up and Assembling the Beer Pump
CAUTION!
Before attaching or removing any accessories, always fl ip the On/Off switch to the
0 position and pull the mains plug out of the plug socket.
1. Place the beer pump on a dry, fl at, stable and moisture-resistant surface. Make sure
that it has clearance of at least 10 cm on all sides so that the circulation of air and
performance are not impaired. To be able to open the lid, clearance of at least 30 cm
is required above the device.
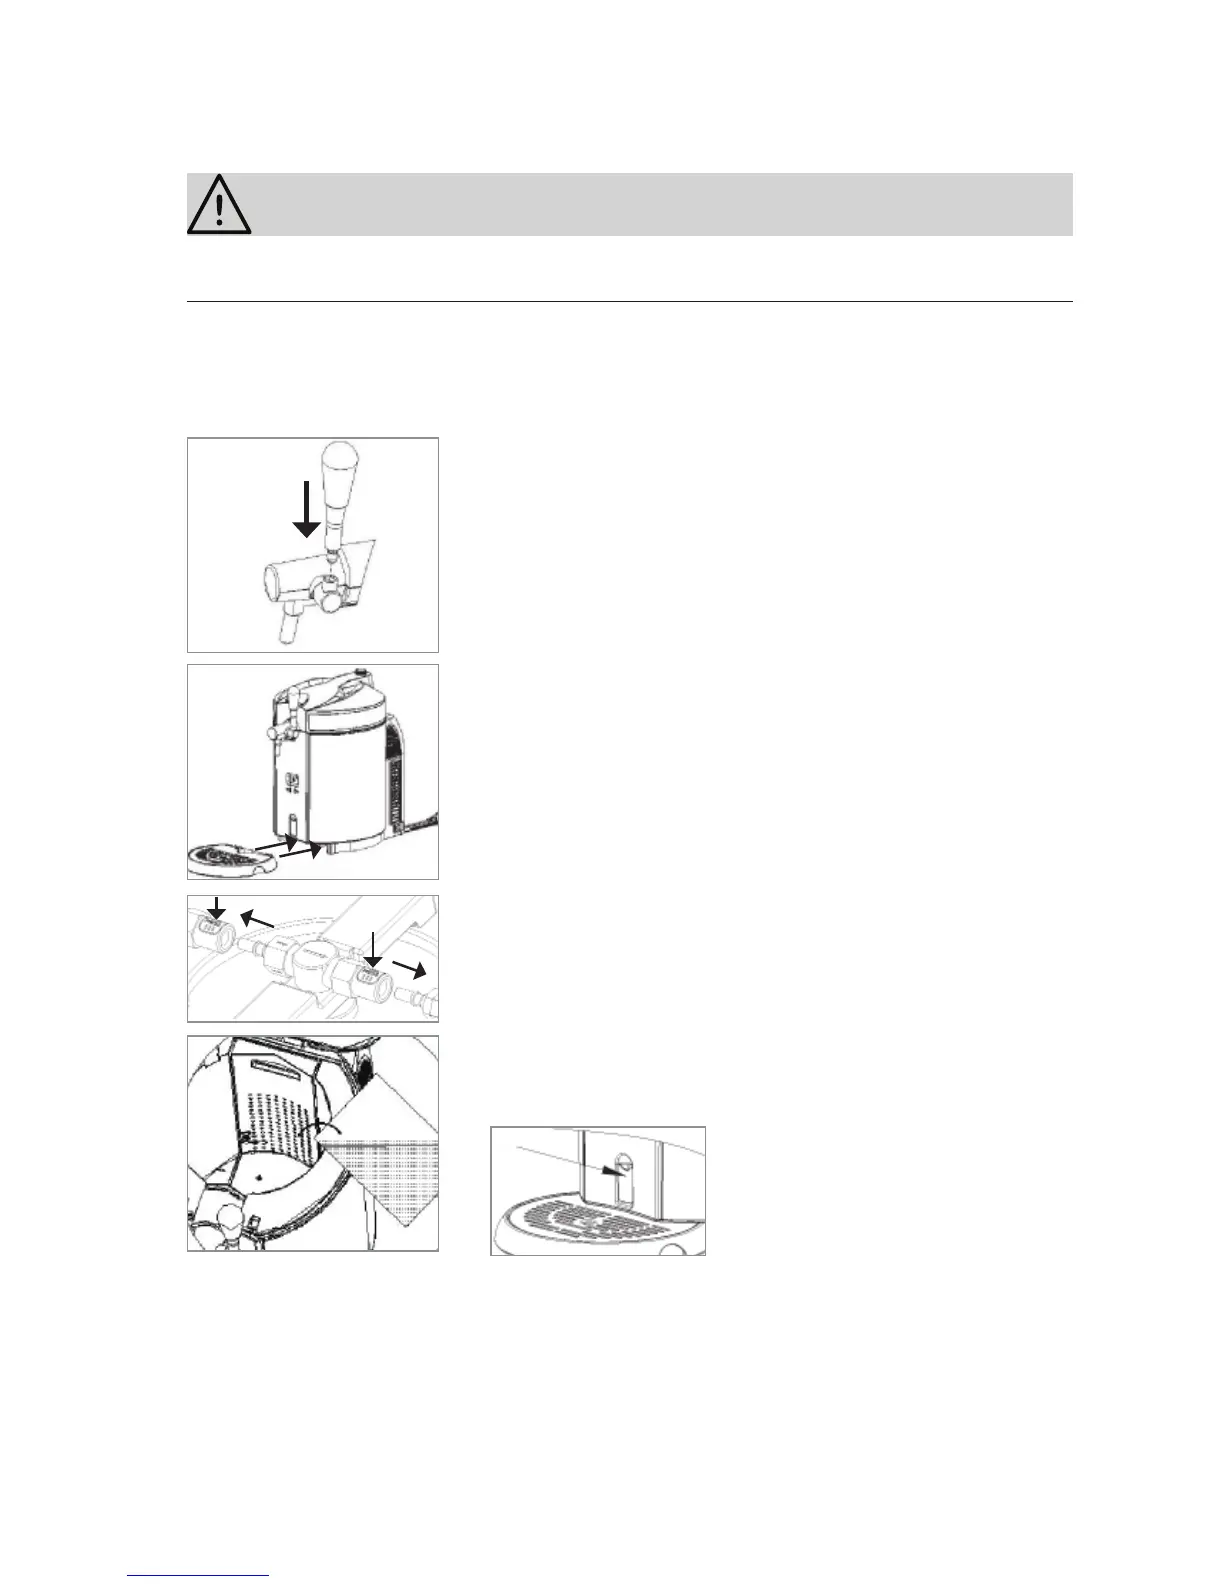
2. Screw the tap handle into the fi tting on the tap.
3. Before initial use, remove the protective fi lm from the
drainage grille. Insert the drainage grille into the drip tray.
4. Slide the drip tray at the front into the base of the beer
pump until it is heard to engage. Make sure that the drip
tray does not protrude over the edge of the surface on
which the beer pump is located. Otherwise, the drip
tray could fall down when a glass is placed on it.
5. Press the release button on the lid of the beer pump. This
will then open.
6. Remove the tapping sword from the cooling container:
Release the line to the CO
2
cartridge and the line to the
tap from the valve unit. To do this, press the white buttons
on the connection pieces and detach them from the valve
unit.
7. Pour around 800 ml of water into the cooling container.
CAUTION: Do not exceed the MAX marking in the con-
tainer!
If you have poured in too much
water, fl ip open the water outlet
and allow excess water to run into
the drip tray.
800 ml