7. Installation and Setup
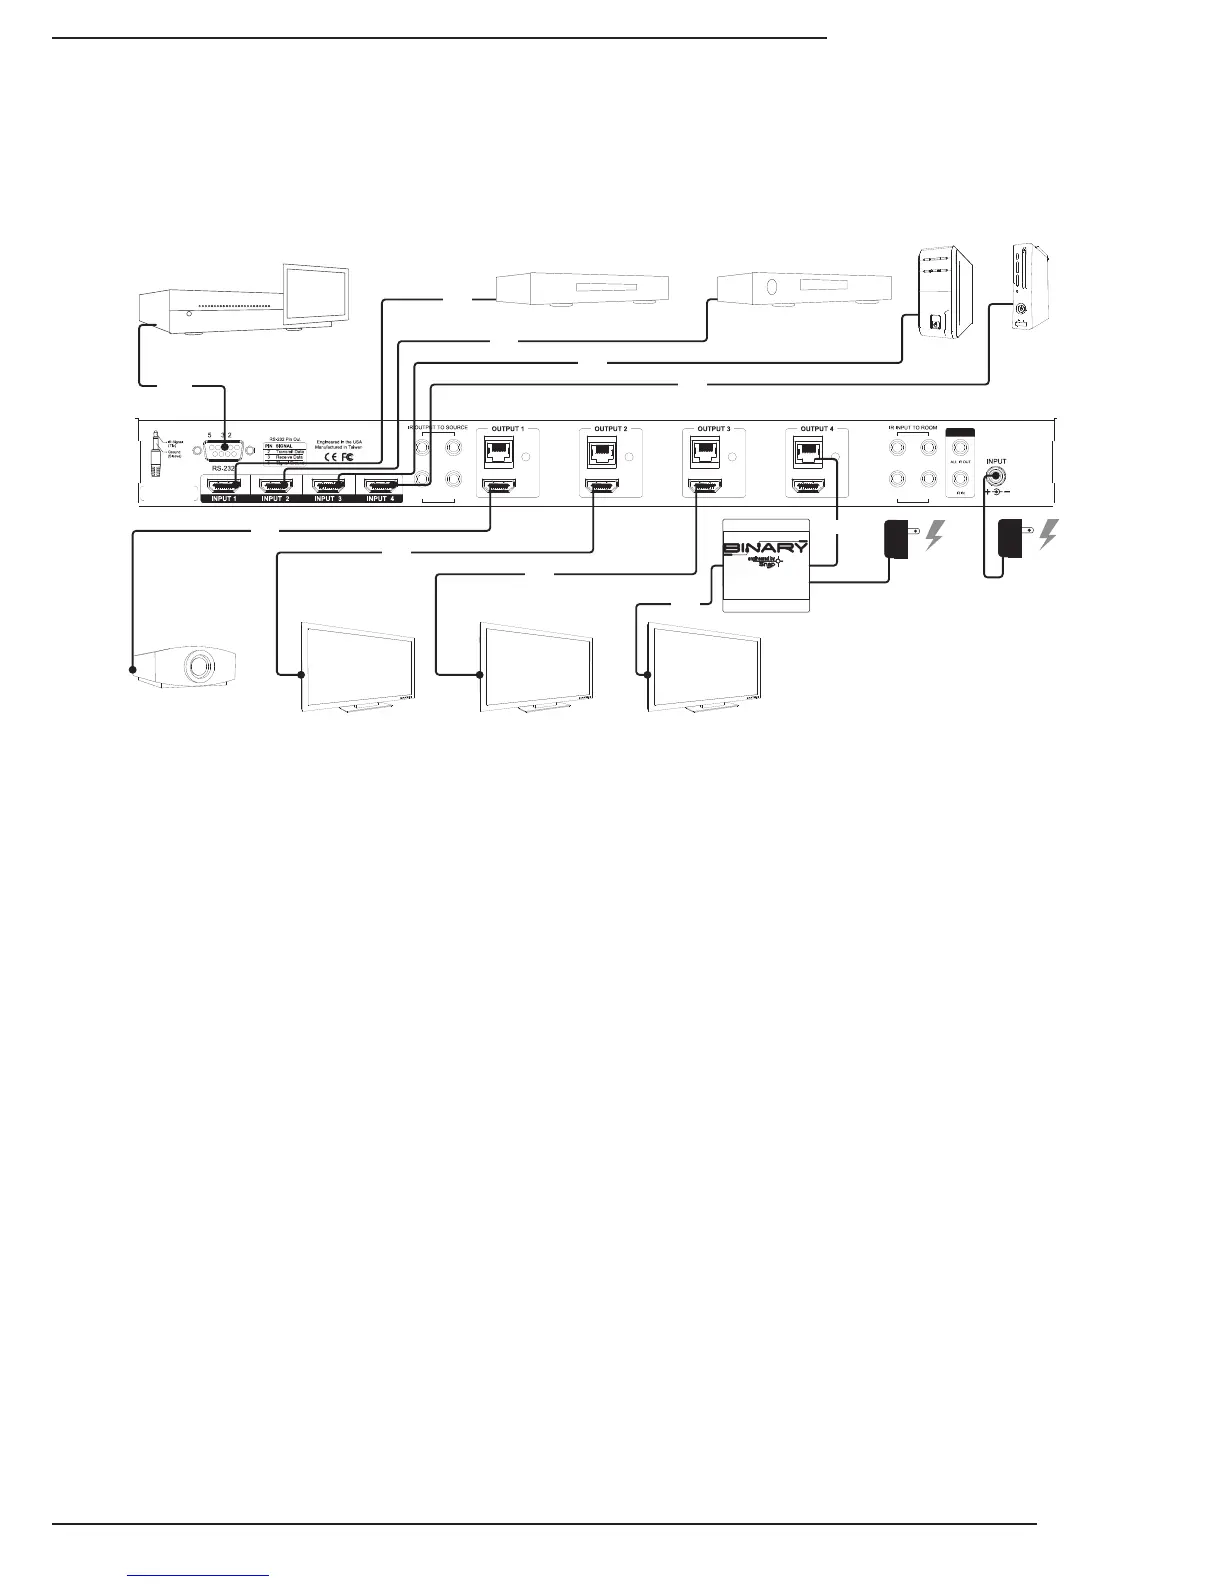
7.1. Basic Installation Diagram
7.2. Basic Instructions
1. Unpackthematrixandinstallitnearthesourceequipment.(7.4.SwitcherLocationandPlacement,page8)
Note: Do not power the matrix switcher until it is indicated to do so.
2. InstallandconnecteachsourcetoaninputonthematrixswitcherusingtheshortestHDMIcablepossible.
(7.5.HDMIInputConnections,page9)
3. InstallthedisplaysandoutputwiringtothematrixlocationusingHDMIcablesforstandardHDMIoutputorCat5e/6
ifB-500-RX-230-IRReceiverswillbeused.(7.6.OutputConnections,page9)
4. RecordtheinputsandoutputsusedintheSystemLayoutChartforfuturereference.
(14.SystemLayoutChart,page26)
5. Ifusingacontrolsystem,connectittotheappropriateportonthematrixswitcherforthedrivertypebeingused:
IRorRS232control.(7.7.MatrixControlConnections,page11)
6. Installandcongurethedriverformatrixswitchingcontrolintothecontrolsystemprocessor.
(7.7.MatrixControlConnections,page11)
7. InstalltheIRequipmentandsetupIRpass-throughifusingit.
(7.8.IRPass-ThroughInstallationandSetup,page12)
8. Attachthepowersuppliestothematrix,sources,anddisplays,thenpowerupthesystem.
9. Testallinputandoutputselectionsforsync,reliableswitching,correctaudioformatandvideoresolution.Usethe
factoryremoteortheMatrixCongurationUtilitytosetupEDIDsasneeded.(8.EDIDConguration,page16)
10. ChangeanyadvancedsettingsintheMatrixCongurationUtilityasneededtosuittheinstallation.
(9.AdvancedSetupUsingtheCongurationUtility,page20)
Completethebasicinstallationsectiontosetupthematrixswitcherformediadistributionbeforecompletinganyother
setup.Usethisdiagramforreferenceduringbasicinstallationofthematrixswitcher,sources,displaysandwiring.
Thesearethebasicstepsthatmustbetakentoconnectequipmenttotheinputsandoutputsofthematrixswitcherand
congurethesystemforuse.Seethesectionslistedforfullinformationoncompletingeachstep.
LINK LINK LINK LINK
1 3
2 4
1 3
2 4
24V DC 2.7A
Projector
Game
Console
PC