Bio-Well Company
www.bio-well.com
9. If calibration is successful after the first cycle — click «OK» in the pop-up
window — calibration is completed.
If parameters of the Glow are not in the normal region (established on the
Bio-Well server) — then server will send a command to the Bio-Well GDV Camera
device to change the voltage of the impulses accordingly, and restart the calibration
cycle again automatically after 30 seconds interval. During this interval please gently
take out the metal cylinder insert, ventilate the air above the glass electrode, wipe it
again and put the metal cylinder insert back.
NB! If you will not make all the above mentioned procedures within 30 seconds
interval between the cycles — program will show error message and you will have to
start next cycle manually by clicking «Start» button again.
Bio-Well Software will repeat the calibration cycle as many times as needed to
attain the normal parameters settings (Area and Intensity of the Glow).
Usually it takes up to 4 cycles in normal environmental conditions.
10. Once the process is finished — remove the metal cylinder insert and
connection cable from the Bio-Well GDV Camera device.
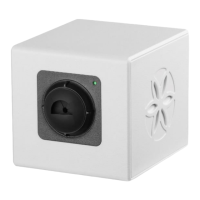
Calibration procedure for BW 2.0 model:
1. Connect the USB cable to the Bio-Well GDV Camera device and computer.
2. Remove the finger insert by holding the unit firmly while gently pressing
downward and pulling outward (insert the thumb inside the insert and hold the insert
between the thumb and index finger, then pull out the finger insert).
3. Clean the glass electrode with a cloth (you may use alcohol for cleansing the
glass).
NB! In dry conditions it is mandatory to clean the glass electrode with wet tissue to
get rid of the static charge, while in wet conditions it is mandatory to finish cleaning by
wiping with dry paper napkin to get rid of the excessive moisture.
4. Insert the calibration metal cylinder insert. Don’t worry, new model of
calibration tool can not damage the glass electrode.
 Loading...