User’s Guide
Next, let’s go into more detail for part 3. Here, it is sensing objects straight in
front so only the center sensor value needs to be checked.
We have now completed with the overall structure of the program. But we still
have to finish part 2 and part 4.
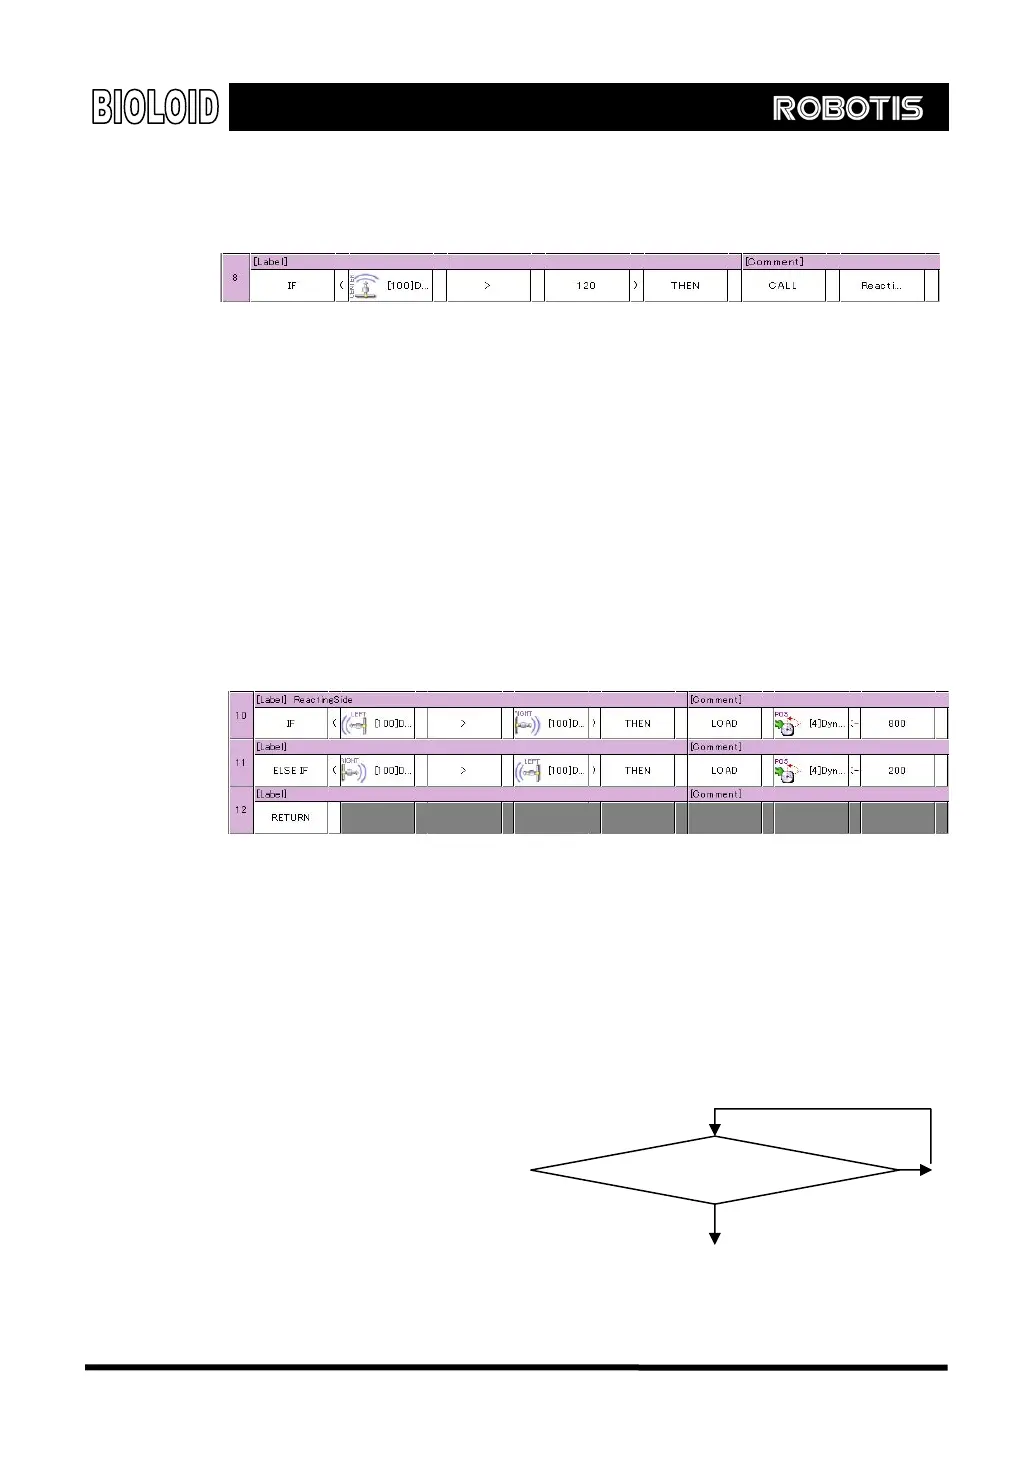
Take a look at part 2. There are several ways to make joint 4 rotate towards the
direction of the object. Here, we will be using the following algorithm.
“If “Left distance sensor value > Right distance sensor value” then move to
position 800. (rotate left until 800)
If “Right distance sensor value > Left distance sensor value” then move to
position 200. (rotate right until 200)
The rotation limit was set to 800 and 200 to prevent the motor from rotating too
much and damaging the wires. If we create the code for this, it will look like the
following.
Finally, we have to finish part 4. The difficult part here is that the arm bending has
to be started after the arm finishes straightening out. The program speed is much
faster than the speed of the actual robot moving, so even before the arm is
finished straightening out the program will set the Dynamixel position value to
where the arm will bend. To prevent this from happening, there is an item in the
Dynamixel called “Existence of movement.” When the Dynamixel is moving, the
“Existence of movement” is
need a routine that will make
the program standby until the
value is 0.
After setti
set to 1, and 0 when not moving. Therefore, we
ng the destination
position, implement the code
for the flowchart shown on
the right. The behavior control
program code will look like the following.
Yes
“Existence of movement” = 1?
No
61