Rev AN-8
10. Change Bypass settings:
a. Select SET PARAMETERS using the keys and Press the key.
b. Select
BYPASS using the keys and Press the key.
c. For USER ID select ON or OFF using the keys.
d. Press the key to save changes to the Bypass setting.
11. Prior to commencing patient testing, remove the Supervisor Code Chip module
from the meter, return it to the storage box and place in a safe place for future
use.
The meter is now ready to run QC Tests in preparation for Patient Testing.
QC Testing should be performed in the following manner:
1. Run
QC Device (see page O-3).
2. Run QC Sample for each lot of devices (see page O-5).
3. If appropriate, Run Calibration Verification Set as a patient sample for each test
panel type to be used. (Refer to the applicable Procedure Manual and Calibration
Verification Set Package Insert for detailed instructions).
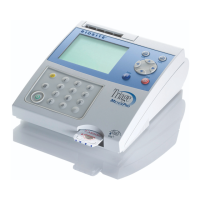
Location
The Triage MeterPro should be placed on a dry, clean, flat, horizontal surface away
from direct sunlight.
Power
The Triage MeterPro requires 6-volts DC supplied by either AC or DC. The meter will run
approximately 100 tests on batteries. It is recommended to use batteries as a backup
in the event of a power outage.
CAUTION: Use only the power supply provided with the meter, failure to do
so may cause permanent damage to the meter.
For more details about
Bypass Settings see
page N-28
N
ote: If the
b
ypass is
O
N
,
the user ID feature is
disabled and anyone
may run a test.
If the bypass is
OFF
,
the user ID feature is
active and only
authorized users may
run a test.
To Install User ID
numbers, see
page N-21.
Note: The Triage
MeterPro will
automatically
tur
n off if left unused
for 2 hours, unless
programmed
otherwise by the
supervisor. Optional
settings allow
automated tur
nof
f
after
1
/2 hour, 1 hour,
2 hours, 4 hours or
NONE.