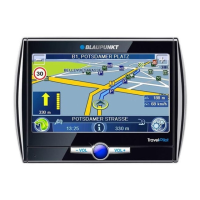
Internet function
59
Touch the respective empty text fi eld of the
following entries to perform the correspond-
ing entry with the keyboard:
Account Name: Freely selectable name
for the account.
Email Address: e-mail address of the
account.
User Name: User name of the account.
Password: Password of the account.
POP3/IMAP4: Address of the POP3 or
IMAP4 server.
SMTP: Address of the SMTP server.
Under the Server entry, touch POP3 or
IMAP4 to select the server type for receiving
e-mails.
Touch the following entries to activate (check
mark) or deactivate (no check mark) the cor-
responding option:
SMTP Need Authentication: The SMTP
server requires an authentication before
sending e-mails.
Save Copy on Server: Read e-mails re-
main stored on the server as a copy after
reading them.
Touch the Save button to save the entry and
return to the Accounts menu.
To edit an existing account,
touch the account twice in the list.
To select an account as standard account for
receiving and sending e-mails,
touch the account in the list.
Touch the Select button.
The account is identifi ed as standard account
in the list by the fl ag symbol.
To delete one or all accounts,
touch the account in the list, if necessary.
Touch the Delete or Clear button.
쏅
–
–
–
–
–
–
쏅
쏅
–
–
쏅
쏅
쏅
쏅
쏅
쏅
Touch the OK button to confi rm the deletion
or Cancel.
Touch the button to exit the
menu.
Settings for sending and receiving
Touch the symbol in the Settings
menu.
The General Settings menu is dis-
played.
Touch the following entries to activate (check
mark) or deactivate (no check mark) the cor-
responding option:
Only Receive Header: When reading
e-mails, receive only the subject and not
the entire e-mail to save transfer time.
Ask for Receipt: When sending e-mails,
request a return receipt.
For following entries, touch the arrow sym-
bols in each case to select one of the available
settings:
Receive Account: Selection of the ac-
count whose e-mails you want to read.
Per Receive/Send Limit: Selecting the
fi le size as upper limit for e-mails to be
received or sent. Larger e-mails are not
called up or sent.
Touch the Save button to save the entry and
return to the Settings menu.
Touch the button to exit the
menu.
Performing spam settings
e-mails identifi ed as spam are not stored in the In-
box folder, but automatically stored in the Spam
folder.
Touch the symbol in the Settings
menu.
The Spam menu is displayed with the
list of the spam addresses.
To enter a new spam address,
touch the New button.
쏅
쏅
쏅
쏅
–
–
쏅
–
–
쏅
쏅
쏅
쏅
 Loading...