EN
17
Installation
www.bora.com
1 2
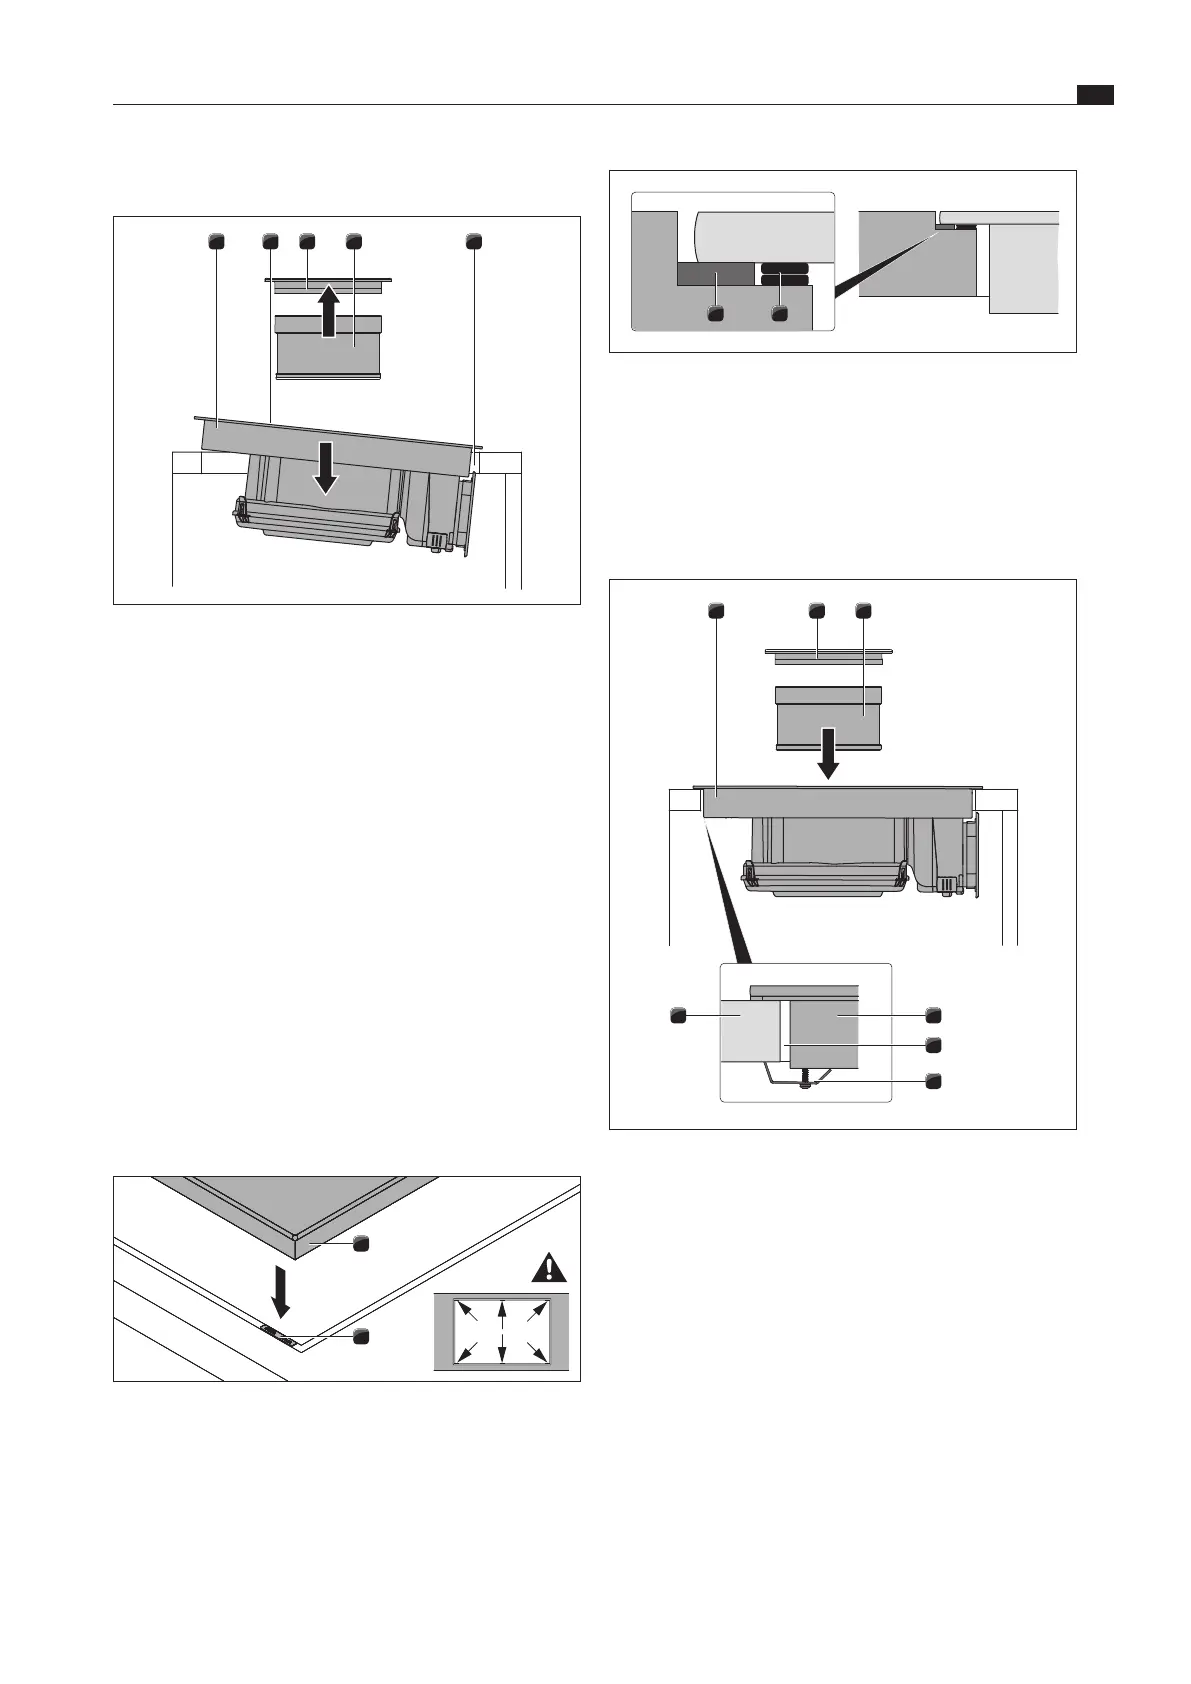
Fig. 5.17 Height adjustment plates
[1] Sealing tape
[2] Optional height adjustment plates
XX
If necessary, lay the height adjustment plates [2] underneath.
XX
Place the height adjustment plates next to the sealing tape [2].
Securing the cooktop
321
5
4
16
Fig. 5.18 Securing the cooktop in the middle
[1] Cooktop
[2] Air inlet nozzle
[3] Stainless steel grease filter
[4] Worktop cut-out
[5] Installation clamp with screw
[6] Worktop
XX
Fasten the cooktop [1] to the worktop [6] using the
5 mounting brackets [5].
XO
2 on each side, 1 in the centre at the front
XO
Tightening torque: max. 2 Nm
XX
Insert the stainless steel grease filter [3] and the air inlet
nozzle [2].
Inserting the cooktop
54321
Fig. 5.15 Inserting the cooktop
[1] Cooktop
[2] Suction opening
[3] Air inlet nozzle
[4] Stainless steel grease filter
[5] Worktop cut-out
XX
Before inserting the cooktop, remove the air inlet nozzle [3]
and the stainless steel grease filter [4].
XX
Use the suction opening [2] as a handle during insertion.
XX
Incline the cooktop [1] as you lift it into the worktop cut-out [5]
XX
Insert the cooktop [1] into the centre of the worktop cut-out [5].
XX
Precisely align the cooktop.
Information regarding flush installation:
XX
Make sure that the sealing tape of the cooktop is well sealed
all the way round.
Information regarding surface mounting:
XX
Make sure that the sealing tape for the cooktop is flat against
the worktop.
Height adjustment plates for flush installation (optional)
2
Fig. 5.16 Height adjustment plates
[1] Cooktop
[2] Height adjustment plate