EN
16
Installation
www.bora.com
2
3
4
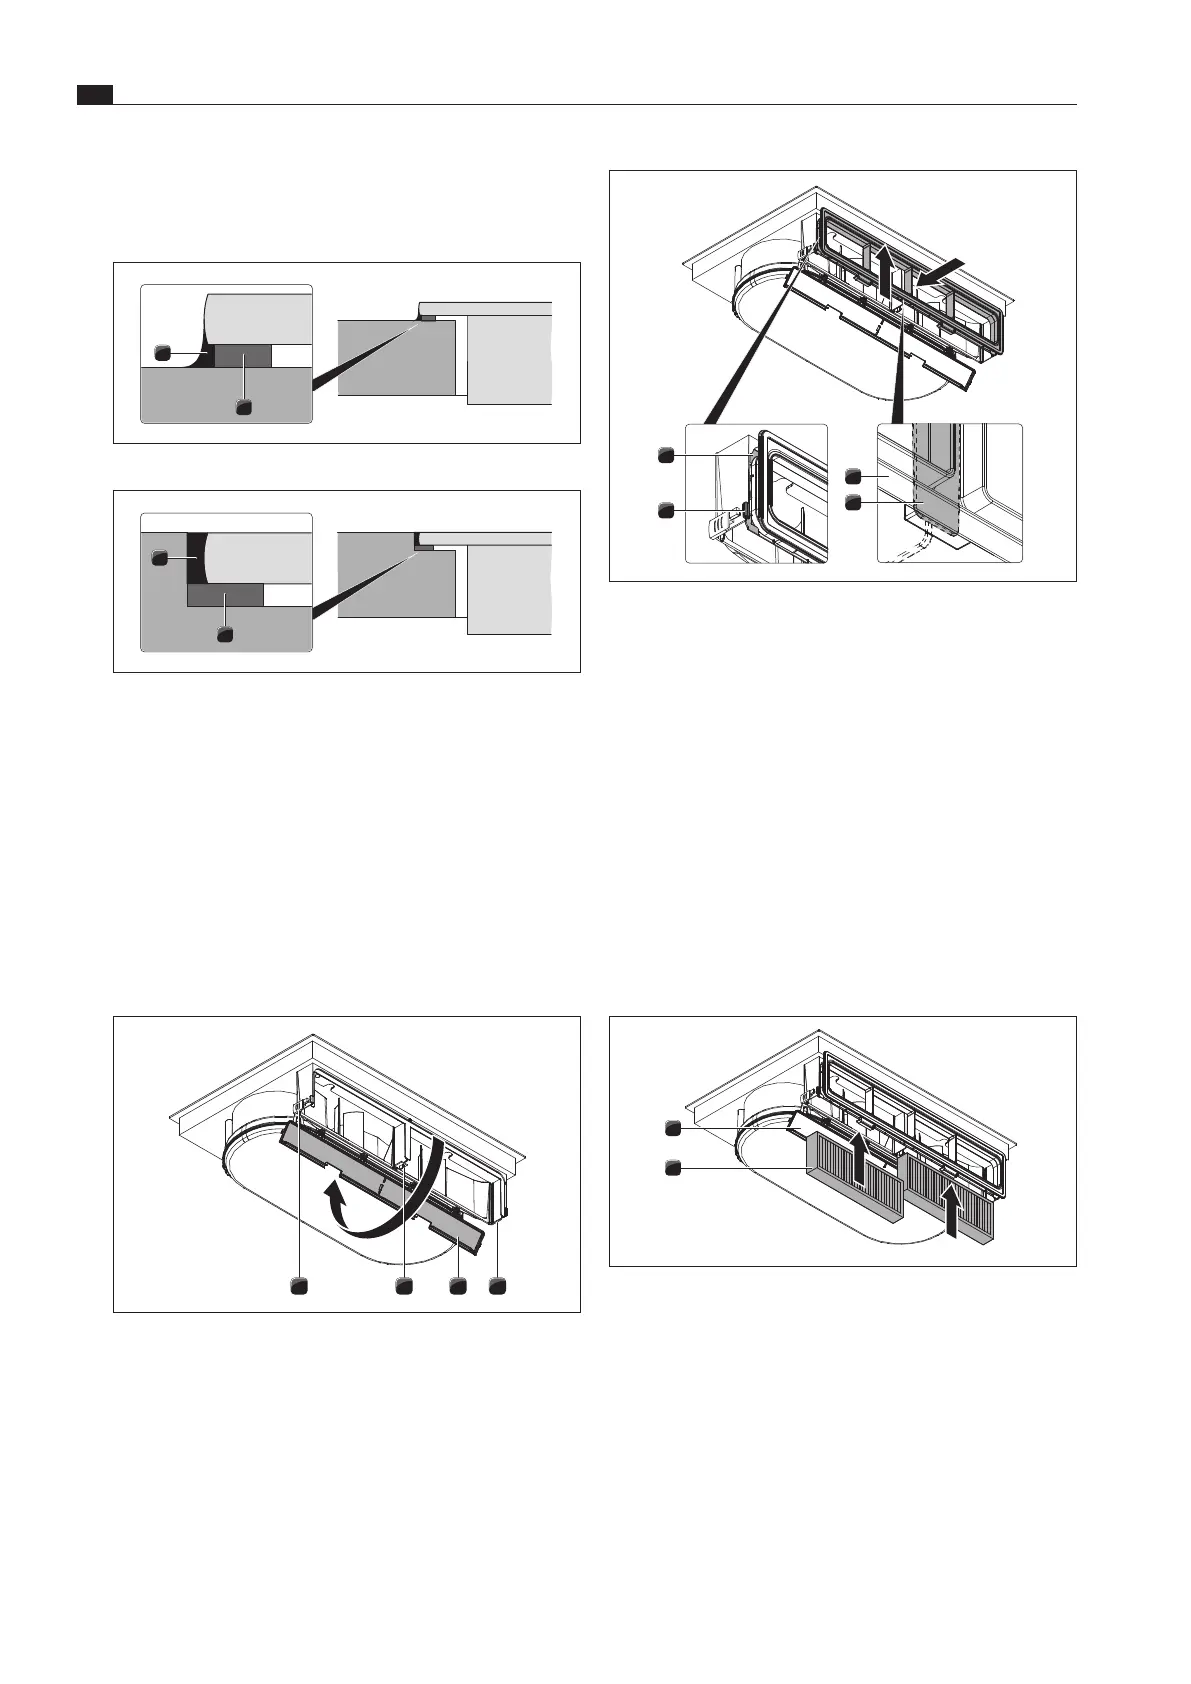
1
Fig. 5.13 Mounting the frame of the exible duct
[1] Position shackles
[2] Retaining groove on the activated charcoal filter housing
[3] Flexible duct frame
[4] Lower lock
XX
Hang the frame of the telescopic pull-out in the retaining
groove [2] on the activated charcoal filter housing.
XX
Ensure that both lateral position shackles [1] are in the guide.
XX
Slide the frame upwards [3] until the lower [4] and upper lock
engage in the middle.
XX
Ensure that the frame is inserted into the activated charcoal
filter housing groove all the way round.
XX
Remove the protective film from the adhesive tape on the
front of the telescopic pull-out.
Inserting the activated charcoal filter
1
2
Fig. 5.14 Inserting the activated charcoal lter
[1] Activated charcoal filter housing cover
[2] Activated charcoal filter
XX
Remove the packaging from the activated charcoal filters.
XX
Insert the two activated charcoal filters [2] from below.
XX
Check the direction of flow of the filters. This is identified by
an arrow.
XX
Close and lock the activated charcoal filter housing cover [1].
5.6 Installing the appliance
Attaching the sealing tape
2
1
Fig. 5.10 Sealing tape for surface mounting
1
2
Fig. 5.11 Sealing tape, ush installation
[1] Black, heat-resistant silicone sealant
[2] Sealing tape
XX
If surface mounting, attach the enclosed sealing tape [2] to
the underside of the cooktop before installing it. Do not leave
any gaps.
XX
In the case of flush installation, attach the enclosed sealing
tape [2] to the horizontal cutting edge in the worktop cut-out,
even if you are sealing the cooktop with a silicone sealing
compound[1] or similar.
Attaching the telescopic pull-out to the appliance
12 31
Fig. 5.12 Opening the housing cover
[1] Outer locks
[2] Central lock
[3] Activated charcoal filter housing cover
XX
Open the cover [3] of the activated charcoal filter housing from
underneath by releasing the two outer locks [1] and the central
lock [2].