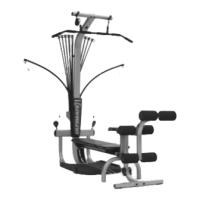
Assembling Your BOWFLEX Ultimate Leg Assembly
18
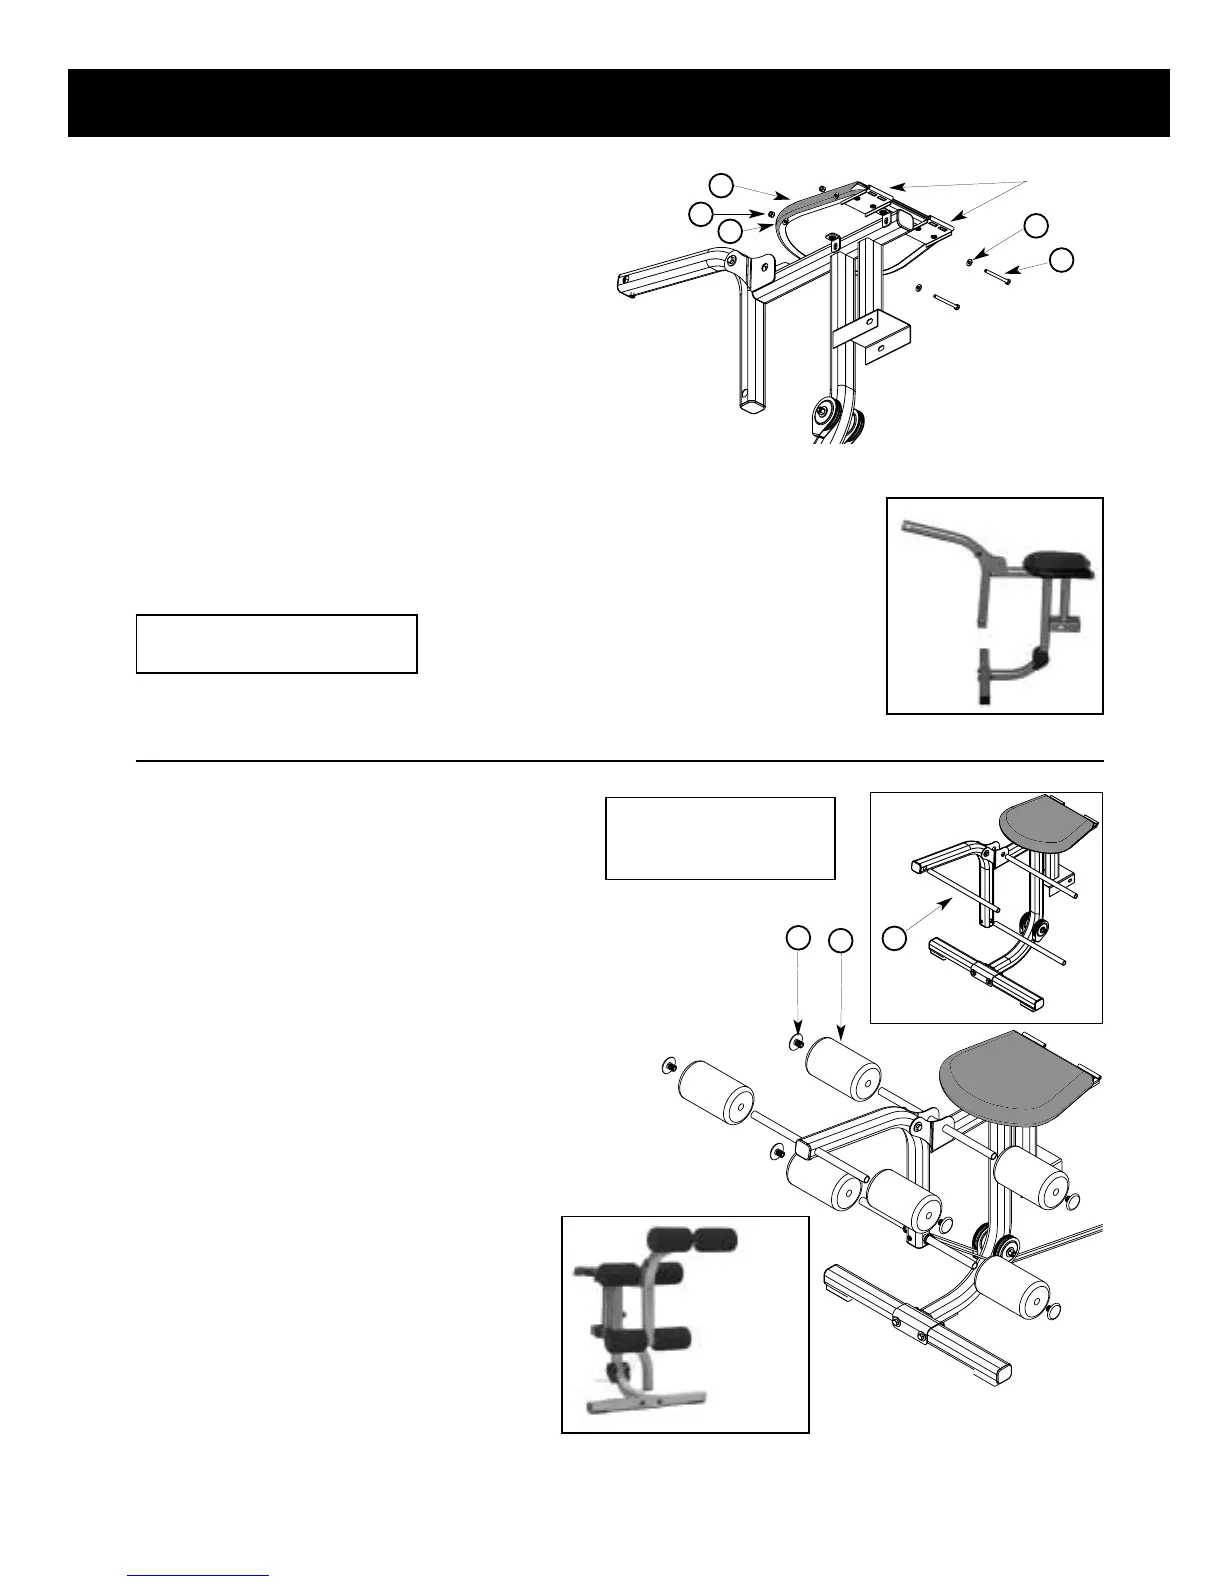
Figure R
Step 3: LEG EXTENSION SEAT INSTALLATION
Locate the following parts:
• Leg extension assembly (from previous step)
• Leg extension seat assembly (Item #61)
• Two (2) 1/4"X2-3/4" bolt (Item #71)
• Two (2) 1/4" nylon lock nuts (Item #72)
• Four (4) 1/4" washers (Item #55)
❏ Place the leg extension seat (Item #61) on top of
the horizontal tube on the leg extension assembly
(Item #62) with the hinge brackets facing the direction
shown in Figure R.
❏ Insert two 1/4"X2-3/4" bolts (Item #71) with 1/4"
washers
(Item #55) through the brackets on the
bottom of the leg extension seat
(Item #61).
❏ Install 1/4" washers (Item #55) onto the bolts and
securely tighten 1/4" nylon lock nuts
(Item #72) on the
bolts.
Hinges
71
72
55
55
61
Unit appears like
this following this
assembly step
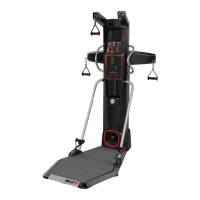
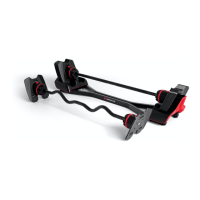
Step 4: INSTALLING THE LEG EXTENSION
CHROME TUBES AND FOAM ROLLERS
Locate the following parts
• Portion of leg extension attachment already
assembled
• Three (3) leg extension chrome tubes
(Item #66)
• Six (6) leg extension rollers (Item #65)
• Six (6) leg extension tube end caps (Item #69)
• Two (2) 73.50” leg extension cables (Item #67)
❏ Back out the screws that are in the end holes of the
leg extension pivot tube
(Item #64) just enough to
slide the chrome tube through the holes.
❏ Slide Chrome tubes into all three holes as shown in
Figure S.
❏ Slide the LARGE LOOP of the leg extension cables
(Item #67) onto the lowest chrome tube, one on each
side of the leg extension pivot tube.
❏ Slide the foam rollers (Item #65) onto the
chrome tubes
(Item #66) as shown in Figure T.
❏ Push the roller end caps (Item #69) into the
ends of the chrome tubes
(Item #66) as shown
in Figure T.
Note: You may need to use a rubber mallet
to get the end caps securely into the
chrome tubes.
Figure T
Figure S
69
65
66
Unit appears like
this following this
assembly step
Components for this step
are in the Leg Extension Box
Components for this
step are in Leg
Extension Box