Assembling Your BOWFLEX Ultimate
8
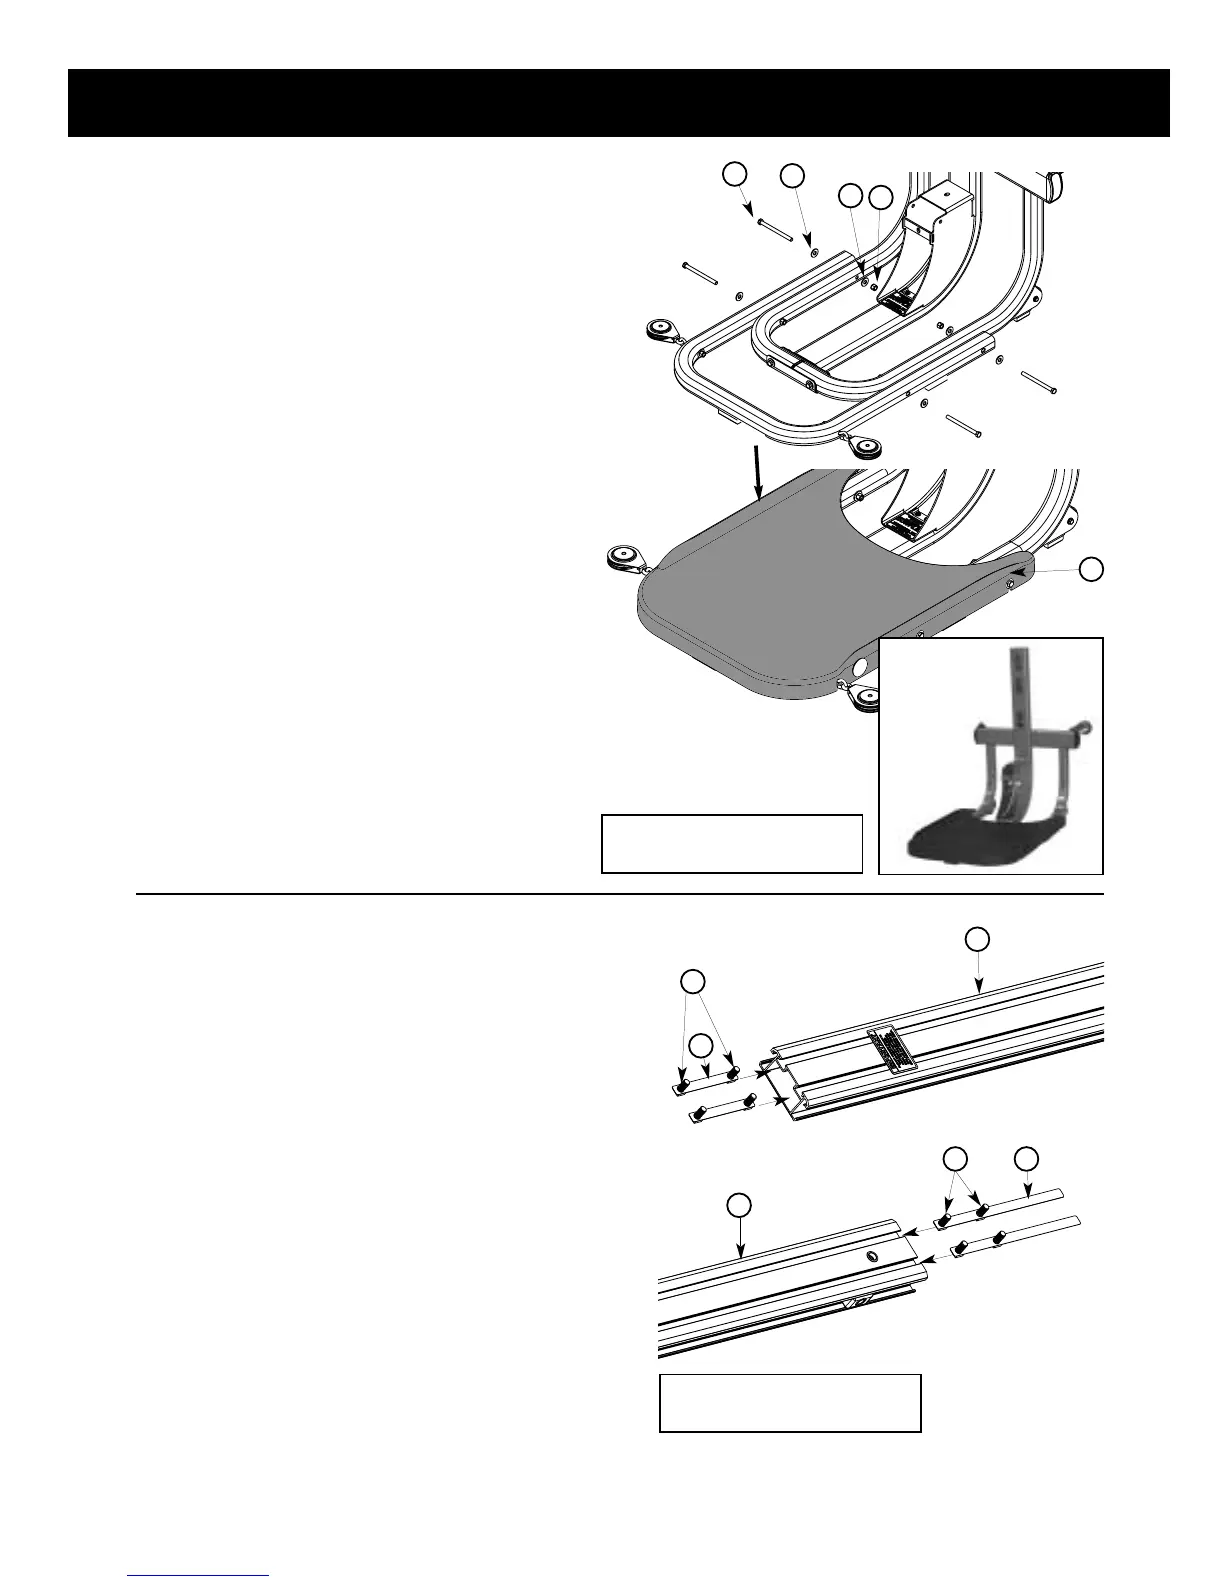
Step 3: SQUAT PLATFORM & FRAME ASSEMBLY
Locate the following parts for this step:
• Large plastic squat platform (Item #5)
• Squat frame (Item #4)
• Four (4) 3/8"X4-3/4" bolts (Item #52)
• Six (6) 3/8" washers (Item #54)
• Two 3/8" lock nuts (Item #57)
❏ Align the holes in the main frame (Items #2&3)
and the squat frame (Item #4) and insert the four
bolts with washers on them into the four holes as
shown in Figure C.
Do not tighten at this time.
❏ Slide the squat platform onto the frame assembly
by aligning the notches on the sides with the bolts
on the frame assembly. Make sure the platform goes
behind the washers.
❏ Place washers and nuts on the inside of the two
forward bolts. Apply downward pressure to the
platform by kneeling on it and tighten all the bolts.
Note: The two rear bolts do not require the use
of a washer or lock nut on the inside of the
assembly.
54 57
54
5
52
Figure C
Figure C2
Unit appears like
this following this
assembly step
Components for this step
are in Box 2 and Box 4
Figure E
Figure E1
Step 4: BOLT KEEPER INSERTION
Locate the following parts for this step:
• Seat rail
(Item #10)
• Eight (8) 3/8" X 3/4" Square Head Bolts (Item #75)
• Two (2) Rear Leg Bolt Keepers (Item #73)
•
Two (2) Leg Press Bolt Keepers (Item #74)
❏ Take two 3/8" x 3/4" bolts (Item #75) and place them
through holes in a Rear Leg Bolt Keeper
(Item #73). Take that
assembly and slide it into a Seat Rail
(Item #10) channel,
starting on the end closest to the warning label, as shown in
Figure E. Line up the end of the bolt keeper with the end of the
rail. Repeat for the other Rear Leg Bolt Keeper.
❏ Go to the other end of the Seat Rail. Take two bolts (Item
#75)
and place them through holes in a Leg Press Bolt Keeper
(Item #74). With the bolt-end of the bolt keeper pointed
toward the seat rail, slide that assembly into a channel as
shown in Figure E1. You may need to remove the twist tie
holding the rail spacer blocks in place to slide the bolt keepers
into the rail.
Note: Please use caution when inserting bolt keepers. Edges
may be sharp.
74
75
10
Components for this step
are in Box 3 and Box 4
10
7375