14 Service Manual Edition 12/07
Replacing assembly units
Brady IP Series Printer
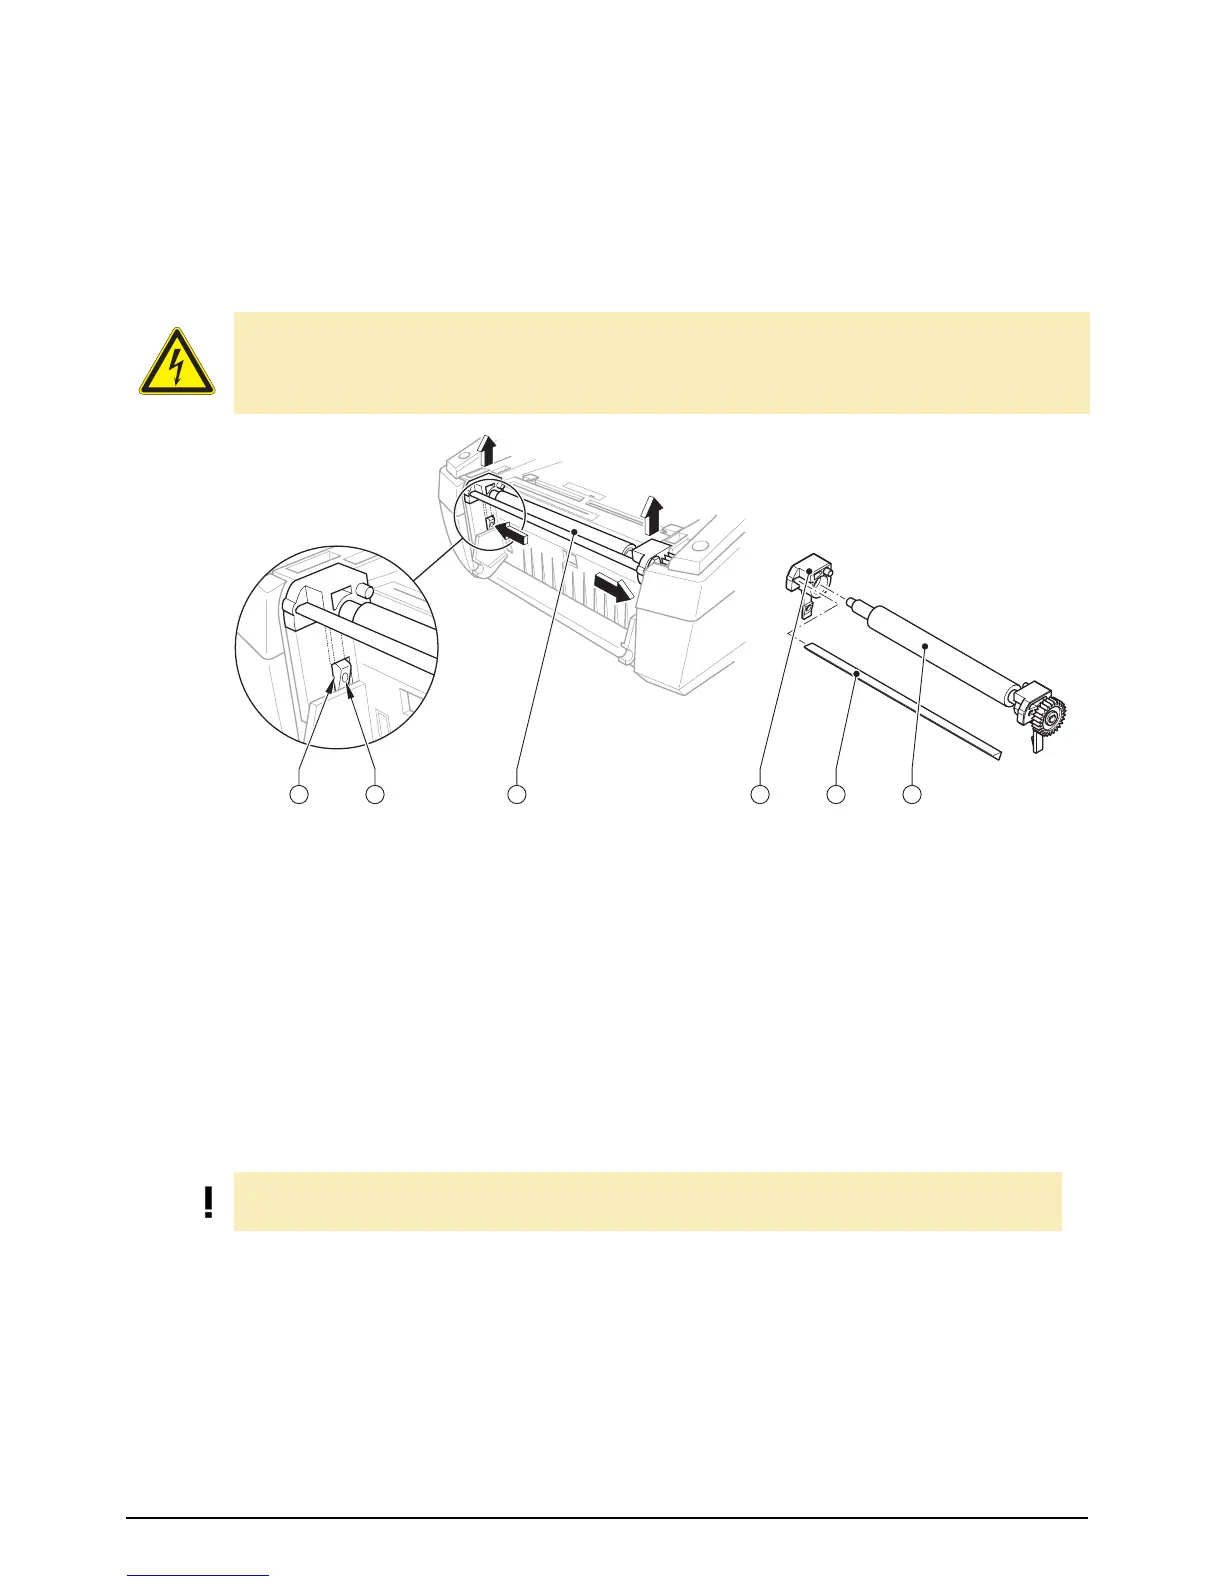
2.8 Replacing the print roller
Fig. 7: Replacing the print roller
1. Open the cover and hinge down the control panel, press the release button and hinge up the print
module.
2. Release the locking device to remove the print roller unit (3):
Insert a pointed tool through the apertures (1) on both sides, press on the pressure points of the hold-
ing lugs (2), and release the print roller unit (3). A soft click will be heard and the print roller unit (3)
rises slightly. Pull the released print roller unit (3) upwards out of the device.
3. Pull the roller holder (4) and the peel-off edge (5) off the print roller (6) and insert both into the new
print roller.
4. Insert the print roller unit (3) into the holder apertures, and press down evenly on both sides until it
latches in.
5. Hinge down the print module and press evenly on the two marked surfaces so that the unit snaps in
on both sides. Close the control panel.
DANGER!
Danger to life and limb from electric shock!
⇒ Disconnect the device from the mains supply.
1
Apertures
2 Holding lugs
3 Print roller unit
4 Roller holder
5 Peel-off edge
6 Print roller
20
10
0
10
30
40
50
50
1
2
4 5 63
NOTE!
Printers with cutter are not equipped with peel-off edge(5).