Brady IP Series Printer
Replacing assembly units
Edition 12/07 Service Manual 9
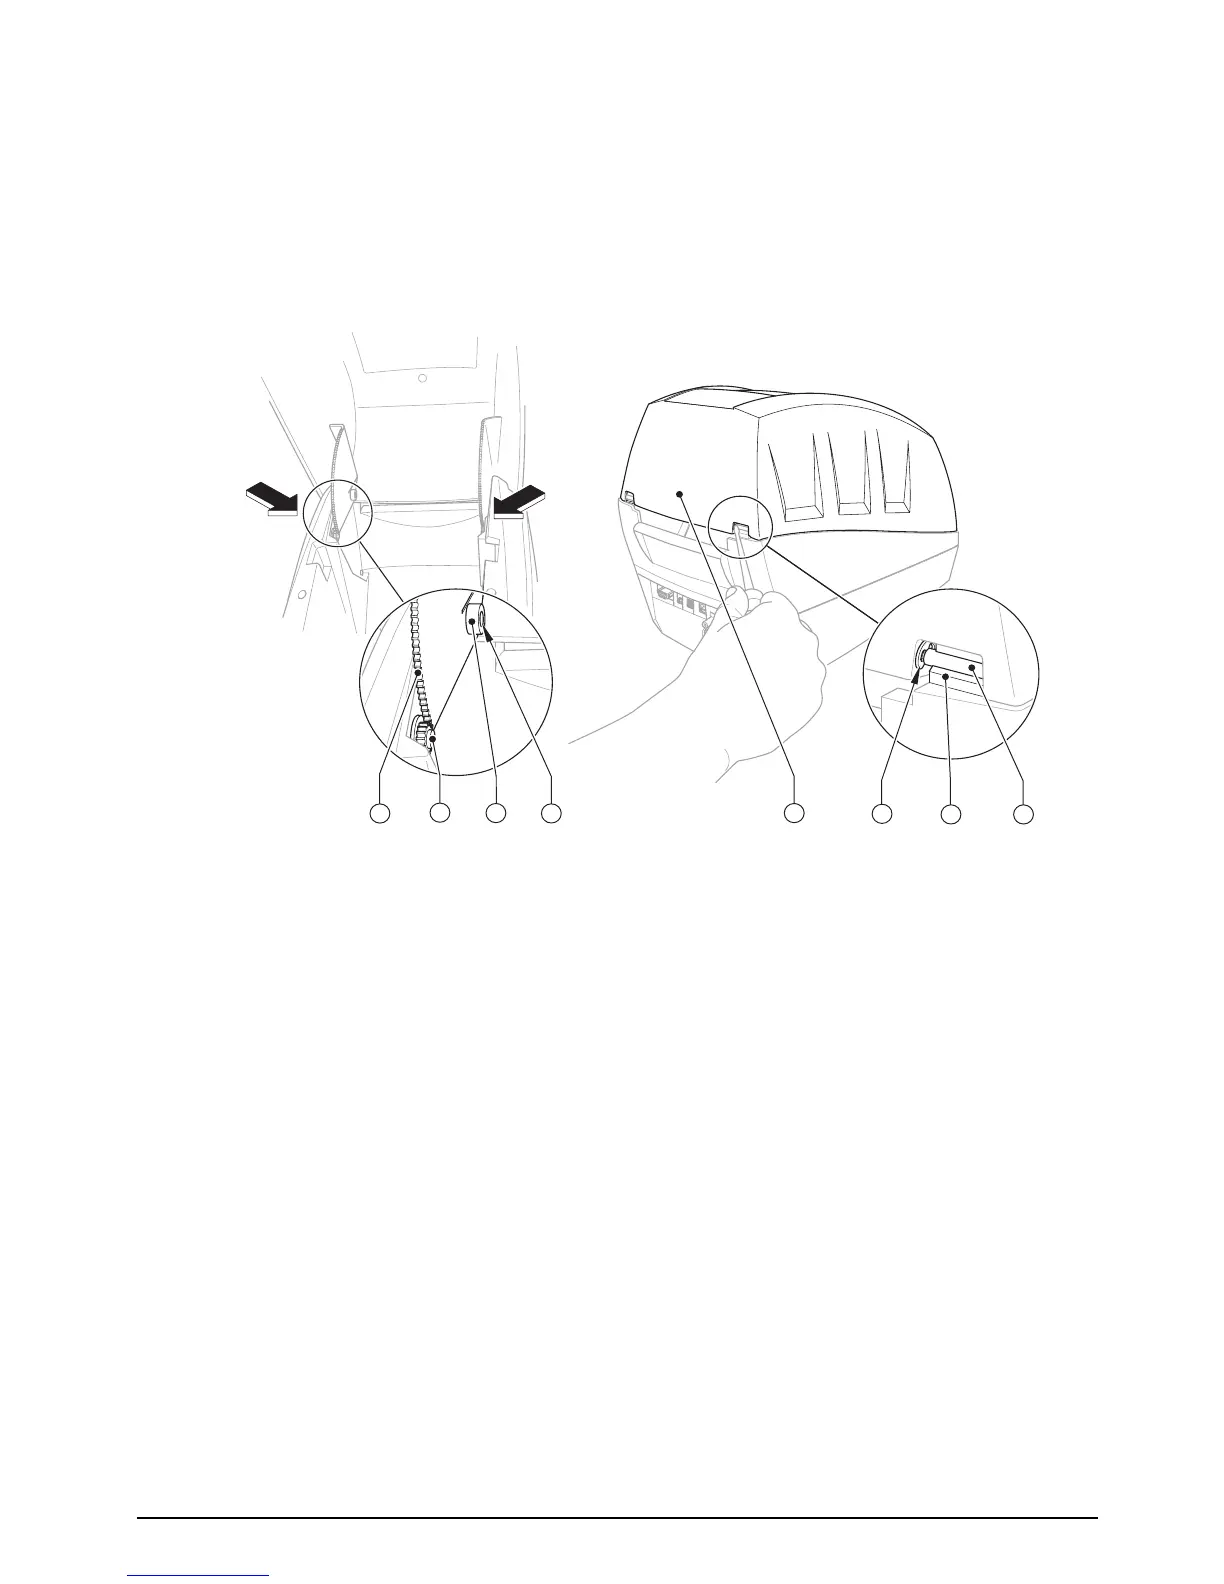
2.4 Replacing the cover
Fig. 3: Replacing the cover
1. Open the cover (5), remove the media hub and label stock.
2. Disconnect the damping mechanism by pressing both toothed lugs (1) towards the center of the
device.
3. Press the cover further back until the axles (4) come out of the guide (7).
4. To fit the new cover, first remove the locking rings (6) and the axles (4).
5. Place a new cover (5) on the casing, ensure that the damping wheels (2) mesh with the toothed
lugs (1).
6. Push both sides of the axles (4) into the hinged aperture (3) from the inside.
7. Close the cover.
8. Attach the locking rings (6).
1
Toothed lug
2 Damping wheel
3 Hinged aperture cover
4 Axle
5 Cover
6 Locking ring
7 Guide for outer casing
7
5
4
6
3
2
1
4