SERIES 70 ELECTRIC ACTUATOR
Installation, Operation, and Maintenance Manual
22 of 48
© 2022 BRAY INTERNATIONAL, INC. ALL RIGHTS RESERVED. BRAY.COM
The Information contained herein shall not be copied, transferred, conveyed, or displayed in any manner
that would violate its proprietary nature without the express written permission of Bray International, Inc.
COMMISSIONING
Mounting the Actuator
All Bray Series electric actuators are suitable for direct mounting on Bray
butterfly valves With proper mounting hardware the S actuator can be installed
onto other quarter-turn valves or devices
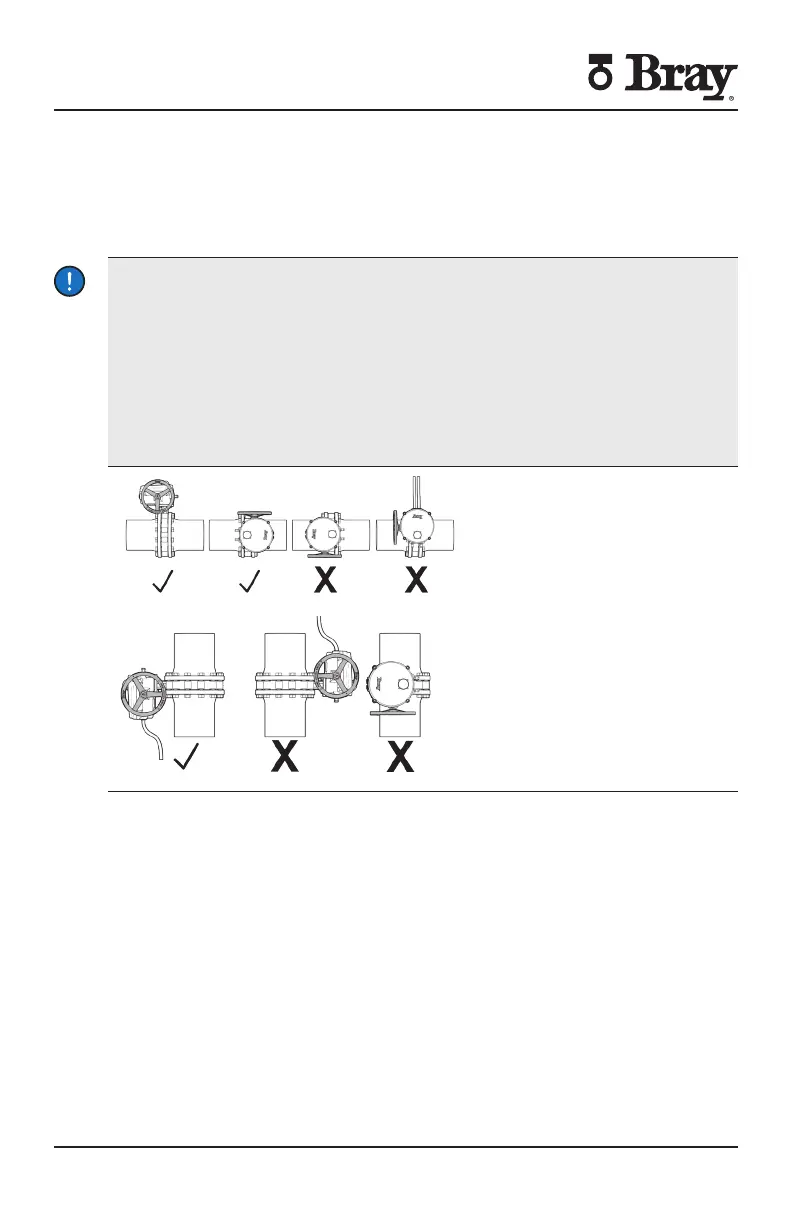
NOTICE
The standard mounting position for the actuator orients the unit with its handwheel
in a vertical plane and parallel to the pipeline
If the actuator is mounted on a vertical pipe it is recommended that the unit be
positioned with the conduit entries on the bottom to prevent condensation from
entering the actuator through its conduits
In all cases the conduit should be positioned to prevent drainage into the actuator
and the handwheel should not be facing down
Follow the steps below to mount the actuator onto the valve
1. Manually operate the actuator until the output shaft of the actuator is in line with
the valve stem. If possible, select an intermediate position for both the valve and
actuator.
2. If required, place the proper adapter onto the valve stem. It is recommended
that a small amount of ‘anti-seize’ lubricant be applied to the adapter to ease
assembly.
3. Mount the actuator onto the valve stem.
4. Install the furnished mounting studs by threading studs all the way into the
actuator base. It may be necessary to manually operate the actuator to align the
valve and actuator bolt patterns.
5. Fasten the mounting studs in place with furnished hex nuts and lock washers

 Loading...


