Configuring your machine for a wireless network
17
3
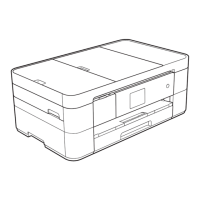
(For MFC-J2510/J4510DW/J4710DW) 3
a Press .
b Press Wi-Fi.
c Press WPS w/PIN Code.
d When Switch Network interface to wireless? is displayed, press Yes to accept.
This will start the wireless setup wizard.
To cancel, press No.
e The LCD will show an 8 digit PIN and the machine begins searching for a WLAN access point/router for
up to 5 minutes.
f Using a computer that is on the network, type “http://access point’s IP address/” into your browser.
(Where “access point’s IP address” is the IP address of the device that is used as the Registrar
1
.) Go to
the WPS (Wi-Fi Protected Setup) setting page and input the PIN which the LCD shows in e to the
Registrar and follow the on-screen instructions.
1
The Registrar is normally the WLAN access point/router.
The setting page may be different, depending on the brand of WLAN access point/router. See the
instruction manual that came with your WLAN access point/router.
If you are using your Windows Vista
®
or Windows
®
7 computer as a Registrar, complete the following
steps.
To use a Windows Vista
®
or Windows
®
7 computer as a Registrar, you need to register it to your network
in advance. See the instruction manual that came with your WLAN access point/router.
1 (Windows Vista
®
)
Click , Network, and then Add a wireless device.
(Windows
®
7)
Click , Control Panel, Network and Internet, and then
Add a wireless device to the network.
2 Choose your machine and click Next.
3 Input the PIN from the printed page and then click Next.
4 Choose your network that you want to connect to, and then click Next.
5 Click Close.
 Loading...


