2005 Buell Firebolt: Maintenance 1-19
HOME
Bleeding Rear Brake
NOTE
Hydraulic brake fluid bladder-type pressure equipment can be
used to fill the brake master cylinder through the bleeder
valve if master cylinder reservoir cover is removed to prevent
pressurization.
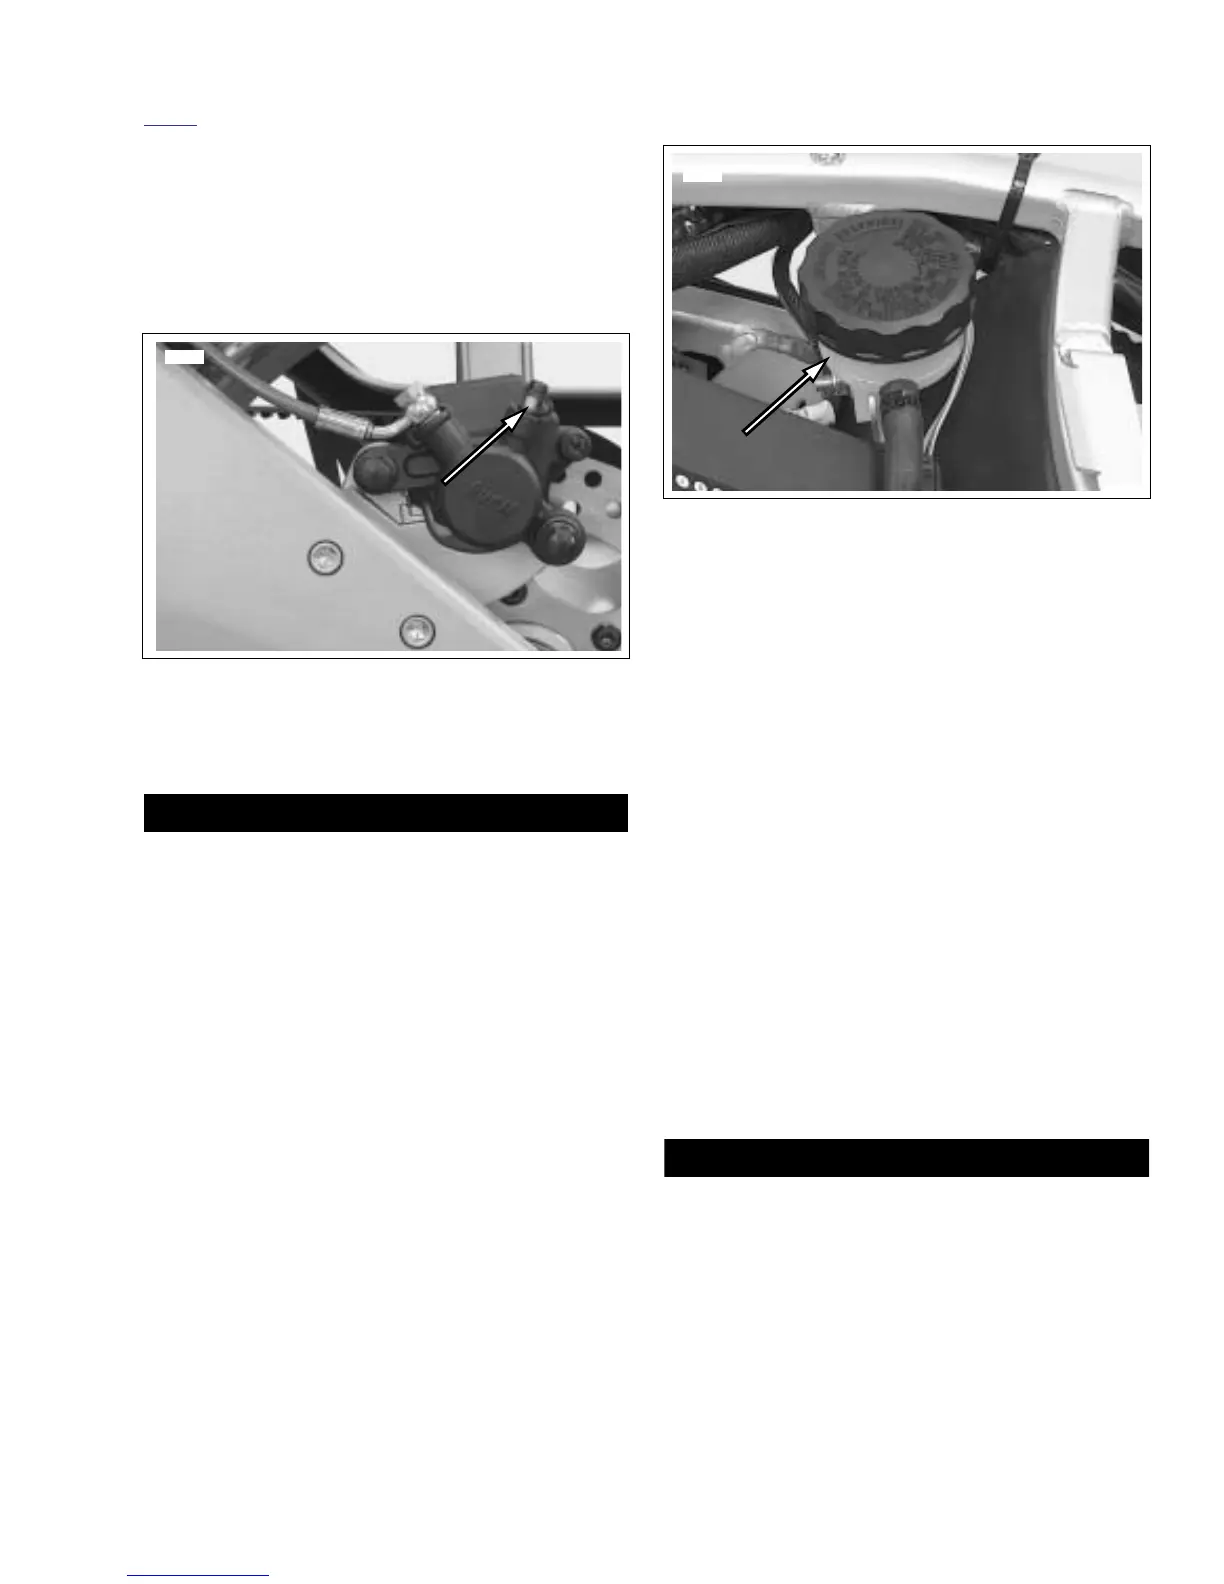
1. See Figure 1-9. Install end of plastic tubing over rear cal-
iper bleeder valve; place other end in a clean container.
Stand motorcycle upright.
CAUTION
D.O.T. 4 brake fluid will damage painted and molded-in
color surfaces it comes in contact with. Always use cau-
tion and protect surfaces from spills whenever brake
work is performed. Failure to comply can result in cos-
metic damage. (00239a)
2. Remove seat. See 2.38 SEAT.
3. See Figure 1-10. Remove cap and gasket from rear mas-
ter cylinder reservoir.
4. Add D.O.T. 4 BRAKE FLUID to master cylinder reservoir
with motorcycle upright (not on sidestand). Bring fluid
level between upper and lower marks on reservoir.
NOTE
Do not reuse brake fluid.
5. Slowly depress and release brake pedal several times to
build up hydraulic pressure, then hold brake pedal in the
depressed position.
6. While holding brake pedal in the depressed position,
open bleeder valve about 1/2-turn counterclockwise.
Brake fluid will flow from bleeder valve and through tub-
ing into clean container. When brake pedal has moved
1/2 to 3/4 of its full range of travel, close bleeder valve
(clockwise). Allow brake pedal to return slowly to its
released position.
7. Repeat steps 5-6 until all air bubbles are purged.
8. Tighten rear caliper bleeder valves (metric) to 36-60 in-
lbs (4-7 Nm).
9. Verify master cylinder fluid level as described in step 4.
10. Attach covers to master cylinder reservoirs and tighten
cap on rear master cylinder reservoir securely.
After installing seat, pull upward on front of seat to be
sure it is in locked position. While riding, a loose seat can
shift causing loss of control, which could result in death
or serious injury. (00070a)
11. Install seat. See 2.38 SEAT.
Figure 1-9. Rear Caliper Bleeder Valve
8348
Figure 1-10. Rear Master Cylinder Reservoir