2005 Buell Firebolt: Chassis 2-81
HOME
FOOTPEG, HEEL GUARD AND MOUNT 2.29
RIDER
Remove Wear Peg
1. See Figure 2-111. Remove wear peg from end of footpeg
assembly.
Remove Footpeg
1. See Figure 2-111. Remove clip (5).
2. Remove footpeg pin (9).
3. Remove footpeg (8).
Remove Heel Guard
1. See Figure 2-111. Remove heel guard fasteners (4).
2. Remove heel guard (3).
Remove Mount
1. See Figure 2-111. Remove footpeg mount fasteners (2).
2. Remove footpeg mount (1).
Install Mount
1. See Figure 2-111. Position footpeg mount (1).
2. Install footpeg mount with fasteners (2). Tighten to 108-
132 in-lbs (12-15 Nm).
Install Heel Guard
1. See Figure 2-111. Position heel guard (3) onto footpeg
mount (1).
NOTE
There is one long fastener which installs on the lower left side
in order to secure the non-California vent clamp.
2. Install heel guard (3) with fasteners (4). Tighten to 72-
96 in-lbs (8-11 Nm).
Install Footpeg
1. See Figure 2-111. Install clip (5).
2. Position footpeg (8) on to footpeg mount (1).
3. Install footpeg pin (9).
Install Wear Peg
1. See Figure 2-111. Apply LOCTITE 272 (red) and tighten
to 36-48 in-lbs (4-5 Nm).
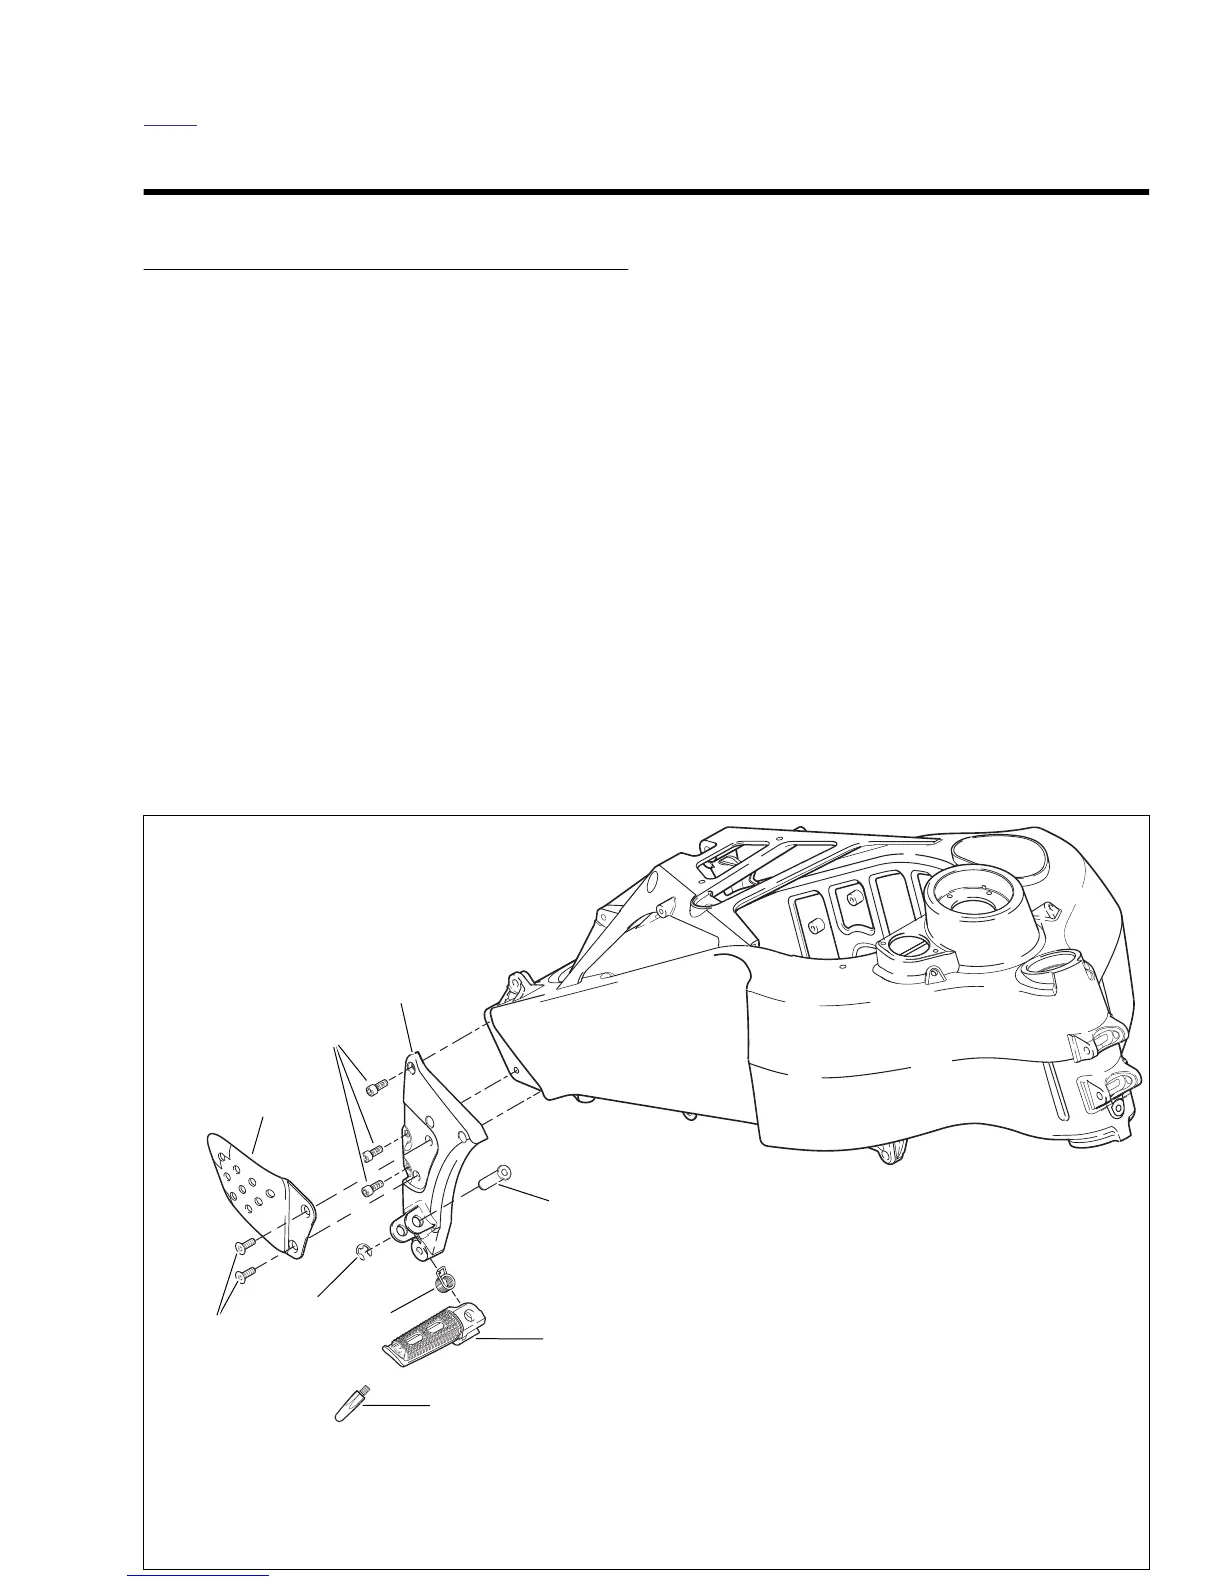
Figure 2-111. Rider Footpeg, Mount and Heel Guard Assembly
1. Footpeg mount
2. Footpeg mount fasteners
3. Heel guard
4. Heel guard fasteners
5. Clip, footpeg
6. Spring
7. Wear peg
8. Footpeg
9. Pin
b0934a2x
9
1
5
6
7
3
4
8
2