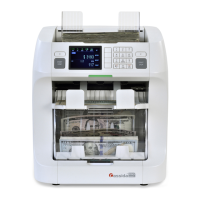
CassidaPRO Zeus: Service Manual
2018 Cassida Corporation. All rights reserved.
Rev: 09/05/2018
cassidapro.com/partner/
[4] LED
• This allows manual control of the CIS LED.
[1] OFF
• This turns off illumination from the front panel LED bar.
[2] ON
• This turns on illumination from the front panel LED bar. Use this menu
option to diagnose illumination issues with the front LED.
[5] Scanning Quality
• This allows the technician to view detailed information from the Zeus’ on-board
sensors and to help diagnose scanning issues. It is suggested that the technician
runs 2 or 3 high denomination bills ($50’s or $100’s) once this option has been
selected to view detailed scanning results such as security thread, watermark etc. In
most of the following screens, use the [8] key to zoom into a curve, the [0] key to
zoom out, and the [ADD] and [STRAP] keys to pan left and right along a zoomed
curve.
NOTE: To exit this menu, press the top unmarked key closest to the display.
[1] Double Sensor Detail
• Pressing [1] repeatedly in this menu allows the technician to view
each double sensor output independently. Each ‘pulse’ is one bill that
has been scanned. Check to ensure that the sensor data matches the
envelope, and that the normalized curve (YELLOW on LEFT double
sensor, TEAL on RIGHT double sensor) does not exceed the bounding
lines.
[2] Magnetic Sensor Detail
• Pressing [2] repeatedly in this menu allows the technician to view
each double sensor output independently. Each ‘pulse’ is one scanned
bill. Ensure that the magnetic sensor levels are around the sample
amplitude, and that the width of the pulses is within the envelope
(BLUE line) for each bill. If no signal is noted, or abnormal spikes
are noted, this points to an issue with the magnetic sensors. MHL is
the LEFT sensor, MHC is the CENTER sensor, and MHR is the right
magnetic sensor.
[3] Position and Speed Details
• Pressing [3] displays the position sensor input, and the average notes
per minute. Each pair of PS1 and PS2 sensors should have similar
pulse locations. PS2 pulses should appear after PS1 pulses, to the
right. The X-axis is time in seconds. NPM default is 1000 notes per
minute. The graphs are displayed in the same order as the key given
on screen:
• ADF - TEAL - Position of the rollers as given by the encoder
wheel. This graph should be a well formed square wave with
longer pulses at the start and end of the graph for when the rollers
DIAGNOSIS 6.2.
 Loading...
