Assembly and operating instructions
CENTAX-L
016L-00050…00090-FS10
CENTA Antriebe Kirschey GmbH 41 / 46
9.2 Dismantling the links
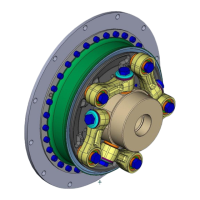
See Fig. 6-9 or 6-10:
Loosen the screws (6 and 7) of the links (1) alternately ("Flange"/"Hub") and
remove with washers (8; with link size 3 and 4 only), bearing unit (4) and
washers for centrifugal bearing (5).
Remove the links (1).
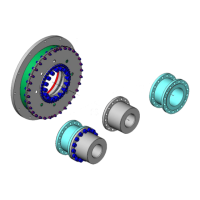
9.3 Dismantling the link flange assembly
Dismantle the link flange assembly as appropriate for the supplied design
(see installation drawing):
Dismantling the link flange assembly with/without sheet (5),
see chapter 9.3.1 .
Dismantling the link flange assembly and the adapter (8),
see chapter 9.3.2 .
9.3.1 Dismantling the link flange assembly with/without sheet (5)
See Fig. 6-6:
Loosen the screws (30) of the connection link flange assembly (1) and
flywheel (B) and remove with the washers (31).
Pull the link flange assembly (1) out of the centring of the flywheel (B) and
remove.
Pull the sheet (5; if existing) out of the centring of the flywheel (B) and
remove.
9.3.2 Dismantling the link flange assembly and the adapter (8)
See Fig. 6-8:
Support the link flange assembly (1).
Loosen the screws (9) of the connection link flange assembly (1) and adapter
(8) and remove with the washers (10; if existing) and sheets (4).
Pull the link flange assembly (1) with the bolts (6) out of the adapter (8) and
place it on the hub (3).
See Fig. 6-7:
Loosen the screws (30) of the adapter (8) and flywheel (B) and remove with
the washers (31).
Pull the adapter (8) out of the centring of the flywheel (B) and remove.
See Fig. 6-5:
Remove the link flange assembly (1) out of the installation space.
Pull the circlips (7; 2x180°) from the bolts (6) and remove as well as the
the bolts.