Freeze-dryer Alpha 1-4 LDplus
Freeze-dryer Alpha 2-4 LDplus
Version 11/2006, Rev. 2.2 of 17/10/2016 • sb
Translation of the original operating manual
Pos: 101 /200 Chris t/361 GT-B A Labor-Pilot ( PROJEKTE)/Alp ha/Alpha 1- 4_2-4 LDplus/05 0 Aufstellung un d Anschluss/050-0 050 Va kuummesssond e Alpha 1-4_2-4 LD plus @ 35\ mod_14303800 91086_68.doc x @ 258868 @ 2 @ 1
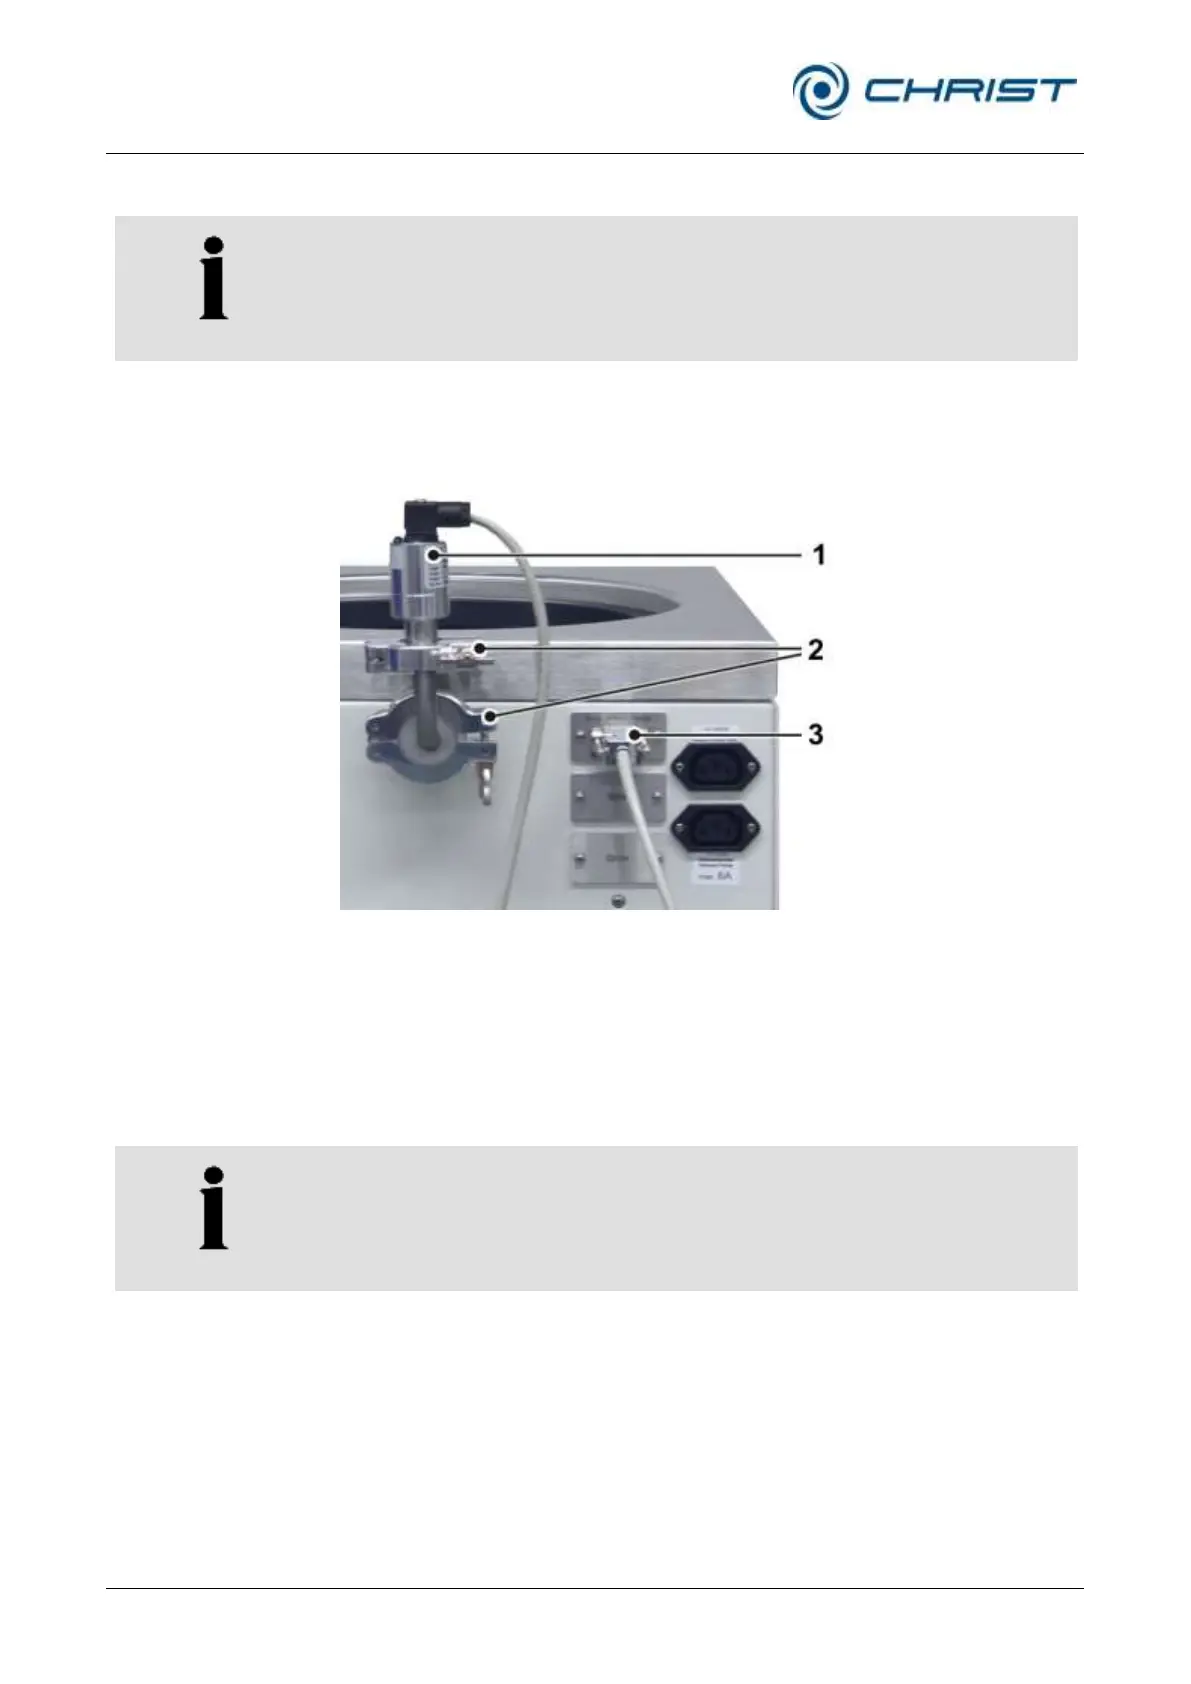
5.4 Vacuum sensor
Please refer to the separate operating manual of the vacuum sensor!
In order to protect the vacuum sensor against transport damage, it comes
supplied in its original packaging. Prior to commissioning the freeze-dryer,
the sensor must be installed.
1 Vacuum sensor
2 Clamping rings
3 Connection socket
Fig. 14: Position of the vacuum sensor and the connection socket
• Switch the unit off by actuating the mains power switch.
• Take the vacuum sensor out of its original packaging and fasten it to the
connector with a bow-shaped connecting piece, two clamping rings
(DIN16KF) and two centring rings (included in the scope of supply).
• Plug the connector to the connection socket and hand-tighten the
screws on the connector.
It is absolutely essential to comply with the manufacturer’s instructions in
the separate operating manual of the vacuum sensor!