1-18
Cisco ONS 15454 SDH Troubleshooting Guide, R5.0
July 2005
Chapter 1 General Troubleshooting
1.2.3 Perform an XC Loopback on a Destination-Node STM-N VC (West to East) Carrying an Electrical Signal
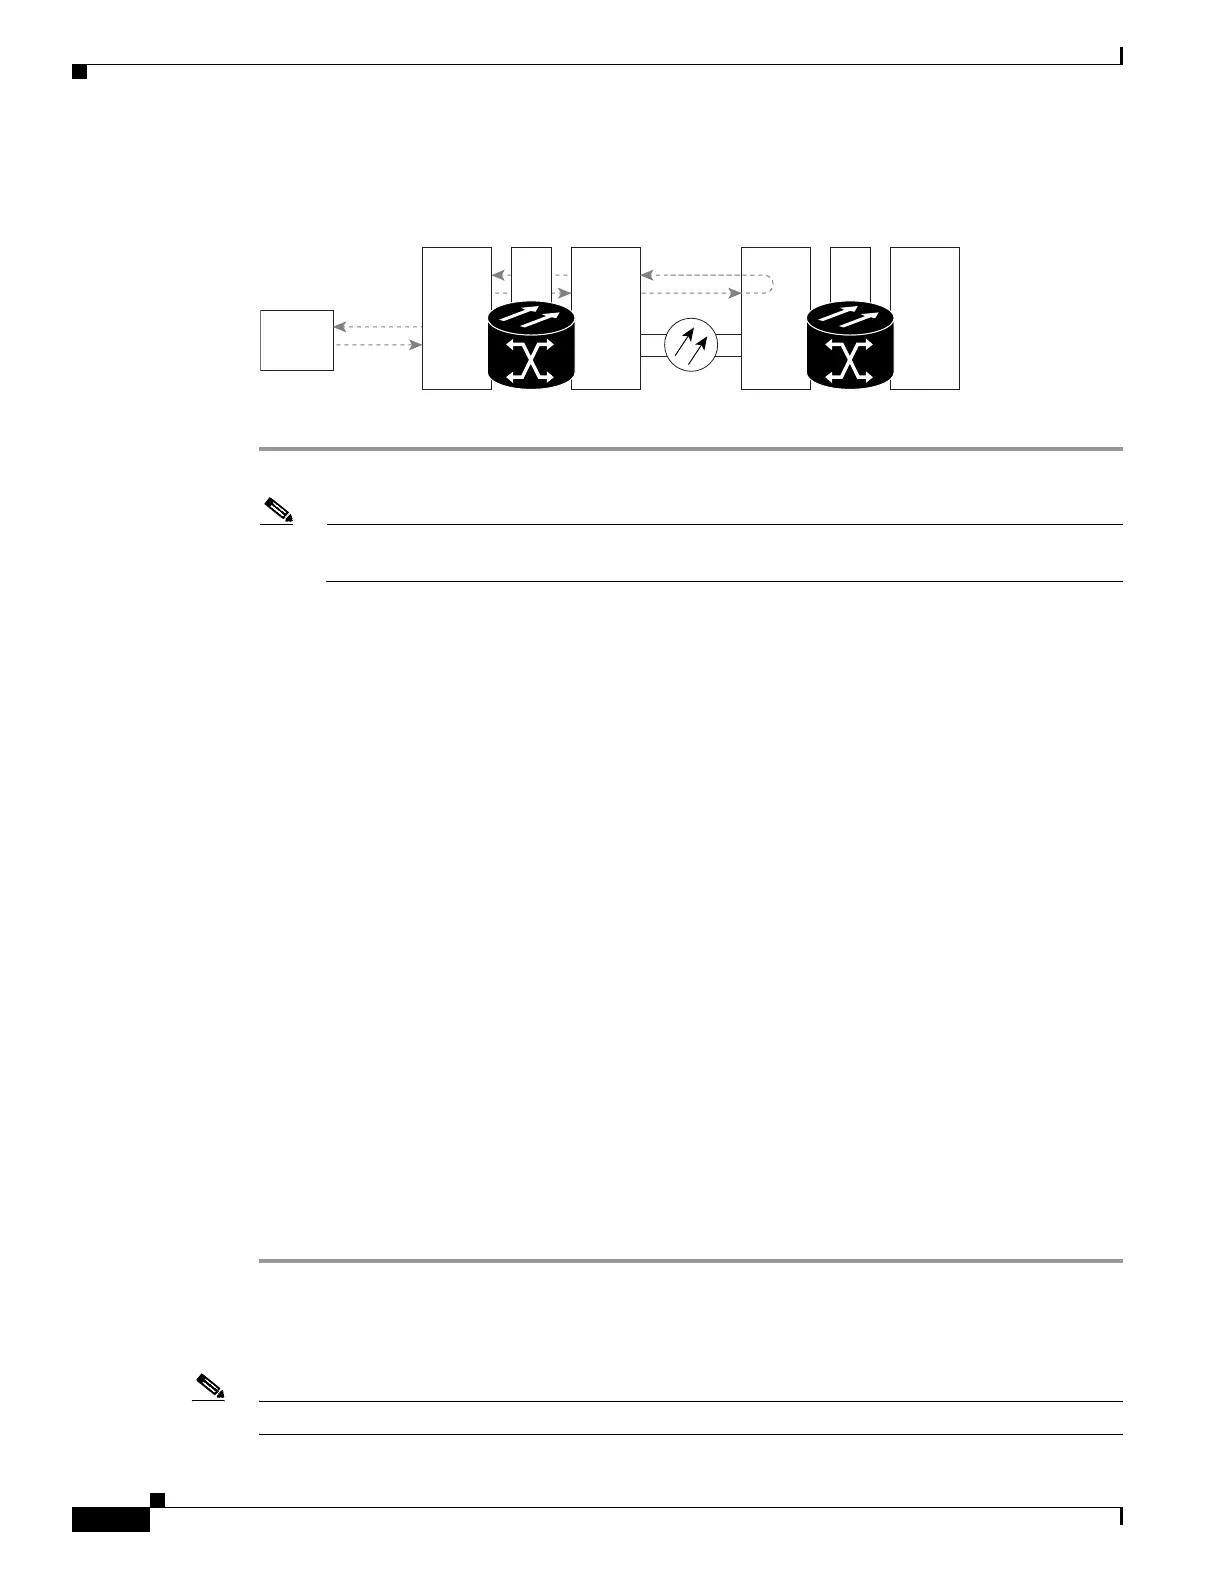
Figure 1-13 XC Loopback on a Destination STM-N Port
Step 1 Connect an optical test set to the port you are testing:
Note Refer to the manufacturer’s instructions for detailed information about connection and setup of
the optical test set.
a. If you just completed the “1.2.2 Perform a Hairpin Test on a Source-Node Electrical Port (West to
East)” procedure on page 1-13, leave the optical test set hooked up to the destination-node port.
b. If you are starting the current procedure without the optical test set hooked up to the destination port,
use appropriate cabling to attach the Tx and Rx terminals of the optical test set to the port you are
testing. The Tx and Rx terminals connect to the same port.
Step 2 Adjust the test set accordingly.
Step 3 Use CTC to put the circuit being tested out of service:
a. In node view, click the Circuits tab.
b. Click the circuit and then click Edit.
c. In the Edit Circuit dialog box, click the State tab.
d. Choose Locked,maintenance from the Target Circuit State drop-down list.
e. Click Apply.
f. Click Yes in the confirmation dialog box.
Step 4 Use CTC to set up the XC loopback on the circuit being tested:
a. In node view, double-click the optical card to display the card view.
b. Click the Maintenance > Loopback > VC4 tabs.
c. Check the check box in the XC Loopback column for the port being tested.
d. Click Apply.
e. Click Yes in the confirmation dialog box.
Step 5 Complete the “Test and Clear the XC Loopback Circuit” procedure on page 1-18.
Test and Clear the XC Loopback Circuit
Note This procedure is performed only on STM-N cards.
Source
ONS Node
Destination
ONS Node
Test Set
XCE1-N STM-N E1-NXCSTM-N
124010