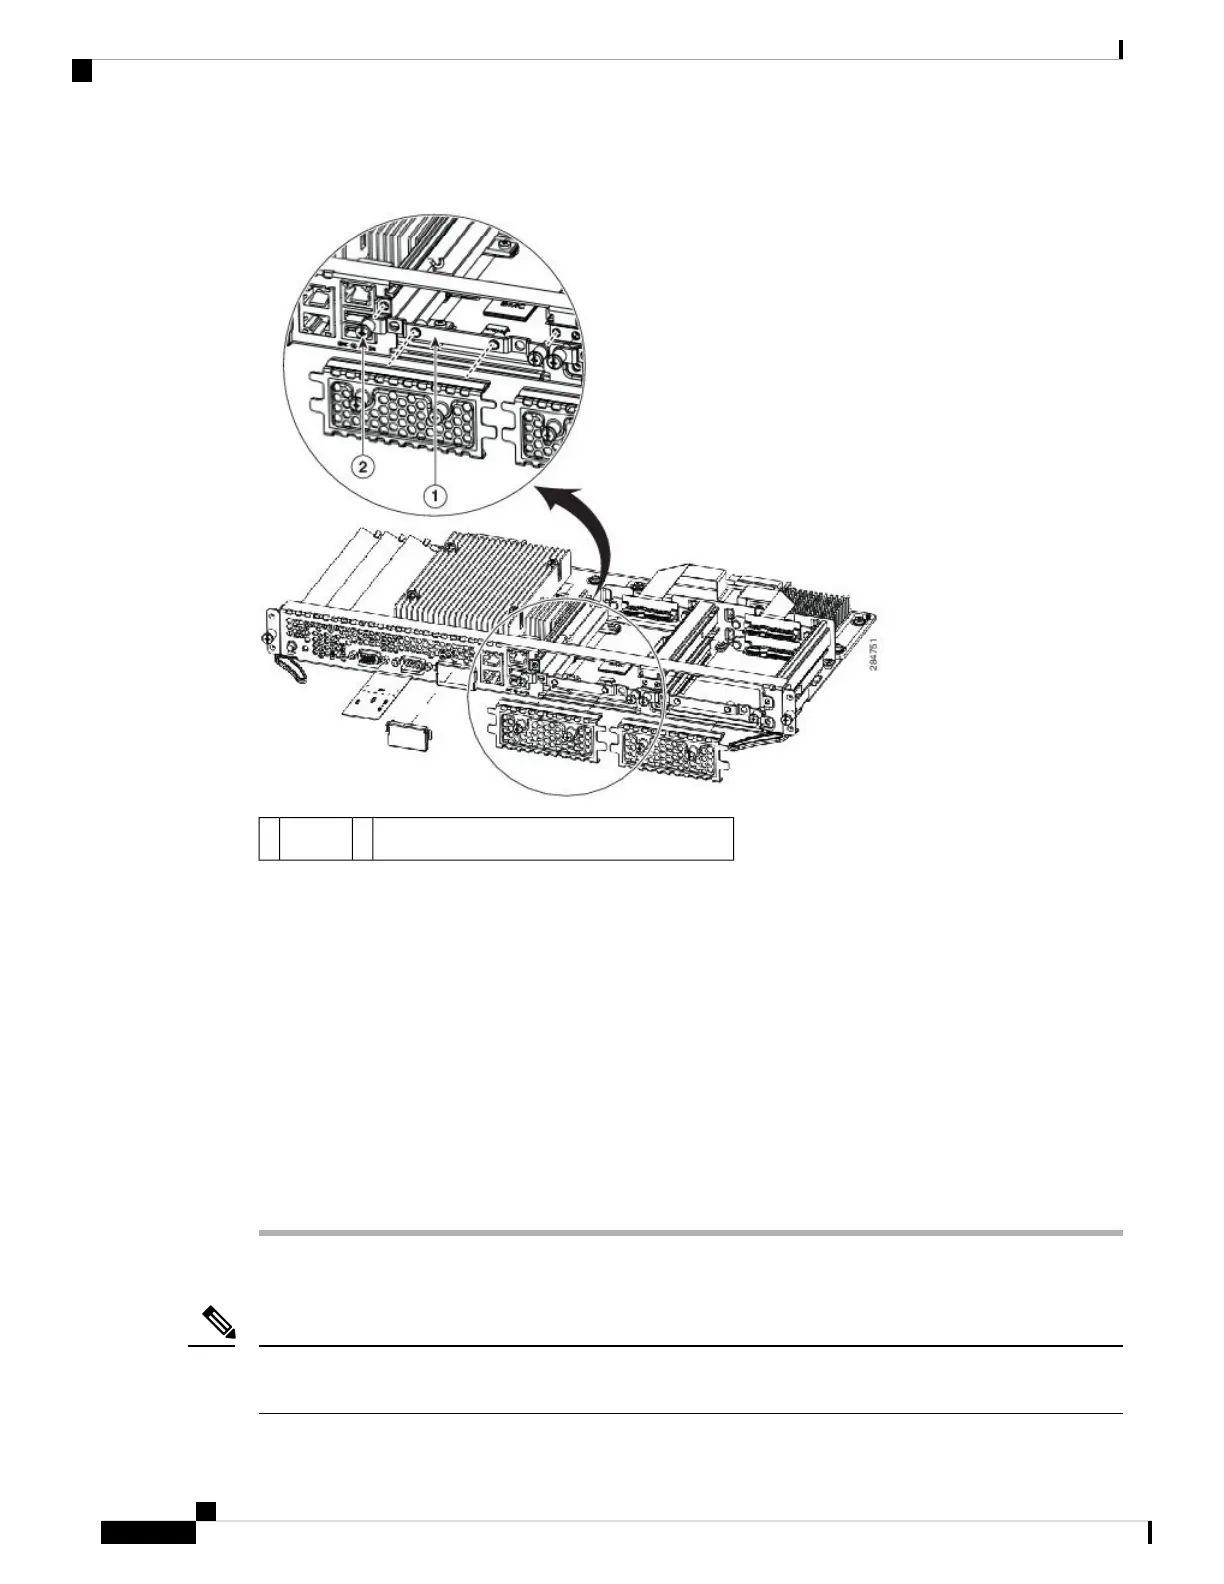
Figure 15: Empty HDD2 Slot
Captive screws on hard disk drive assembly2Bracket1
Step 4 (Optional) If there is a hard disk drive, use the screwdriver to loosen the captive screws on the hard disk drive
assembly.
Step 5 (Optional) To remove the faulty hard disk, pull the handle of the hard disk drive assembly and slide out the
hard disk drive.
Step 6 Slide the new hard disk drive into the E-Series Server until it clicks into place.
Step 7 Tighten the captive screws on the new hard disk drive assembly. Make sure that the HDDs are firmly secure
to the carrier to avoid rattling during operation.
Step 8 Replace the faceplate.
Step 9 Restart the E-Series Server.
Step 10 Configure the new HDD as the new hotspare disk drive. For the configuration procedure, see the GUI
Configuration Guide for UCS E-Series Servers and the Cisco UCS E-Series Network Compute Engine
Integrated Management Controller.
Installing and Replacing the Memory DIMMS in the E-Series Servers
You cannot replace the memory DIMM in an EHWIC E-Series NCE. If you encounter a problem with the
memory DIMM, you must replace the entire EHWIC E-Series NCE.
Note
Cisco UCS E-Series Servers and the Cisco UCS E-Series Network Compute Engine Hardware Installation Guide
40
Installing and Replacing the Memory DIMMS in the E-Series Servers