Pag. 20
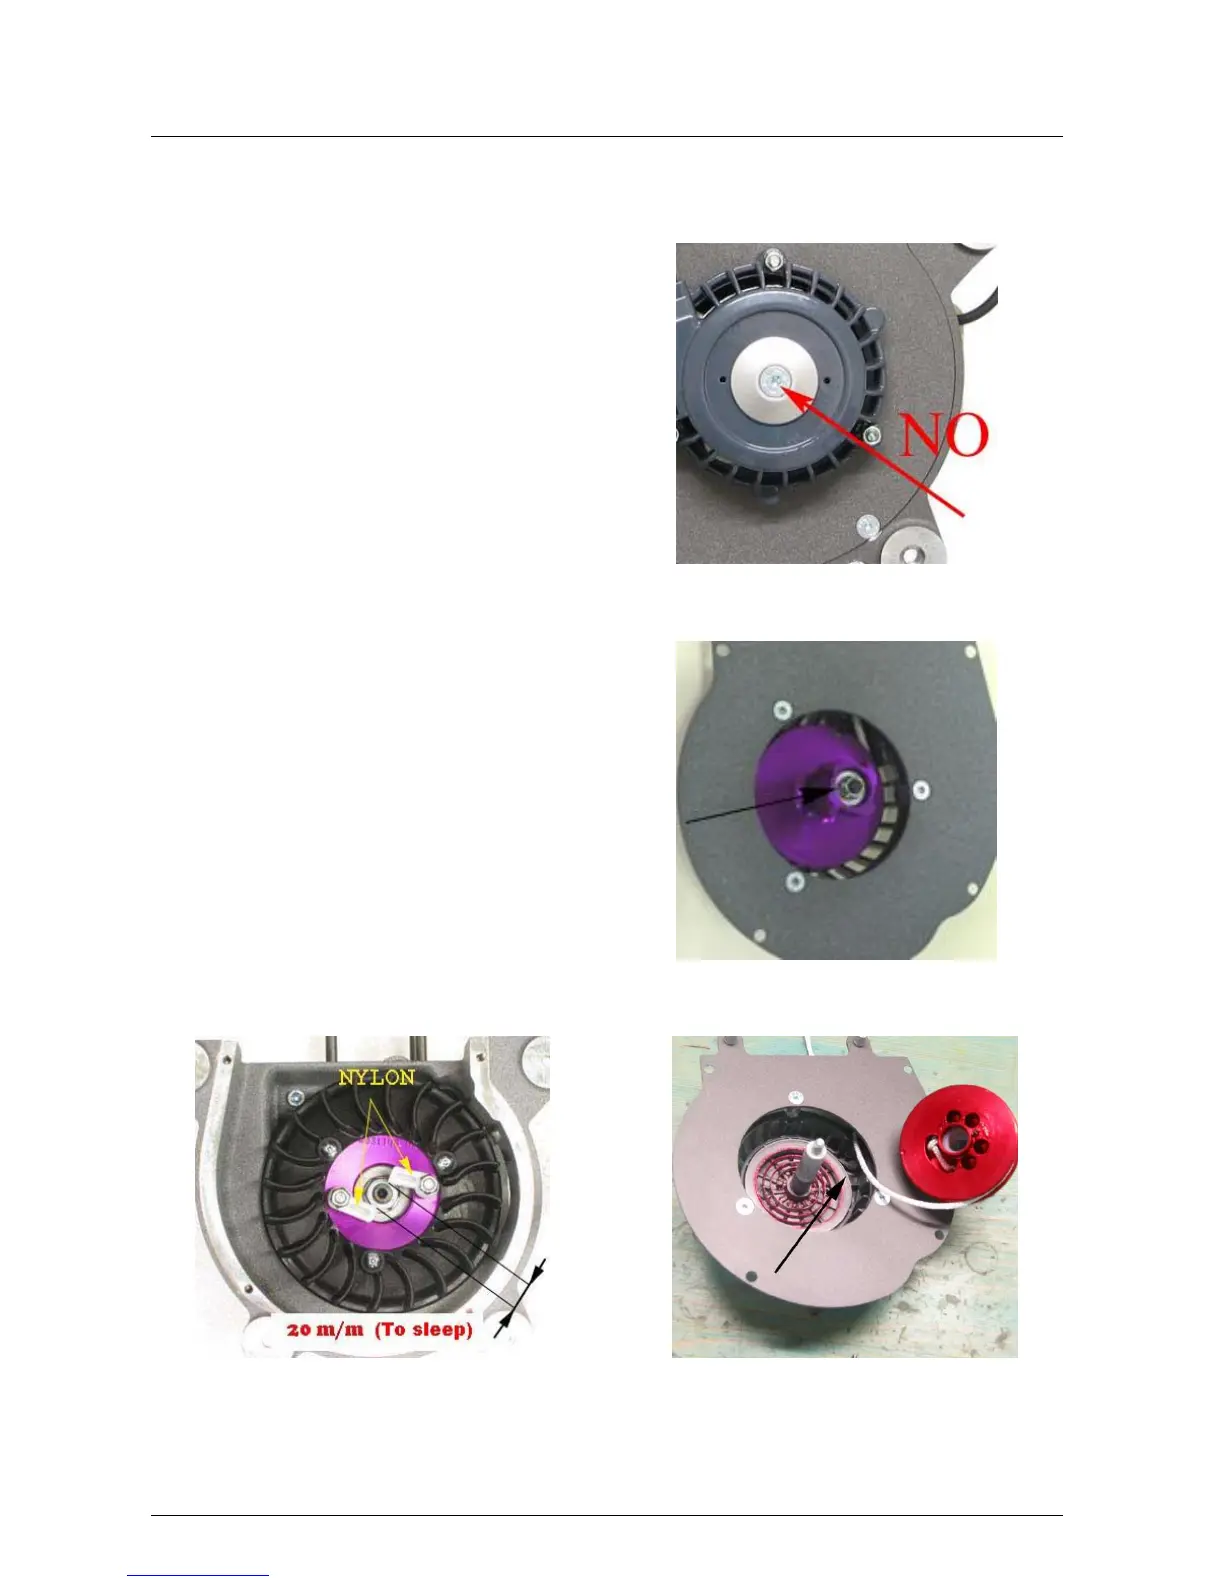
6.3 DISASSEMBLY/ASSEMBLY STARTER
Fig.18
1. Remove the air duct see the chapter 6.2
2. Remove 4 screw (Fig.18)
3. Remove the nut (Fig.19)
4. Remove the pulley
5. Replace chord 3 m/m diameter
CAUTION
NOT REMOVE THE SPRING (fig.21)
1. Install the pulley and tighten the screw
(Fig. 19) to the specified torque
TORQUE : 15Nm( 1,5 kgf/m)
2. Insert the starter into the cooling fan with
open grafts (Fig.20)
3. Tighten the screw (Fig.18) to the
specified torque
TORQUE: 6Nm( 0.6 kgf/m)
Fig.19
Fig.20 Fig.21