3-5. Disassembly, Reassembly and Lubrication
CLP-621 & CLP-631 3-8
3-5-2. Case U
There are two ways to remove the Case U.
1) Removing the Case U without detaching the Ribbon Unit (Normal way)
Procedure is long, but no adjustment is necessary when reassembling.
2) Removing the Case U after detaching the Ribbon Unit. (Readjustment is necessary.)
You can remove the Case U easily. However,
once the Ribbon Unit is detached, you need to
perform ribbon slant elimination adjustment.
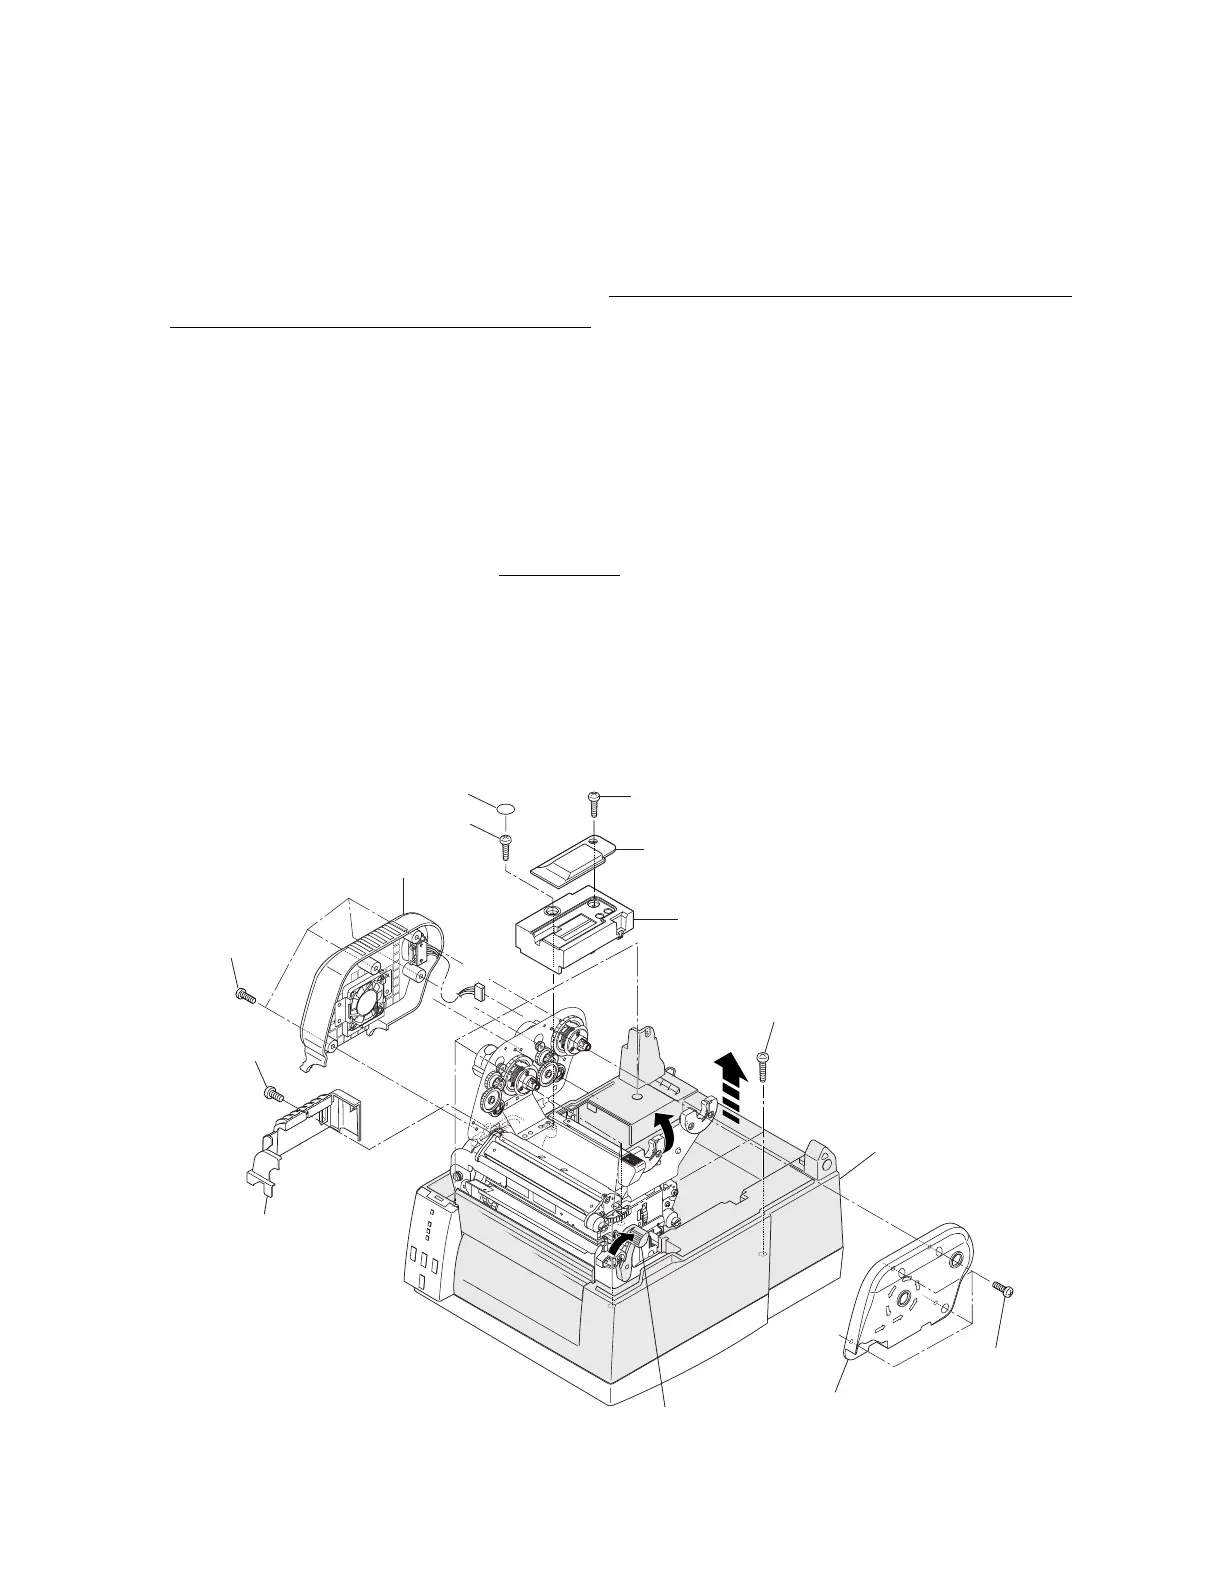
(1) Removing the Case U without detaching the Ribbon Unit (Normal way)
1. Remove the Top Cover SA. Refer to 3-5-1 “Top Cover SA”.
2. Remove 4 screws (PH (N), M3x4) and detach the Ribbon Unit Fan SA2 Block, and then
disconnect 1 connector (CN706) from the Ribbon Main PCB.
3. Remove 4 screws (PH (N), M3x4) and detach the Ribbon Unit Cover R.
4. Remove 1 screw (PH, M3x3) and detach the Motor Cover.
5. Peel off the Case U Cap. It is
not reusable.
6. Remove 1 screw (PHT (BH2T), M3x14) and detach the Connector Case U Cover Block.
7. Remove 1 screw (PHT (BH2T), M3x14) and detach the Connector Cover from the
Connector Case U Cover.
8. Remove 5 screws (PHT (BH2T), M3x14).
9. Release the Head Open Lever (blue color) to open the Head Unit, and then carefully
detach the Case U Unit by lifting it upward.
Cover, Connector
Cover, Connector Case U
Cap, Casu U
PHT (BH2T), M3x14
(Ribbon Unit Fan SA2 Block)
PH, M3x3
Cover, Motor
Cover R, Ribbon Unit
PH (N), M3x4
PHT (BH2T), M3x14
PHT (BH2T), M3x14
PH (N), M3x4
Head Open Lever
(CN706)
(Case U Unit)