750-392
CBEX-DE
5-23
Refractory
5.19.3 — Installation
The following procedure is typical for all boilers with corrugated fur-
naces. When working with plain furnaces, disregard any steps referring
to insulation of corrugated areas. See table below for brick tool P/Ns.
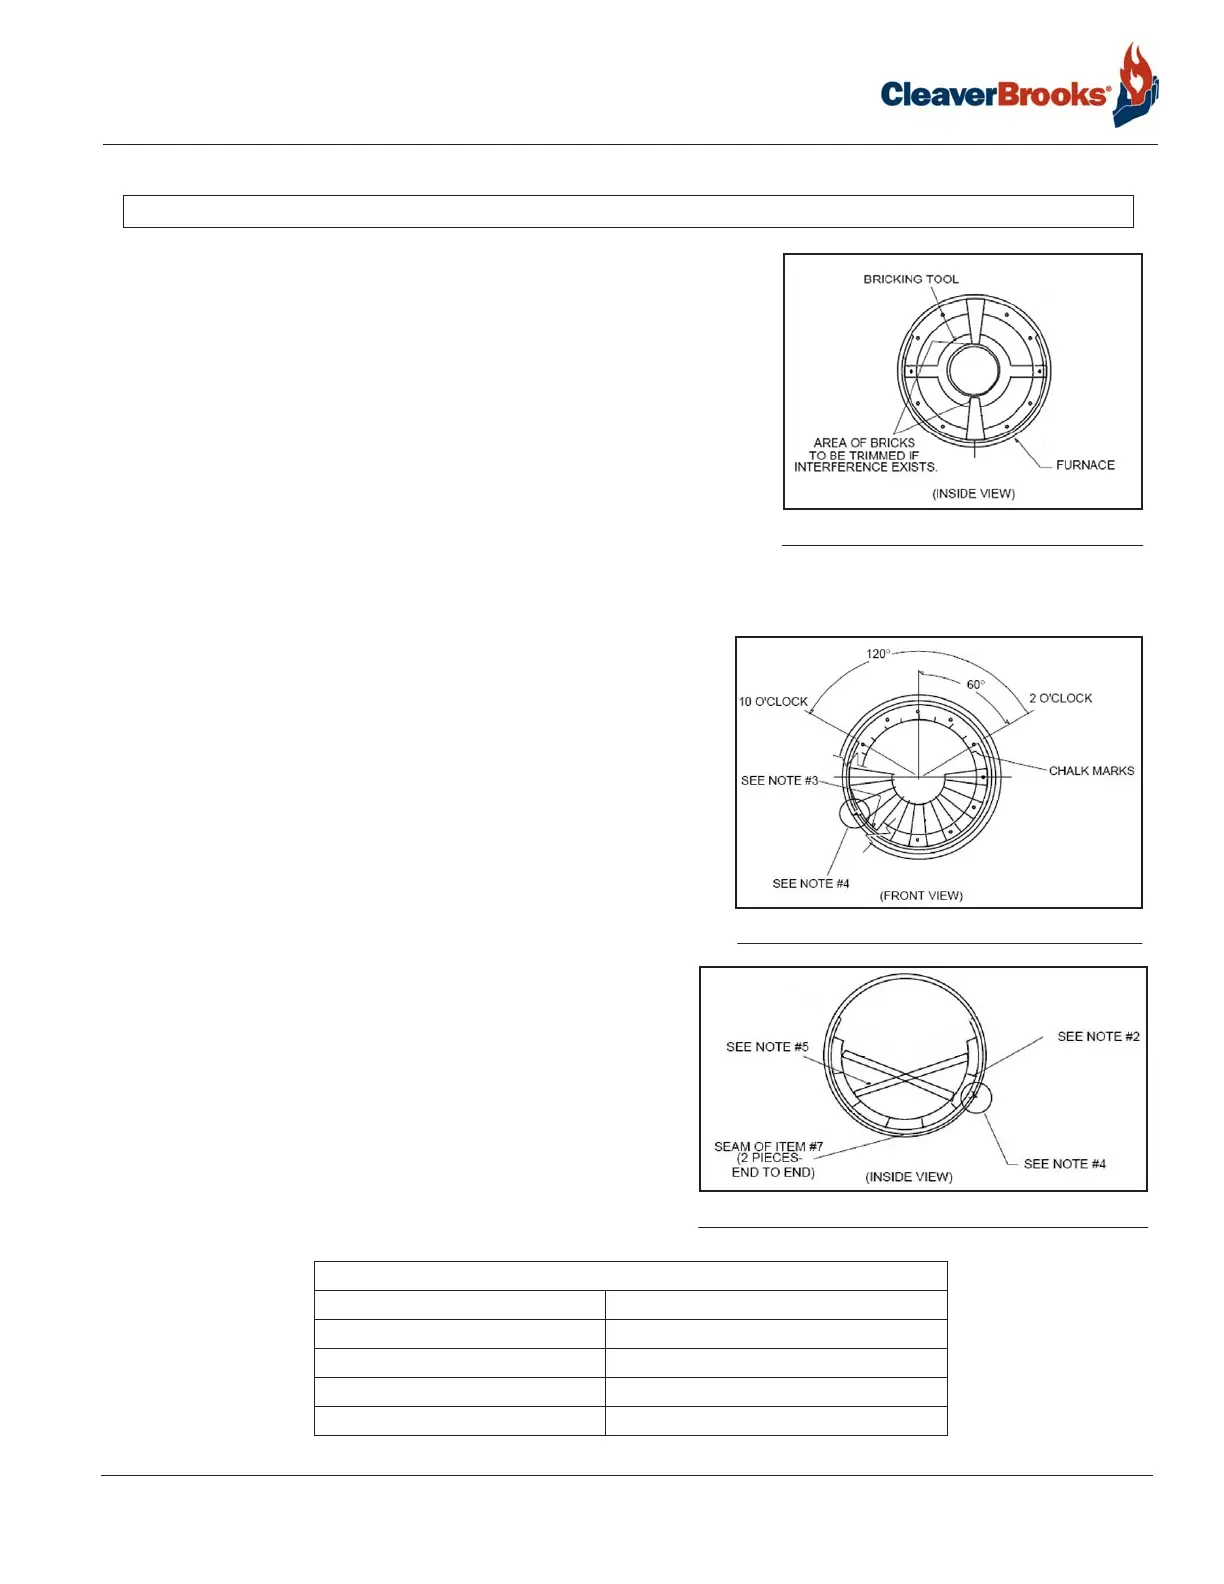
1. Install studs, bricking tool, cerafelt, bottom and top arch bricks as
shown in Figure 5-15 to check for correct fit up. If interference is
present at the arch brick, measure this distance and trim inside
diameter (I.D.) of all bricks.
2. Install the bottom half of arch bricks as shown in Figure 5-16.
Mix the vee block to a mortar-like consistency (per manufacturer’s
instructions) and pack the front (3) valleys of the furnace corrugations
with the mixture, flush with the furnace I.D. up to 3 o’clock and 9
o’clock from the centerline of the furnace. Install both pieces of cerafelt
to insulate the tile from the corrugation, and begin bottom half of first row of tiles.
3. To begin the top half of arch bricks and tiles, measure off the
upper half of furnace arch bricks and tiles with templates,
mark with chalk, and determine if a cut brick or cut tile is
needed (Figure 5-16). If cut brick is required, locate below the
2 o’clock and 10 o’clock positions (see note #1 on Figure 5-
18). If brick is cut, angle of the cut surface should be the same
as original brick. If cut brick or tile measures less than 1/2” full
width, cut two pieces.
4. Install bricking tool as shown in Figure 5-15 and continue
installing upper half by alternating one arch brick and one cor-
responding tile behind brick typical (see notes #5 and #6 on
Figure 5-18).
5. For the last two rows of tiles, pack all remaining valleys of
furnace corrugations (measure 36” from inside surface of
arch bricks) with vee block mixture flush with furnace I.D.
up to the 3 o’clock and 9 o’clock centerlines of the fur-
nace.
6. Install both pieces of cerafelt and continue laying furnace
tiles to complete the last two rows.
7. After joint cement hardens (approximately 2 hours),
remove bricking tool, wooden tile supports, and discard
cerafelt shims.
NOTE: The arch bricks may need to be trimmed to match the burner housing I.D. on higher pressure boilers.
ARCH BRICK INSTALLATION TOOL 30/60/UC NOx
BOILER SIZE TOOL PART NUMBER
250-350 HP 098-00280
400 HP 098-00333
500-600 098-00375
700-800 098-00279
FIGURE 5-15. Begin arch brick install
FIGURE 5-16. Lower arch brick installation
FIGURE 5-17. Liner tile installation