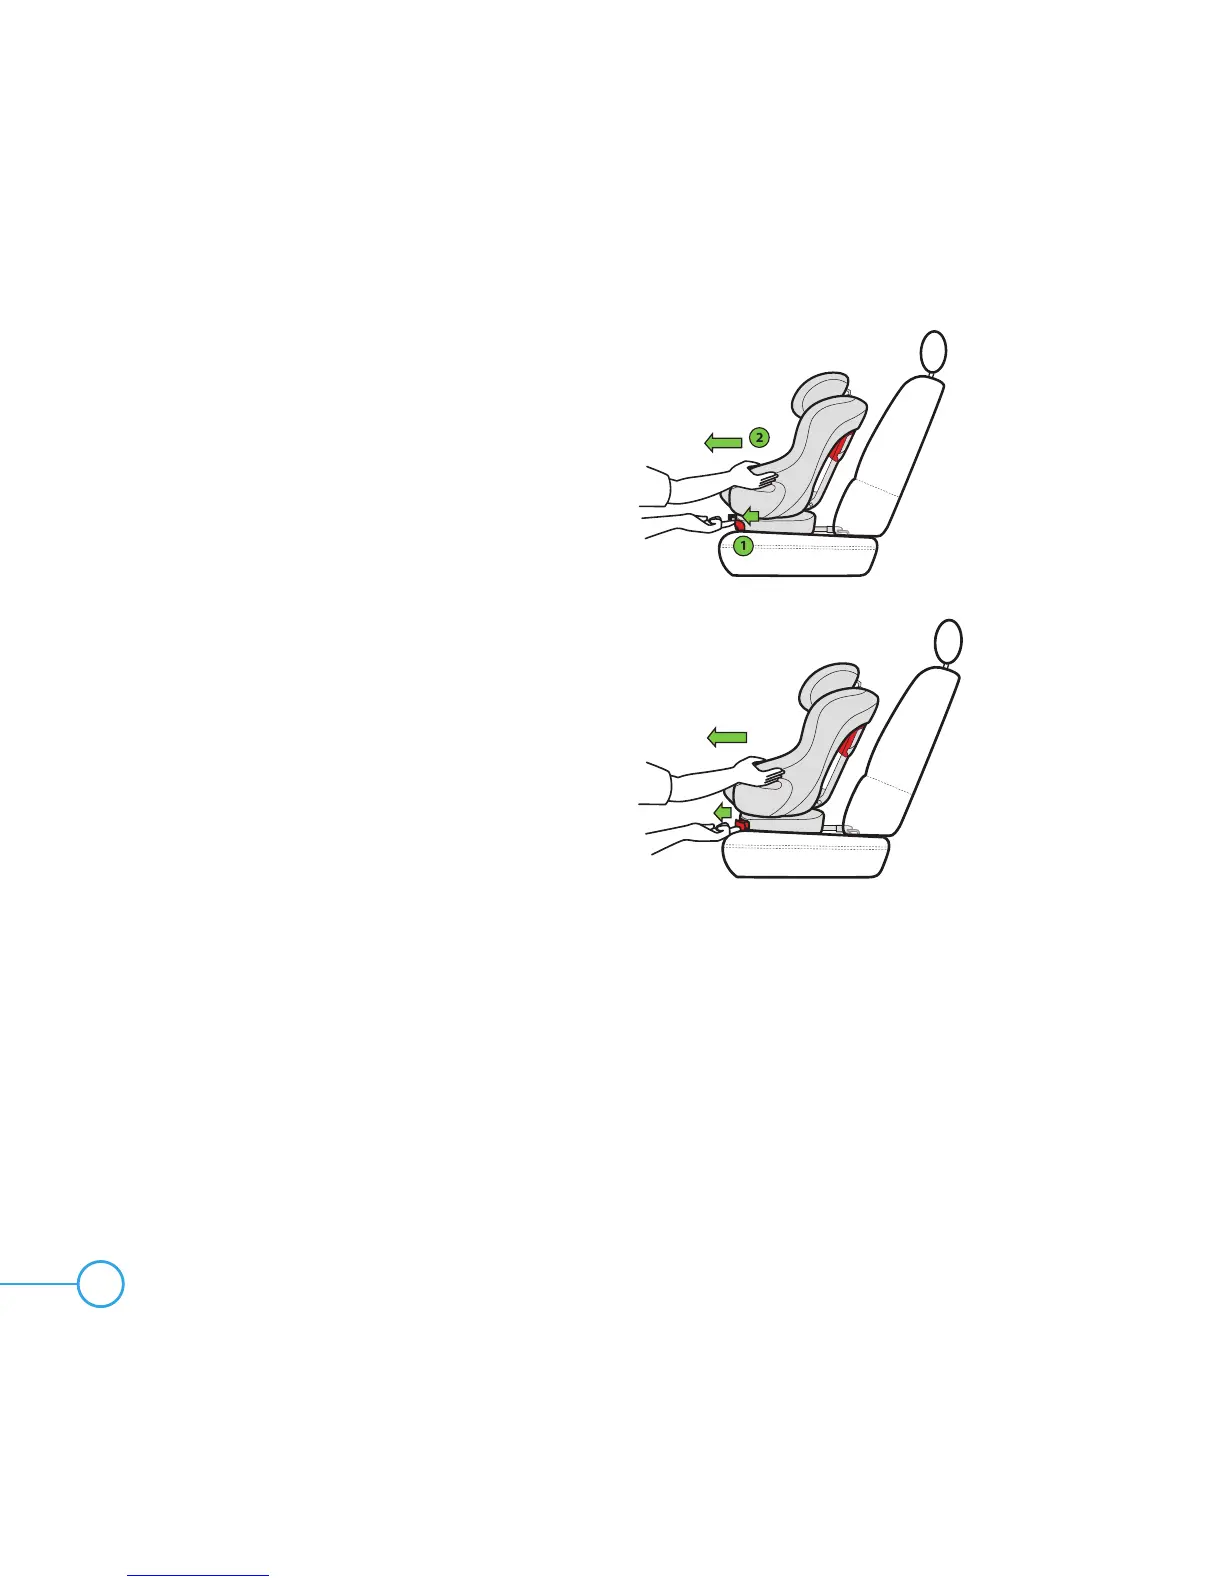
65
Step 4
Pull Rigid LATCH Connectors to the fully
extended position as shown in Figure 93.
• Pull and hold Rigid LATCH Adjustment
Handle.
• Grasp the seat and slide it out until it stops.
• Release Rigid LATCH Adjustment Handle.
Step 5
Pull the red Rigid LATCH Release Handles,
one at a time and pull the car seat forward
to remove each Rigid LATCH Connector from
the vehicle LATCH lower anchor as shown in
Figure 94.
IMPORTANT: Rigid LATCH Connectors
CANNOT be released unless they are
FULLY extended.
NOTE: Moving the car seat slightly from front
to back or side to side may make it easier to
release the Rigid LATCH Connectors from the
vehicle LATCH lower anchors.
Step 6
Remove this car seat from vehicle.
Step 7
Store the Top Tether and Rigid LATCH Connectors,
see “Top Tether Storage” and “Forward-Facing
Rigid LATCH Storage” on page 89.
Figure 94
Figure 93