38
Step 1
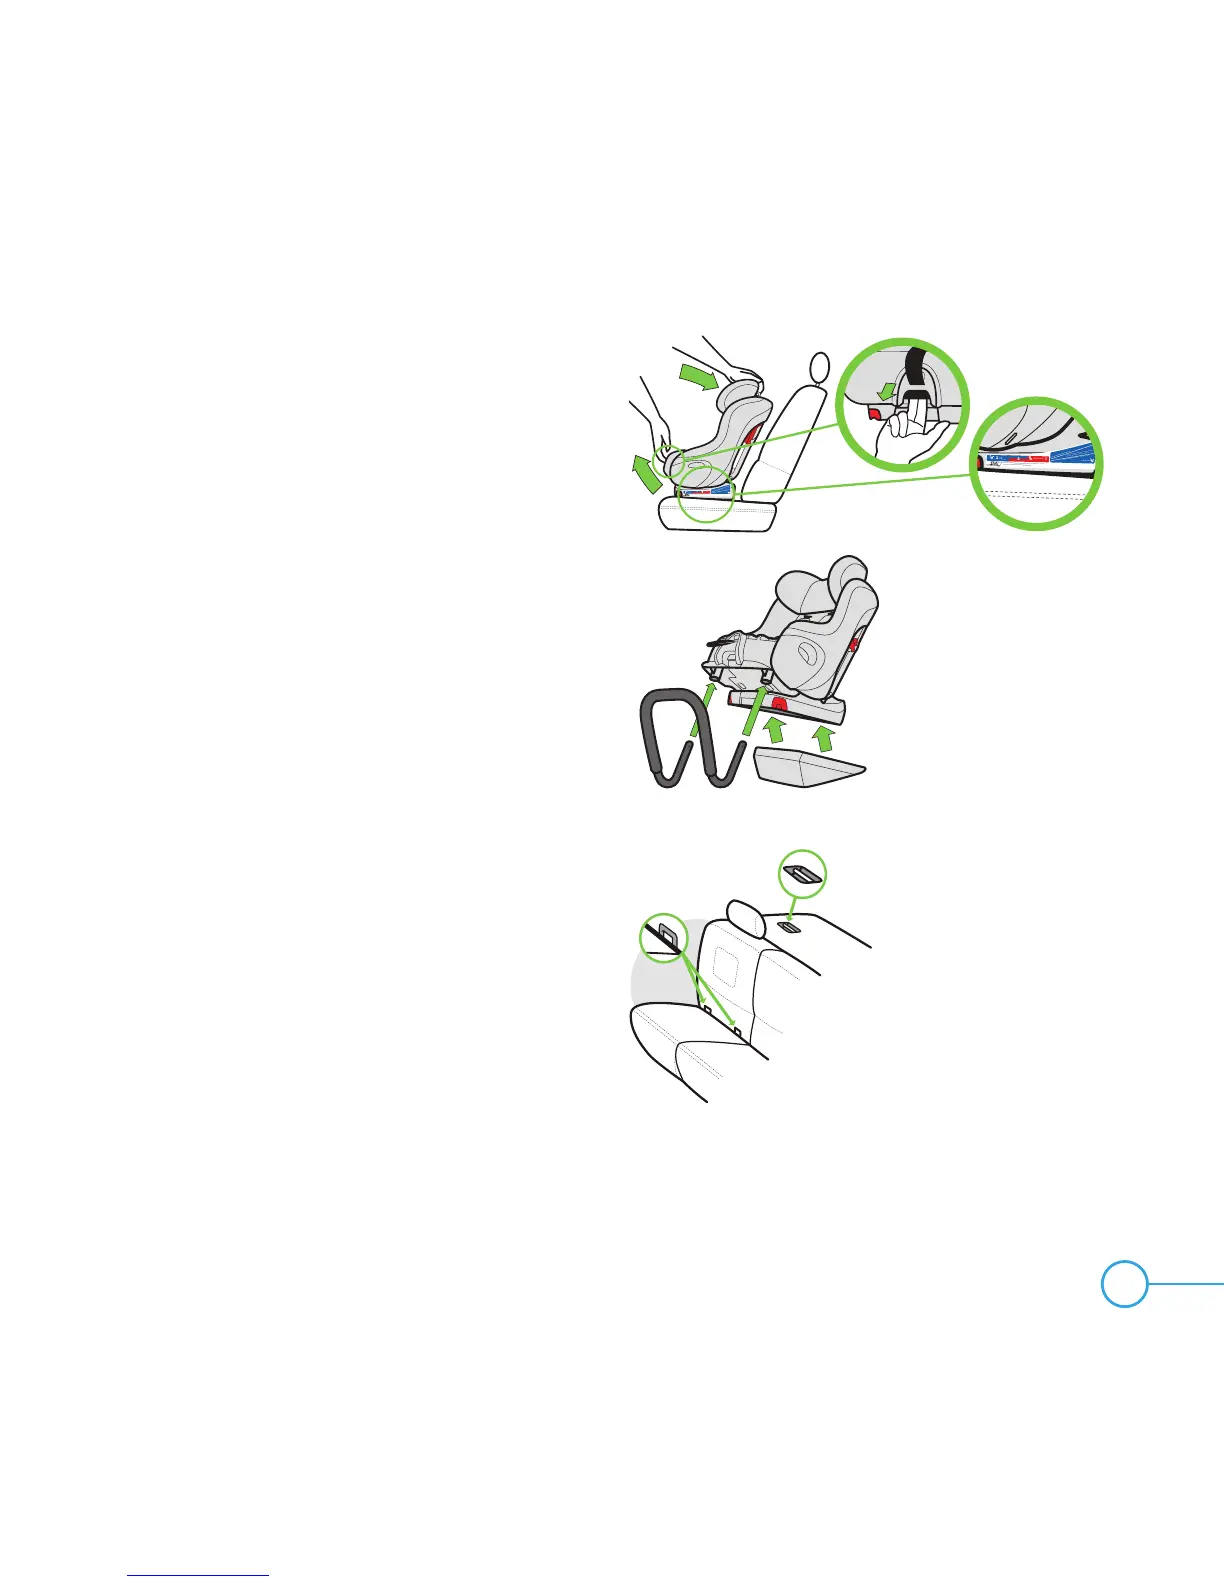
Prepare car seat for Rear-Facing Installation:
• Fully recline car seat to Recline Position 3
by pulling Recline Handle out and rotating
car seat back as shown in Figure 41.
• Install Rear-Facing Base to bottom of
seat. See “Installing/Removing Rear-
Facing Base” on page 82.
• Remove seat cushion and install Anti-
Rebound Bar. See “Installing/Removing
Anti-Rebound Bar” on page 85.
Note: This car seat can be used Rear-Facing
in recline position 2 or 3 only.
Step 2
Select a Forward-Facing vehicle seating
location which has LATCH.
Locate the LATCH lower anchors (as explained
in the “Vehicle Child Restraint Anchorage
System (LATCH)” on page 18 in this manual
and in your vehicle owner’s manual. See
Figure 42.
Figure 42
cuando la línea adecuada para el peso del niño es paralelo al suelo
UTILICE ESTA LÍNEA PARA BEBÉS BAJO 22 libras (10 kg)
UTILICE ESTA LÍNEA PARA LOS NIÑOS ENTRE 22–50 libras (10 a 22.7 kg)
Viendo hacia atrás
1
3
• Para soltar los conectores inferiores del sistema LATCH rígido: Extienda totalmente los conectores
y luego tire de las manijas rojas para soltar el sistema LATCH rígido.
2
Viendo hacia adela nte
Viendo
hacia atrás
El asiento infantil está debidamente inclinado en modo mirando hacia atrás
cuando la línea adecuada para el peso del niño es paralelo al suelo
UTILICE ESTA LÍNEA PARA BEBÉS BAJO 22 libras (10 kg)
UTILICE ESTA LÍNEA PARA LOS NIÑOS ENTRE 22–50 libras (10 a 22.7 kg)
Viendo hacia atrás
1
3
• Para soltar los conectores inferiores del sistema LATCH rígido: Extienda totalmente los conectores
y luego tire de las manijas rojas para soltar el sistema LATCH rígido.
2
Viendo hacia adelante
Viendo
hacia atrás
El asiento infantil está debidamente inclinado en modo mirando hacia atrás