87
Step 3
Keep Locking Pins and Locking Pin Clips with Anti-Rebound Bar for storage.
Step 4
Place LATCH Connectors back into their storage location, see “Rear-Facing
LATCH Storage” on page 87.
Install the Seat Cushion, see “Removing/Installing Seat Cushion” on page 83.
Rear-Facing LATCH Storage
REMOVAL OF LATCH FROM STORAGE
Step 1
Remove the Seat Cushion, see “Removing/
Installing Seat Cushion” on page 83.
Step 2
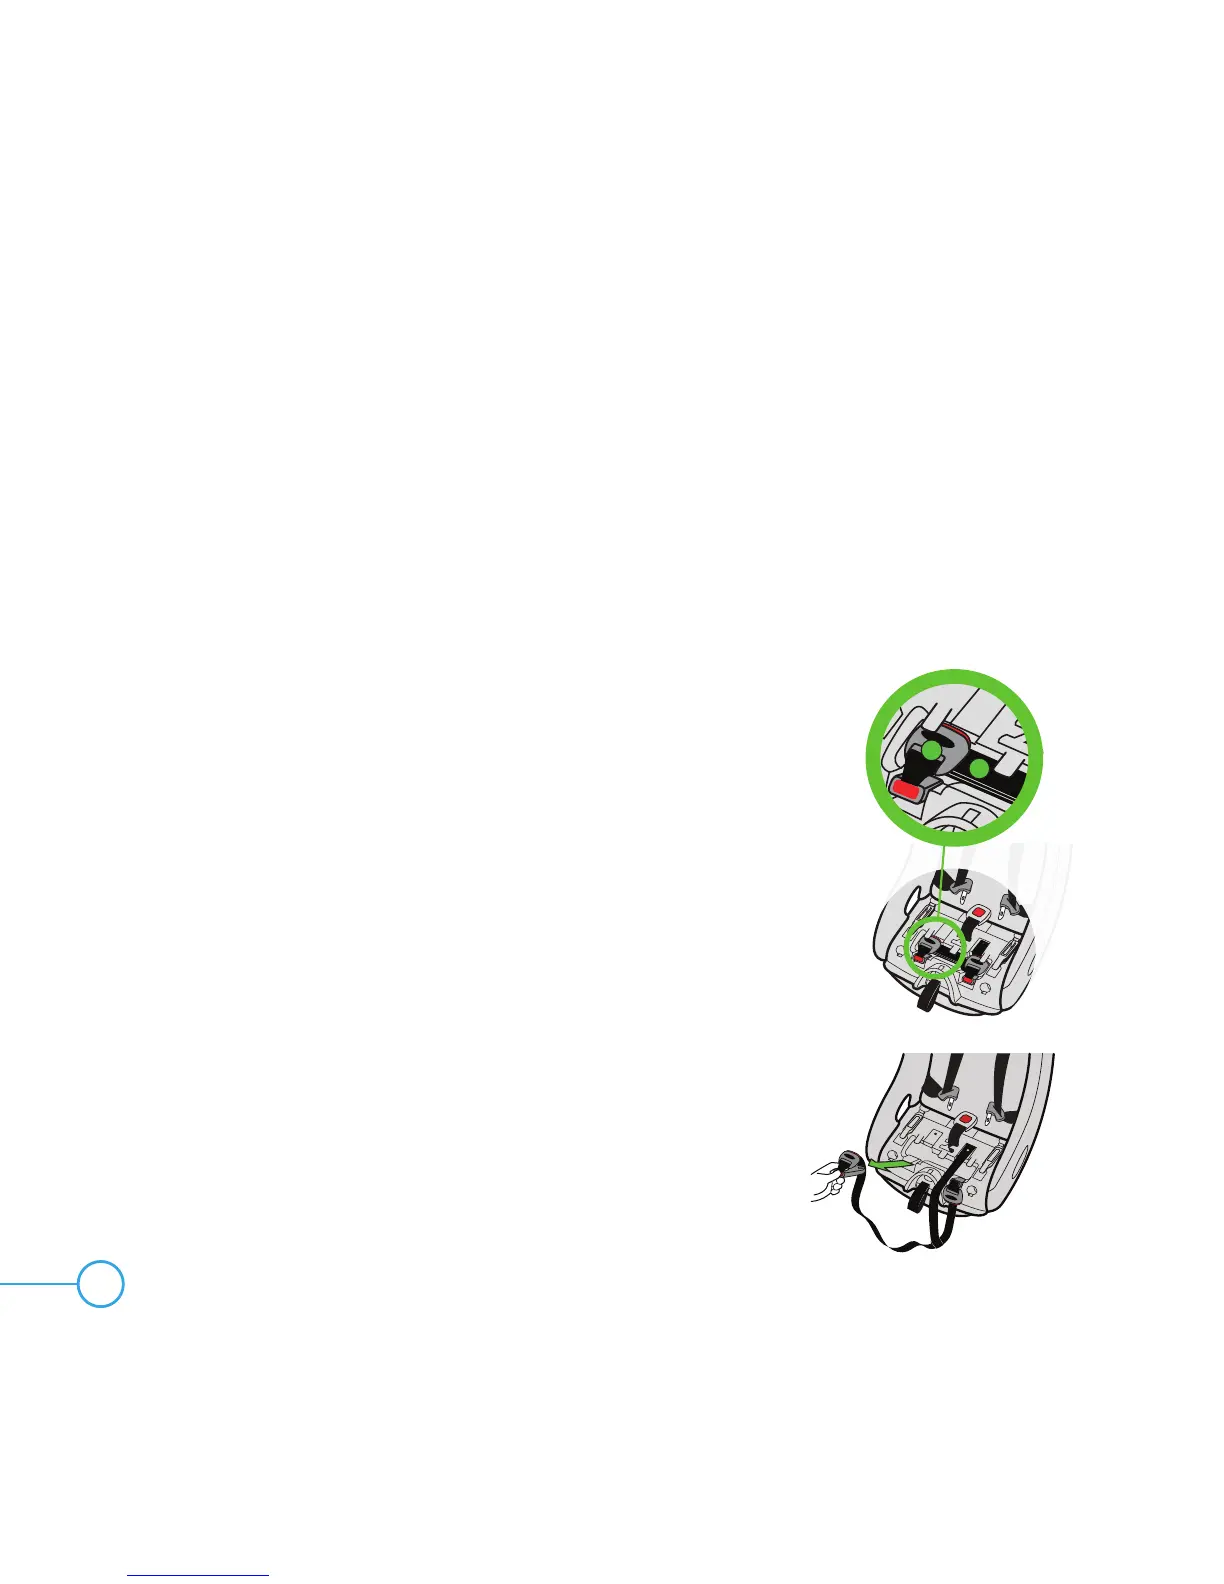
Remove the Rear-Facing LATCH Adjusters (1)
and Belt (2) from their storage position in the
seat bottom shown in Figure 136.
Step 3
Push and hold red release button on Rear-
Facing LATCH Connectors and pull out as
shown in Figure 137.
Figure 137
Figure 136
2
1