86
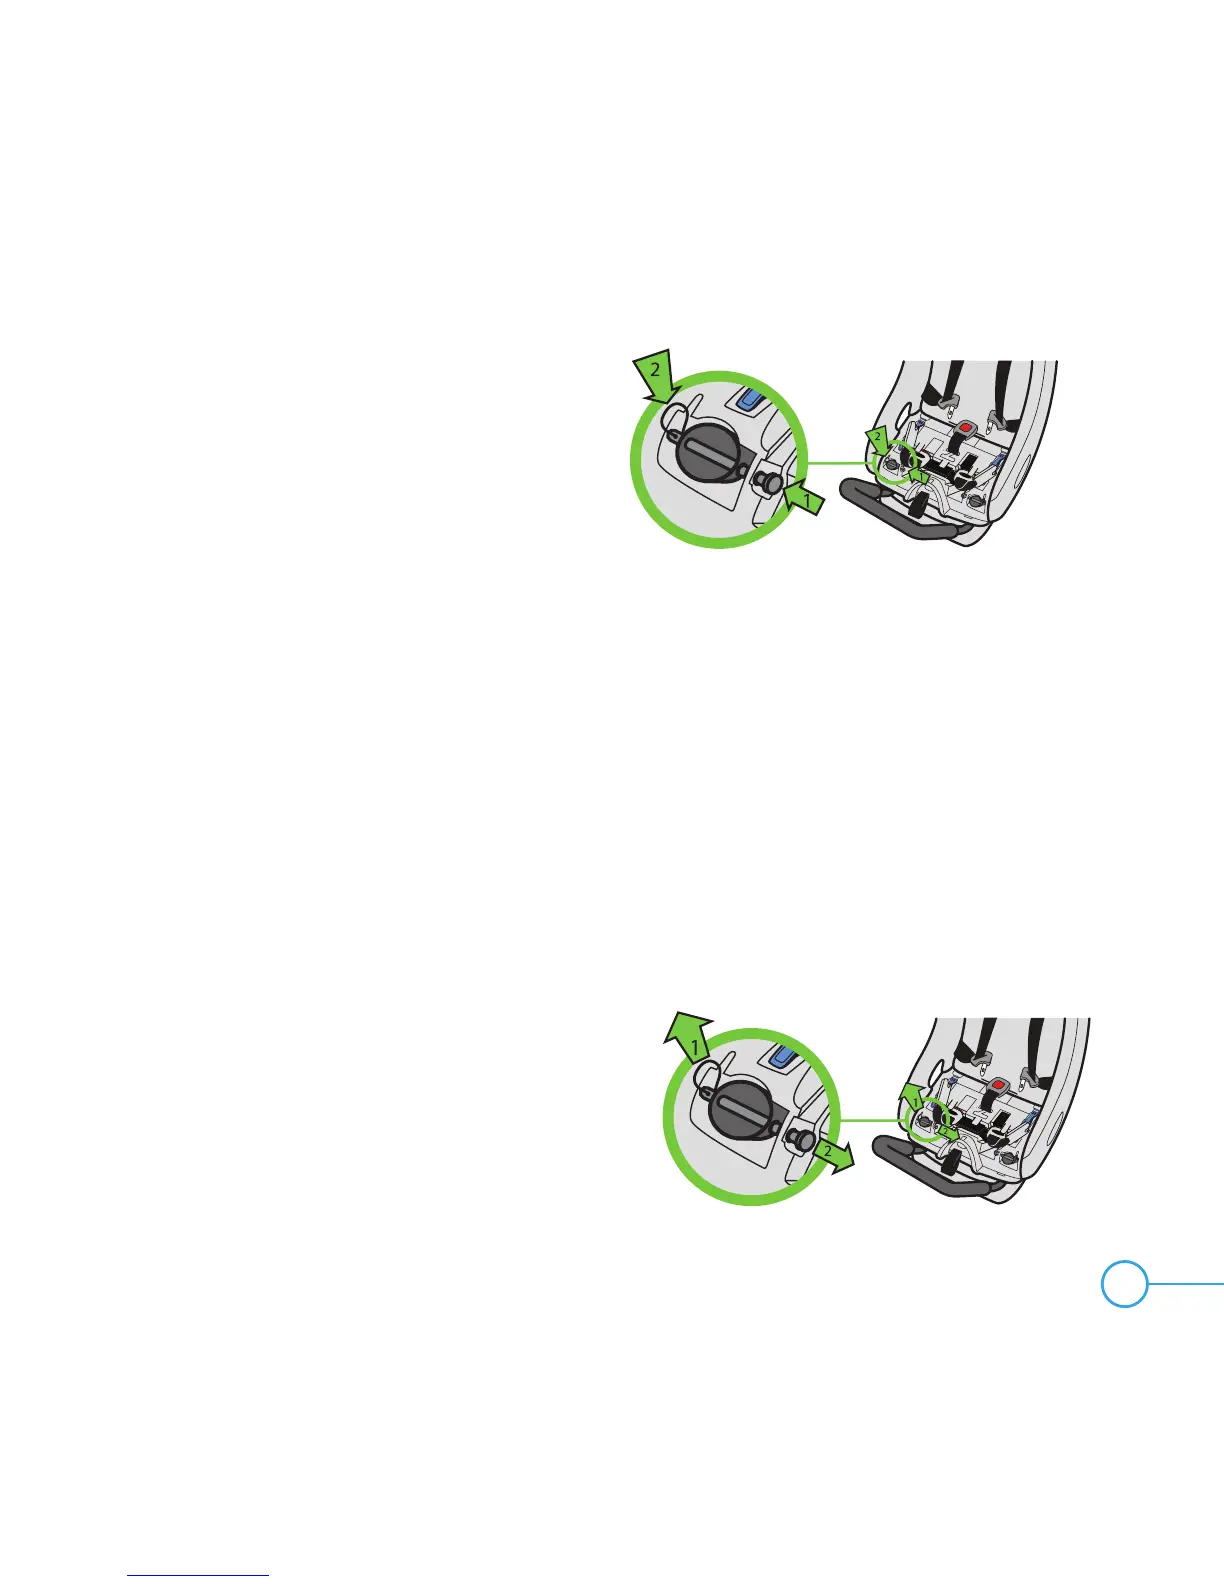
Figure 134
Step 4
Hold the Anti-Rebound Bar in place and
insert Locking Pins into the holes in the seat
and through the Anti-Rebound Bar as shown
in Figure 134. Check that each Locking Pin
is securely installed through both sides of the
Anti-Rebound Bar and that the Locking Pin
Clips are through the Locking Pins.
Step 5
If installing with vehicle belt, place Rear-Facing LATCH Connectors back
into their storage location, see “Rear-Facing LATCH Storage” on page 87.
TO REMOVE ANTI-REBOUND BAR
Step 1
Remove the Seat Cushion, see “Removing/Installing Seat Cushion” on page 83.
If LATCH Connectors are stored, remove them from their storage location, see
“Rear-Facing LATCH Storage” on page 87.
Step 2
Remove the Locking Pins and Locking Pin
Clips from the seat as shown in Figure 135.
The Anti-Rebound Bar should slide down until
it comes completely out of the seat.
NOTE: Seat must be in Recline Position 3 to
allow the Anti-Rebound bar to be removed.
Figure 135